
Trek to Yomi: Chapter 6 - all secrets and collectibles Trek to Yomi guide, walkthrough
This page of the Trek to Yomi guide hides a list of chapter 6 secrets - you will learn where to find 10 artifacts and upgrades for the hero and his equipment.
Last update: 09 May 2022
This page of the guide to Trek to Yomi contains a list of collectibles from chapter 6. It should help you find all the different types of secrets - these are 10 artifacts, but also various upgrades for the main character.
- Artifact #1 - Yutsu-Tsuma-Gushi
- Stamina Upgrade; Artifact #2 - Maggots
- Artifact #3 - Ebikazura Grapes
- Artifact #4 - Thunder Drum
- Artifact #5 - Ookamuduminomikoto
- Artifact #6 - Totsuka-No-Tsurugi
- Artifact #7 - Naginata Tip
- Stamina Upgrade
- Health Upgrade
- Artifact #8 - Tainted Clothing
- Artifact #9 - Yomotsu Hirasaka
- Artifact #10 - Onusa
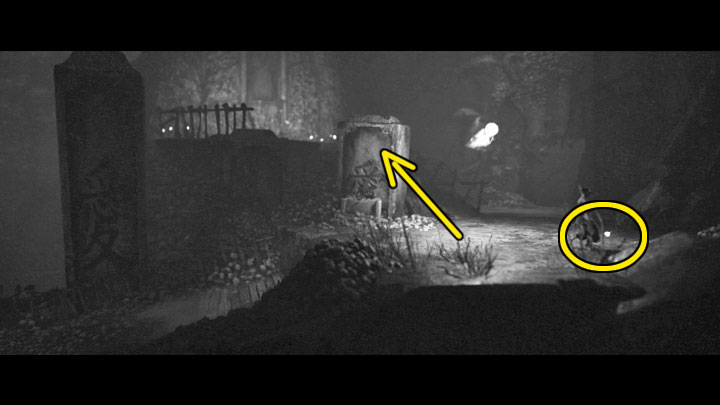
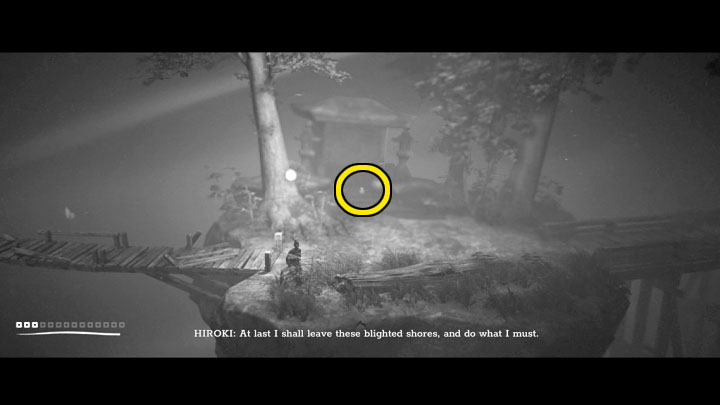
Artifact #1 - Yutsu-Tsuma-Gushi

You can easily find the secret right after the beginning of the chapter. Choose the first available upper path. The collectible will be on the ground next to the first shrine.
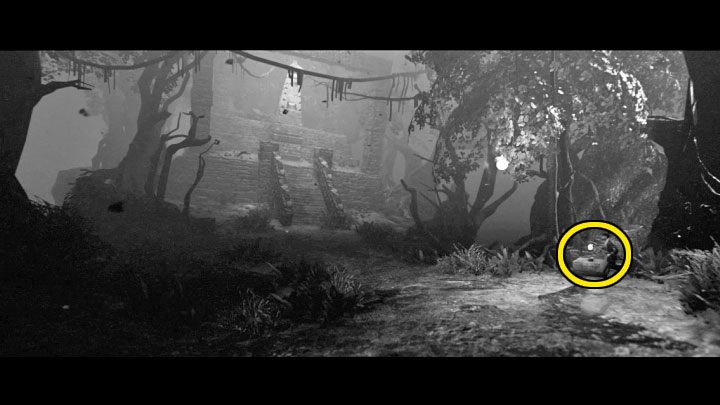
Stamina Upgrade; Artifact #2 - Maggots
Both secrets are in the same area that you will reach by using one of the obelisks at the beginning. The upgrade is near the main path in picture 1, and the artifact is on the adjacent small left hill visible in picture 2.
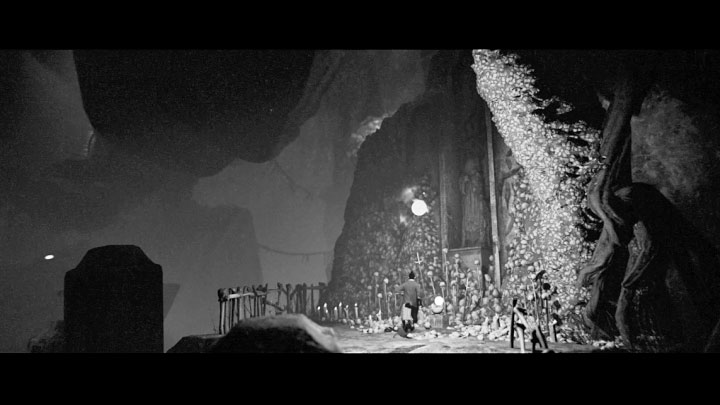
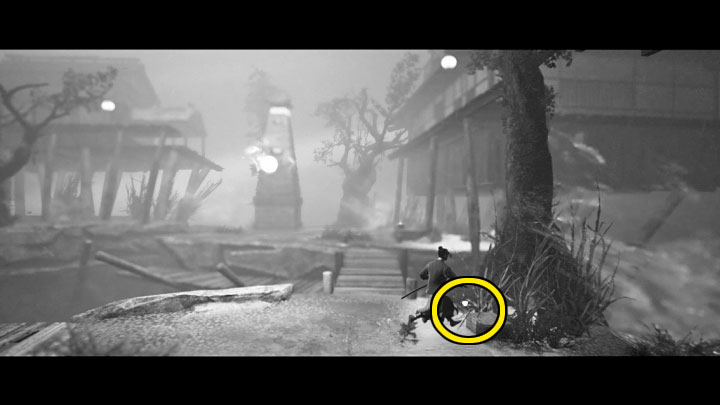
Artifact #3 - Ebikazura Grapes
You can find the artifact right after completing the section where you have to fight and avoid the heavy archer fire at the same time. It is in the location marked in the picture, near the shrine.
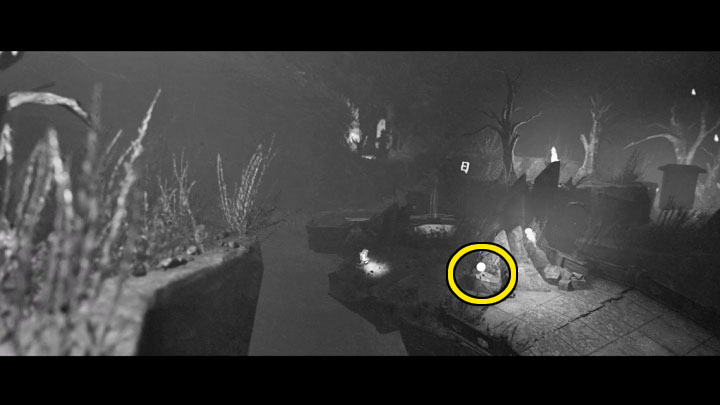
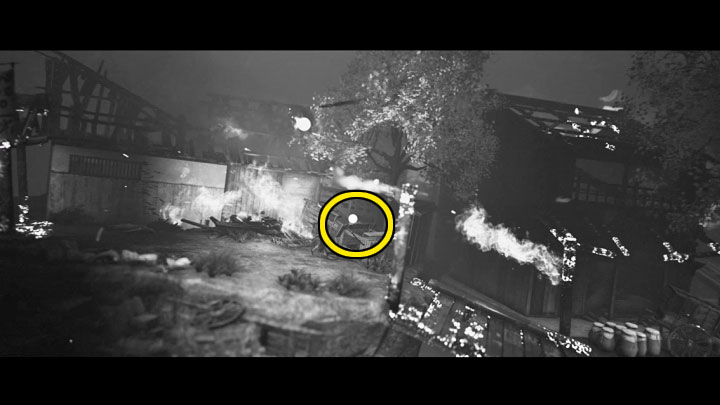
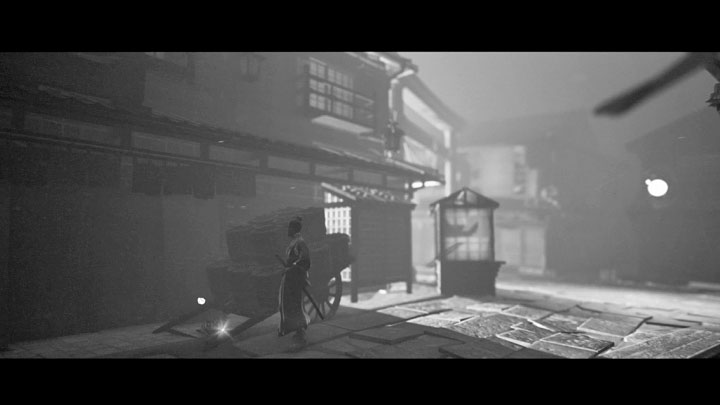
Artifact #4 - Thunder Drum
You will find the artifact shortly after solving the second puzzle with symbols. You have to follow the main path until you reach the ladder. Use it to enter the place shown in the picture, and then reach the collectible hidden in the darkness (follow the line from the picture).
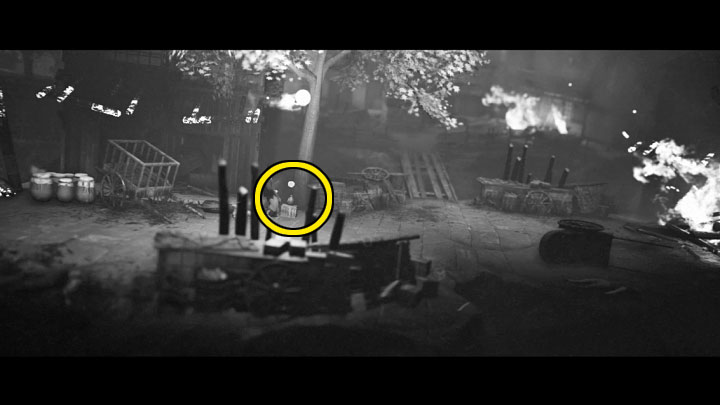
Artifact #5 - Ookamuduminomikoto
The secret can be found shortly after you start fighting the Blighted instead of ghosts. While following the main path, you will reach the area presented in the picture. The artifact is to the right - find it before you get close to another obelisk.
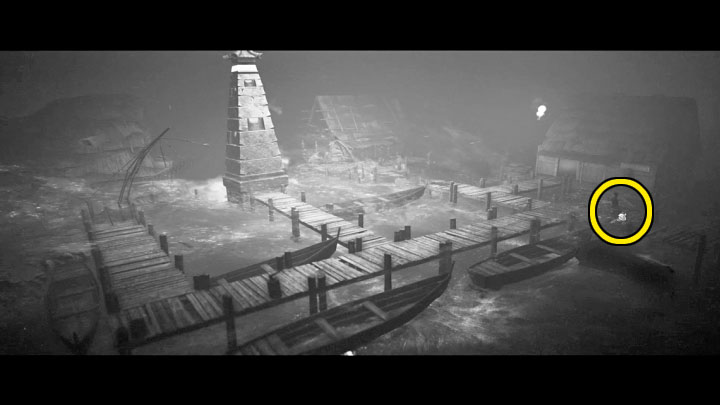
Artifact #6 - Totsuka-No-Tsurugi
You can locate this artifact after another series of monster fighting and defeating the first sniper in this chapter. Similarly to the previous collectible, first locate the secret (near the tree on the right) and then activate the new obelisk.
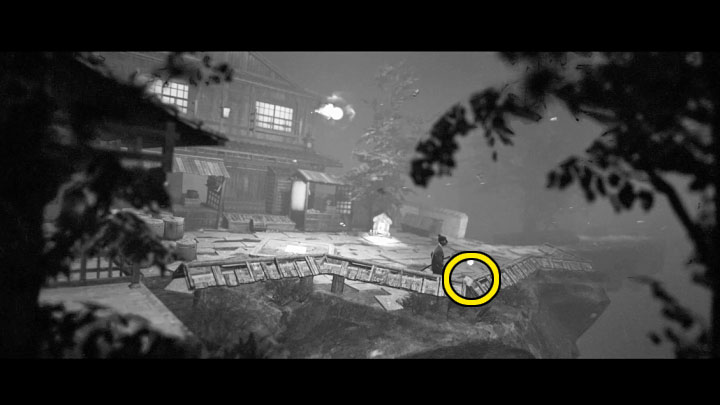
Artifact #7 - Naginata Tip
You can find the secret while going through the burning areas. When you go off one of the bridges, you will find it in the upper part of the screen, in the place marked on the picture above.
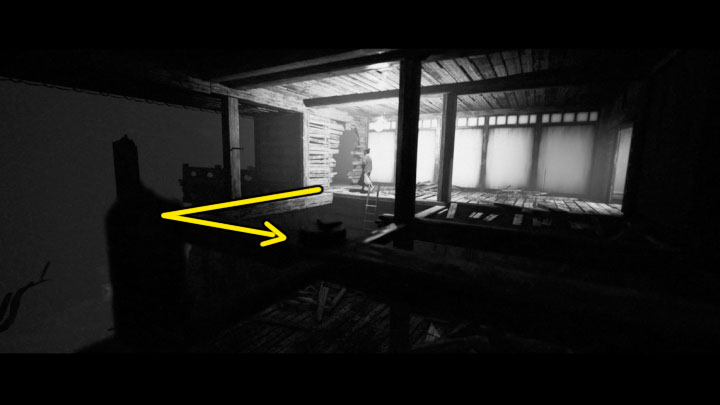
Stamina Upgrade
You can get the upgrade right after finding artifact 7, described above. Go a bit further to the right and examine the area marked in the picture above.
Health Upgrade
The upgrade can be found after you walk down from one of the long bridges where you fought monsters. In the location shown in the picture above, check the upper area before going further to the right.
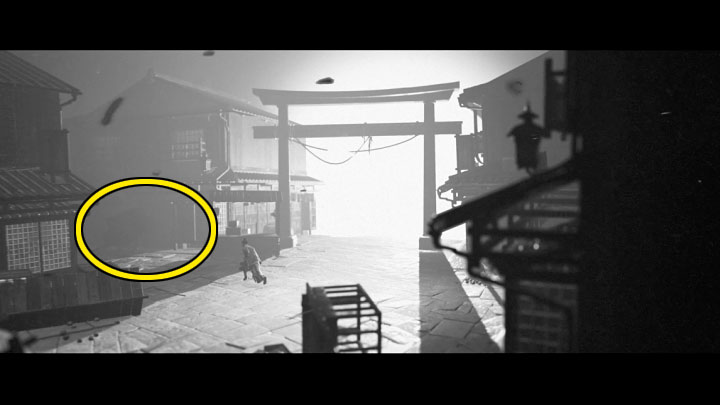
Artifact #8 - Tainted Clothing
The artifact is hidden in the right part of the location with walking planks and an obelisk shown in the picture. Don't approach the obelisk too early. Go right first to i.a. pick up the collectible.
Artifact #9 - Yomotsu Hirasaka
You can get this secret right after finding artifact 8, described above. Activate the obelisk in the location with the walking planks, and then you reach the next location, you'll see artifact 9 next to a new shrine.
Artifact #10 - Onusa
You can find this artifact at the end of the mission, although it is easy to miss. When you reach the location from picture 1, do not go towards the white light, because you would reach the boss's lair too early. Instead, choose the left passage marked in picture 1, which will lead you to a side alley with the secret (picture 2).