Mission 6.3: Nevada Dam - Spillway Rainbow Six Vegas Guide
Last update: 11 May 2016
Unlike most of the previous missions, this level is going to be much longer. You will have an opportunity to do a lot of interesting things. The first part of this mission will require you to escort a dam worker towards a large control room. After that, you're going to have to take part in a large number of fairly difficult fights. You will be dealing with well armed terrorists, so you must be careful in order to succeed.
You start off inside a small tunnel (#1). As you've probably noticed, the rescued technician is standing here with you, however he won't follow you automatically. I would recommend leaving here for at least a few minutes. He'll be safe here and you will have plenty of time to clear a path that leads to the control room. Start moving forward. You should be able to reach an exit very soon. Order your men to move forward. They should hide behind a small brick wall (#2).
 |  |
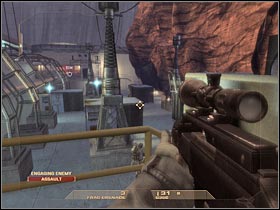
You will have to get closer to this new area. New enemy soldiers will arrive here. Start off by killing a single sniper. He will be moving on your right (#1). Thankfully, you shouldn't have any problems finding him. Order your men to move forward a little (#2). Notice that they will be more exposed to enemy fire.
 |  |
Get closer to a small balustrade. Order your men to move on to a lower level of the compound (#1). It's very important that your teammates hide behind one of larger objects. Try getting closer to the stairs. As a result, more enemy soldiers will appear in this area. Go back to the balustrade and help your teammates to deal with this problem (#2).
 |  |
Keep moving towards your current destination (#1). I would recommend staying in the exact same spot. You should be able to give orders from here. Move your men towards the nearby building. Sooner or later, you will have to leave this platform. Be careful, though. Some of the terrorists may still be hiding (#2). I would recommend using tactical view very often.
 |  |
A small group of enemy soldiers will be hiding near the higher platform (#1). I'd strongly recommend taking them down from a larger distance. You will have to use a scope. Additionally, you will be able to surprise some of the terrorists from the right flank (#2), however you will have to use a tactical map in order to be able to perform these types of actions.
 |  |
Once you've secured this area, go back to the technician. Order him to follow your lead. You will have to reach this secured area (#1). Order the civilian to hide behind one of the larger objects. Make sure that he's not standing too close to the large building. Gather the rest of the team around your position. Head on to nearby stairs. You will have to locate a small door (#2).
 |  |
It would be wise to use a Snake cam here. As a result, you will be able to tag two terrorists (#1). Be careful, though. There are more enemy soldiers in this room. Order your men to prepare for an assault. Don't give the order just yet. Instead, locate a ladder (#2). You will have to use it in order to get to a roof of this building.
 |  |
As you've probably noticed, there are some windows here. You will have to get closer to these objects. Order your men to proceed with the assault. Stand up at the same time and try to take out several terrorists (#1). You could also some of the carried grenades (#2), however you would have to do this quickly. Otherwise you would have probably harmed your team. Go back to the ground level and secure this entire room.
 |  |
Make sure that the area is safe. Go back to the civilian and order him to follow you. Enter the building. The civilian should automatically step up to one of the consoles (#1). Thankfully, you won't have to guard him. Listen to what he has to say to you. After that, head on to a nearby door (#2). You will have to reach an unexplored section of the compound.
 |  |
Head on to the next room. You will come across a large staircase (#1). There aren't any terrorists here, so you won't have to perform any unwanted stops. Additionally, the game will create an autosave here. Once you've reached the ground floor, take a closer look at your tactical map. Once again, you will have to commence an assault. Head on to the nearby door and order your men to start preparations (#2). It doesn't really matter which door you choose.
 |  |
Use the camera. Like always, tag two different opponents (#1). They will be standing in a larger distance, but that's not a problem. Head on to the left room (on your own). You will come across a second door (#2). Use the camera once again. As you've probably suspected, most of the terrorists are standing in front of you. Hide behind the left wall, so you'll be covered the whole time.
 |  |
Once you're ready, give the order to proceed with the assault. Open the door and eliminate all enemy soldiers (#1). You could also throw a grenade inside, however I would recommend leaving at least one grenade for later. Enter the room. Once the area has been secured, rejoin with the rest of the squad (#2). Start moving towards your current target.
 |  |
Once you've reached your destination, enter the watch post and order one of your men to perform a default action (#1). Your teammate will try to hack into the system. Just as before, you will have to defend this position against enemy attacks. The first group will appear near both entrances (#2). Your teammate should be able to handle most of these terrorists. You will have to focus your attention on something else.
 |  |
You will have to turn right. As you've probably noticed, there's a large warehouse door here (#1). This gate will open in a very short while. There are two terrorists inside (#2). You will have to kill them quickly. Otherwise they would have surprised your team and that would result in a mission failure. Once this area has been secured, get back to the main fights.
 |  |
It would be wise to eliminate enemy soldiers from a much larger distance (#1). I'm sure that you know by now that terrorists are capable of using grenades. You will have to kill them all. Once this is done, a new checkpoint will be made. Order your team to hide behind nearby objects (#2). There are plenty of them here, so it shouldn't be much of a problem.
 |  |
You will have to make sure that this area has been secured. Take out all of the remaining hostiles (#1). Once this is done, start moving forward. You will have to reach a large gate that leads to a new warehouse. Order your men to enter this building (#2), however you will have to make sure that they will hide behind cover.
 |  |
Now you will have to reach a nearby staircase (#1). This will allow you to get to the upper floor. Make a few steps forward and enter a new room. One of the enemy soldiers will be hiding behind a computer. Once he's gone, more terrorists will enter this room (#2). I would recommend asking your team for help. Alternatively you could go back to the staircase, however this won't be necessary.
 |  |
If you take a closer look at your map, you'll notice that you're going to have to stick close to the right wall (#1). Thanks to that, you will be able to reach your current destination. This is a very large warehouse. You won't encounter any terrorists right away. Turn left and start moving forward (#2). Order your men to go to the left. After that, hide behind one of the pillars.
 |  |
Start leaning out carefully. Most of the terrorists will be hiding at the opposite end of this hallway (#1). Thankfully, they shouldn't try to get closer to your position. Once they're gone, proceed to the next section. Some of the terrorists will destroy the roof windows and slide down on the ropes (#2). Take them out as soon as possible, mostly because they would land near your position.
 |  |
Keep heading towards your current destination. I'd strongly recommend ordering your teammates to hide behind a small balustrade. They should be able to take out a lot of enemy soldiers from here (#1). Once you've secured this area, move your team towards larger crates. These objects are located in front of you (#2).
 |  |
Be careful! More enemy soldiers will arrive in this area. Once again, some of them will be using the ropes (#1). Take them out in the first place. Once they're gone, you shouldn't have any problems with the rest of the terrorists. You should be using your rifle scope here (#2).
 |  |
Make sure that the area has been fully secured. Proceed to the lower level and gather the rest of the team around your position. I would recommend going to a small tunnel (#1). You shouldn't have any problems finding this corridor on your minimap. You will come across a small door. One of the terrorists will be hiding inside (#2). Take care of this small problem. After that, head on to the right door. This path leads to a new section of the compound.
 |  |
Order your teammates to move to your right (#1). They will have to hide behind one of larger objects. It's very important. You can't let them stay in the open. More enemy soldiers will arrive in this area. Help your squad members to deal with these thugs. You should be using a scope in order to take out terrorists from a larger distance (#2). Additionally, check your tactical map from time to time.
 |  |
You could also try hiding behind one of the larger objects (#1), however you'd have to be very careful here. Once you've taken out all hostile units, gather the rest of the team around your position and proceed to the upper level. Turn around. You should consider hiding here, mostly because more enemy soldiers will arrive here (#2). Kill them. Start moving forward.
 |  |
One of the enemy soldiers will be hiding here. Use your tactical map if you're not sure where he is standing (#1). Enter the room. You will have to reach a small staircase (#2). Proceed to the lower level of the complex. Make sure that the rest of the team is following your lead.
 |  |
Use the camera and tag one of the terrorists for your team (#1). Once this is done, order your team members to proceed with the assault. Thankfully, you won't have to use any grenades here. Head on to the stairs, however don't go all the way down just yet. Turn right. You should be able to kill one of the terrorists from here (#2).
 |  |
Start moving towards the ground floor. Turn right and start shooting at the remaining terrorists (#1). You should be just fine, however I would recommend choosing long bursts instead of single shots. Gather the rest of the team around your position. More enemy soldiers are hiding just around the corner (#2). Use the zoom feature to take them out from a large distance.
 |  |
Once again, we will have an opportunity to organize a simultaneous attack. Order your men to proceed to your right. They will have to be standing near a door. Use the camera and tag two terrorists (#1). After that, head on to your left (#2). Once you're ready, proceed with the assault. Lean out and help your squad members to secure this entire area.
 |  |
Make sure that there aren't any hostile units in this area. After that, you will have to locate a small staircase (#1). Use the stairs to go down to a lower floor. You should be able to find a few ropes here (#2). Order your men to use these objects. This is where the mission will come to an end.
 |  |