Isle map of The Witness The Witness Guide
Last update: 06 March 2019
This chapter focuses on the map in The Witness. Here, you can learn about the locations of the lasers. You will also learn how to move around the map.
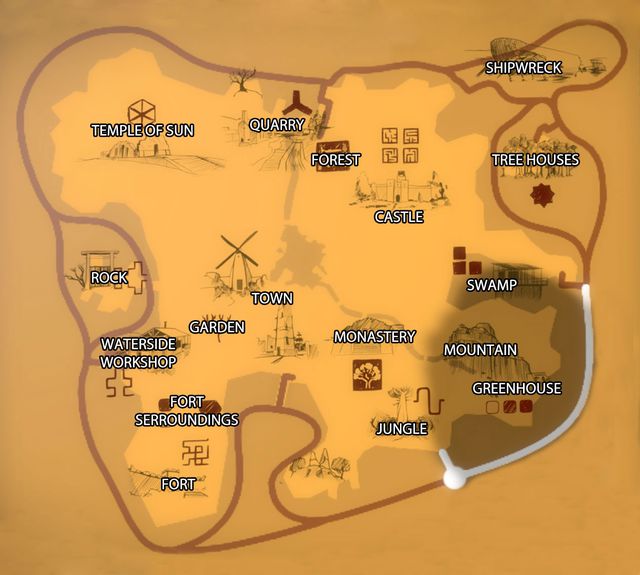
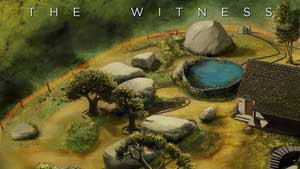
The game world has been divided in a dozen-or-so separate locations. Starting with the moment at which you leave the fort, you can access all of them. These all are standalone locations, so you can solve puzzles in them in any order you want. Apart from puzzles that allow you to activate lasers, you will find small sets of exercise puzzles. Thanks to them, you will learn about the rules governing all types of puzzles.
The goal of the game is to activate, at least, seven lasers out of the eleven on the island. This means that you do not need to solve all of the puzzles on the island to complete the game. However, you can do this to gain access to additional puzzles and first of all, the challenge. The order, in which you activate lasers on the isle is up to you, and so are the locations that you activate them in. You can find lasers in: Rock, Town, Monastery, Jungle, Greenhouse, Marsh, Keep, Treehouses, Forest, Quarry and Sun Temple.
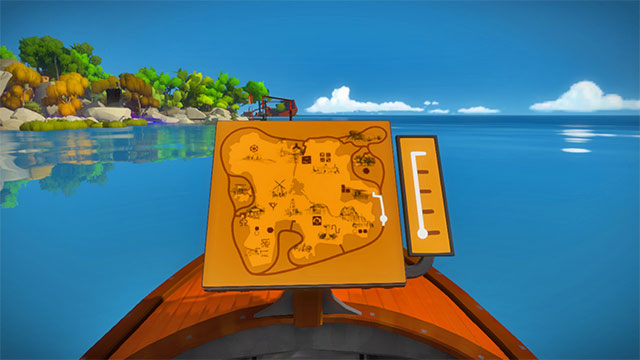
During your journey around the island, you will also find a boat. Using it, you can fast-travel between quay locations, which will prove key for solving several hidden puzzles. You can summon the boat at any quay, as long as you have unlocked it beforehand. Additionally, its control panel is a simplified map of the isle. In order to activate the boat, go to the quay to the South of the Jungle location and use the panel at the end of the pier. You mark the destination on the map and set the speed using the panel to the right.
Also, it is worth noting the lake neighboring the mill and the town. If you take a closer look at it, you realize that the shape of the lake corresponds to the shape of the isle and you can use it as a map. Lighthouses on the lake represent locations of lasers. The lit lighthouses represent lasers that have already been activated. The closed and opened clams represent hidden and found film access codes. Fountains activate after you have activated monoliths, which requires you to solve terrain puzzles. Flowers represent audiologs, and triangular orange leaves represent arrow puzzles. The ones that you have found are represented by leaves, whereas the ones yet to be found are represented by shadows cast by the leaves.
On the isle, there is also a number of collectibles. The first type of those are audiologs that contain sound messages of varying length. Another type are arrow puzzles, which are not connected with any sets of puzzles or panels. In theory, they are useless and their only role is training one, before the challenge. Solving them requires you to guide the beam, so that it passes by next to the symbol the number of times corresponding to the number of arrows on it. If the symbol consists of one arrow only, the beam may touch to only one of its sides, if there are two arrows, it can touch to two sides and so forth.
The third activity is searching for film access codes. Near the town, there is a mill. In the underground, under the mill, there is a cinema with six films. To access them, you need to solve the most difficult and time-consuming puzzles in the game. Additionally, you will have to jot the code down, because you cannot take it with you. On the isle, there are seven stashes - in six of them, there are film codes, whereas in the seventh one, there is a code that unlocks the underground cinema.
The last optional activity are terrain puzzles. On the isle, there are six black monoliths. Activating them is necessary if you want to achieve 100% completion of the game. To do this, you need to keep an eye out while exploring the isle and search for elements of surroundings that form puzzles. Each one consists of the starting point, the finishing point and the line connecting them. Usually a long and/or complicated one. Anything can be an element of the puzzle, from a mosaic element to a footprint in the sand. You solve them just like any other puzzle, by guiding the line from start to finish. The difference is that terrain puzzles usually do not have any additional set of rules. It is enough for the surroundings to form a path. The only problem may be to find it and to position yourself appropriately, relative to it, or to change it while solving the puzzle. After you have solved all of the puzzles in a given set, the monolith activates and it turns white.
On the isle there are six obelisks, but puzzles assigned to them are scattered all around the isle. Sometimes to activate one monolith, you have to visit four different locations around the isle. Due to their being scattered, and for the sake of clarity, solutions to terrain puzzles have been provided in chapters devoted to locations, instead of separate chapters devoted specifically to them.