
Escape from Detention | The Surge 2 Walkthrough The Surge 2 guide, walkthrough
Last update: 23 September 2019
In this chapter you will learn how to complete the first mission of The Surge 2. Also, it contains all tips and tricks that will be displayed during further stages of the game, so it's worth checking this section of our guide if you're a fresh player of The Surge series. Tips and guidelines on how to play the game can be found in the separate chapters of this guide.
- First Steps
- Tech Scrap
- Boss - Nitro
- MedBay and new features
- Additional task: Benjamin Burke
- Obtaining and collecting weapons
- Boss - Warden Garcia
First Steps

After creating the character, you start the story of The Surge 2 in a medical facility adjacent to a prison.
- You can use the basic key (LMB - light attack) or the additional key (RMB - heavy attack) to attack your enemies. In addition, you can charge the attack. Make combinations by pressing one key or by mixing them.
- By pressing the interaction button (the E key), you can open loot caches.
- Pay attention to the health bar (red) and stamina bar (green) visible at the bottom of the screen - stamina is used during each blow, and when it's gone you need to rest.
- By holding down the defense key (Ctrl) you receive reduced or completely reduced damage from enemy attacks. Stamina decreases over time when you perform various actions. Remember about that cause when it hits zero you will receive additional damage.
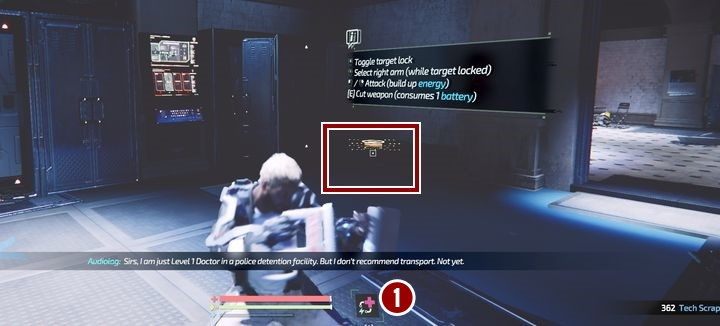
- Targeting (MMB) will allow you to automatically follow the target. Press Tab key to switch between targeted enemies.
- Switch between enemy body parts (use mouse wheel). The yellow marked parts of the body are armored, the blue parts are not. By choosing unarmored parts you inflict more damage. In addition, by weakening the limbs of enemies you can cut them off with finishing blows and obtain schematics, crafting materials and more scrap.
- In combat, you can use fire of the arenas to burn your enemies. Simply push them into the fire so they may ignite and scorch.
Take the access card out of the container and move towards the next room.
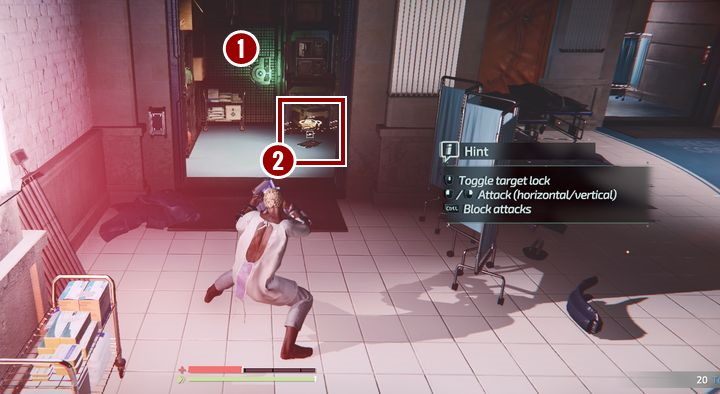
To heal yourself, you need to find special first aid stations (1). In later stages of the game you will get the opportunity to heal yourself in many ways, passively or through the elimination of enemies.
Also note the yellow hologram tablet (2) - you will find many useful story items and technologies in this form. All these items can be investigated and used. You will also find audiologs, as in this place [audiolog #1] (second room behind closed doors on the right), which have a form of collectibles that can be found in the game.
It's worth collecting audiologs even if you're not a fan of secrets and collectibles. For every 10 recordings you will be able to receive 10,000 tech scrap metal units for completing a repetitive side quest.
Tech Scrap
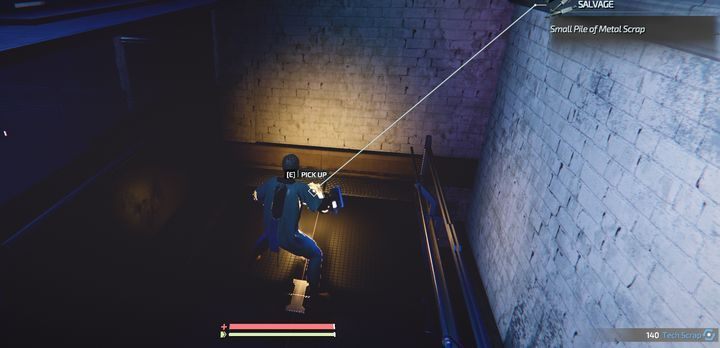
In The Surge 2 you mainly collect Tech Scrap - this is your most valuable and only resource that will be used to build new improvements for the hero. You obtain tech scrap by eliminating mechanized enemies and finding it in the form of yellow solids objects scattered around the map.
- When you lose your health, you wake up at the nearest point of rebirth, but lose your tech scrap - if you have enough time, you can pick it up where you left off. In the upper left corner you will see how much time you have left to collect your tech scrap, how far it is and how many scrap units you have lost.
- Eliminating enemies along your way extends your time limit to get the scrap.
- If you die on your way to get scrap, you'll lose the chance to get it back.
- After death and visiting MedBay, enemies respawn on the map (except bosses). This allows both grinding (acquiring scrap and schematics from defeated enemies) and also makes it difficult to get to distant places.
Boss - Nitro
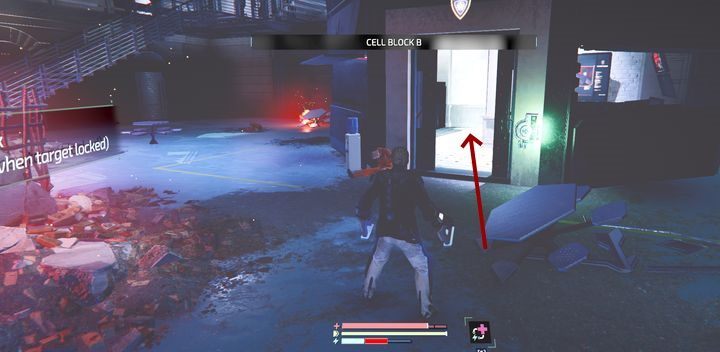
Get through the prison block. Eliminating minor enemies at this stage is optional. You won't receive experience points for combat, but only small amounts of tech scrap (so far). Run to the stairs in Block B and get upstairs to face the mini-boss.
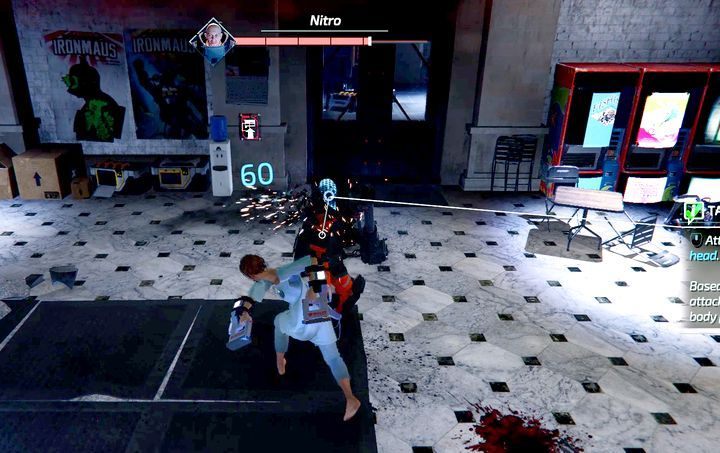
Hit him four times as fast as you can and block his attack, constantly controlling his level of stamina (if you're out of stamina you can receive maximum damage even when using block). The opponent performs the same attacks, repeating a sequence of strikes up to a maximum of four blows. Defeat him in battle by lowering his health bar at the top of the screen to zero.
Target enemy's head that is unarmored to inflict some serious damage to him.
MedBay and new features
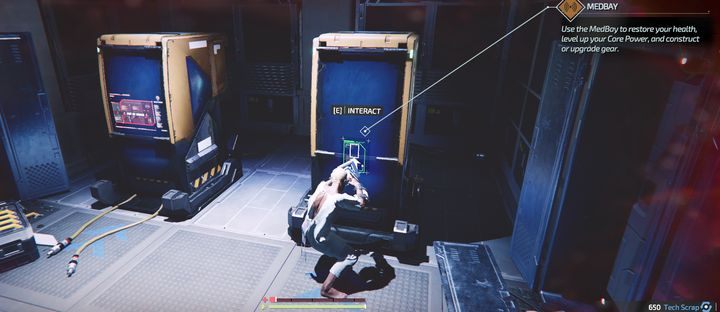
After defeating the first boss, take his card and go to the adjacent room to use MedBay. These stations allow you to spend tech scrap that you've collected on modifying your armor. Buy and upgrade new armor items, increase health, durability and battery life (determines how and for how long you can use some of the installed modules). You can store your scrap here so that you won't lose it during your journey. It's useful if you prefer to collect it for something expensive.
In the MedBay room you will find another audiolog (#2) - it's in the corner. From now on you can use the implant (1) by pressing the button (1). It uses a single battery to completely restore your health. From now on you can also
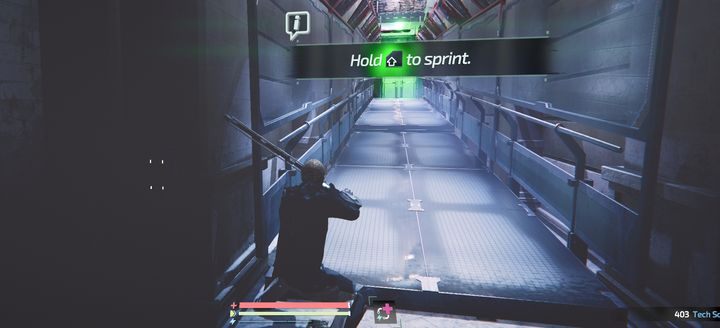
- run (Shift) and attack while running,
- jump (Space Bar) and jump over obstacles while running,
- charge primary and secondary attacks, to perform interesting combinations,
- use jump and move sideways to perform a dodge.
Additional task: Benjamin Burke

Before you move to other areas, it is worth returning for a while (from now on you can open locked doors by using the force). A few meters from the room where you fought with the boss, you will find a cell where Benjamin Burke is being imprisoned - this is the main objective of the Behind the Bars secondary mission.
Release him from his cell (this is only possible after visiting MedBay for the first time). After talking to Burke, return to the room where you fought with the boss and open a locker to find a Salvaged Couger weapon.
Obtaining and collecting weapons

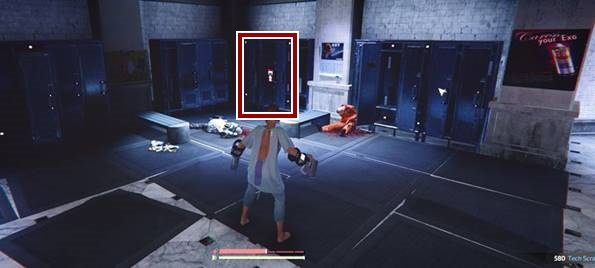
The Surge 2 in-game mechanics allows you to acquire new weapons by taking them from a defeated enemy. How to do it? Choose an opponent with a weapon and target his right hand. Once the hand receives a sufficient amount of damage, you can deal a critical strike by holding down E key. This way, an item will appear on the floor that can be collected. It should be right next to the enemy, and:
- if it is a new weapon, you will unlock it and be able to use it after selecting it in MedBay,
- if you already own a weapon, you will gain material (from the level of your opponent - so you can't improve your weapon in the first stages of the game) that you can use to improve your MedBay weapon.
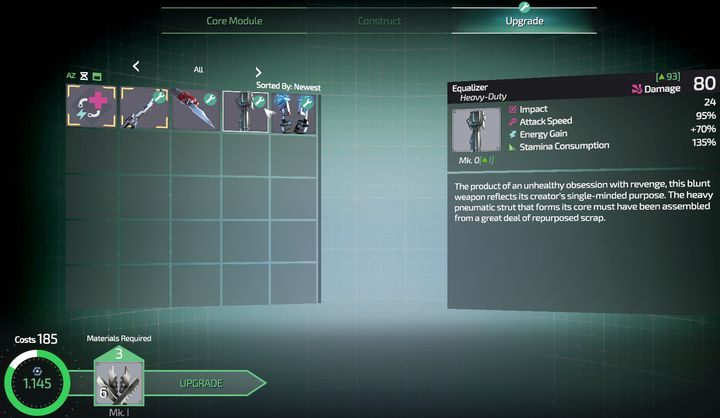
Before you start making improvements, it's important to make sure which weapon suits you. Each weapon has its own characteristics:
- amount of damage,
- attack speed,
- decrease of durability in result of used attacks,
- energy gain - which you will use during the fight to activate implants, at the moment: to heal yourself.
In later stages of the game, weapons can also have additional features such as elemental damage.
For the time being, your opponents are unarmored. However, in further stages of the game the same rule applies to acquisition of new armor equipment including hands, legs, torso and head armor pieces. Similarly, you'll have to track down the enemy's armored body part from which you want to extract the module and deal a critical strike.
Boss - Warden Garcia
Head through the closed door from the boss fighting arena to the next corridor. In the hallway, collect a yellow pyramid from the floor - it is an implant: Directional Block Analyzer - that informs you of an enemy attack and shows you which side the blow is coming from so you may parry the strike. Go through the adjacent rooms at the end. At the tilt, press the button on the console and run to the door before it closes. In the next room, collect the implant from the table: Automatic Inject-Charger - part of the battery is recharged in currently used healing module. This way, it doesn't get wasted.
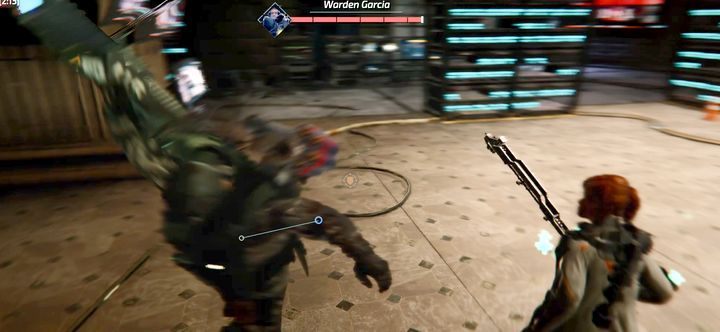
Now you have to fight with the second boss Warden Garcia. Before the fight, it is worth depositing tech scrap at MedBay. The only uncovered point of the opponent is his left hand. Try to dodge instead of blocking his attacks: if the enemy does a combination of blows, you will not have enough stamina to defend yourself. Evade to the right to get a chance to hit him in the left hand.

In addition, the boss launches a loaded attack from above, which is signaled by the icon of your inability to defend against such an attack - jump backwards. Sometimes the boss also releases fire grenades - run away from the fire zone. When your opponent launches a drone, hide behind the pillars or move away from your enemy sufficiently to block the heavy fire of the drone. Don't forget to heal yourself during the battle.
If you have a problem defeating this boss, consider using another weapon, upgrading it, or increasing the core level while improving the hero's stats.
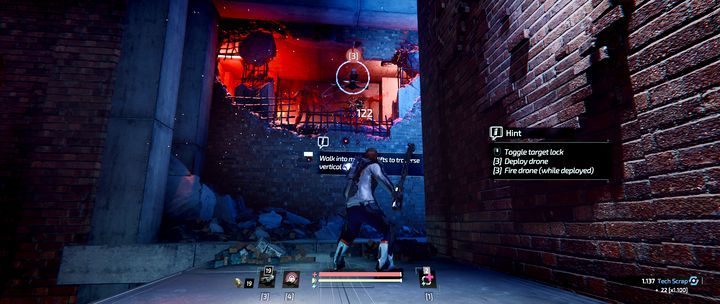
After this battle, you receive a drone at your disposal. It will allow you to attack enemies at a distance, as well as using the "Search & Rescue" function and get you out of trouble by teleporting you to the last checkpoint. Remember that you will lose the scrap you carry when using this feature.
Take the stairs to the top and eliminate opponents standing on the first floor by using a drone, then take the illuminated elevator to the top.