Face Shrine | Link's Awakening Walkthrough Link's Awakening guide, walkthrough
Last update: 04 November 2019
In this chapter of the guide to The Legend of Zelda: Link's Awakening, you will find the location of items such as the Magnifying Lens and a Boomerang. We'll tell you how to learn the Frog's song of soul and where to find Coral Triangle in the Face Shrine.

Level main goals:
- Finding the Magnifying Lens
- Getting a boomerang and learning the Frog's song of soul
- Getting a Face Key in the Ancient Ruins
- Finding the Coral Triangle in the Face Shrine
Finding the Magnifying Lens
Dive to swim through the underwater tunnel and swim out on the other side of the stones. Swim northeast and climb the stairs ashore. Turn right and then at the tree turn down and go forward. You will pass the Telephone Booth. When you reach the end of an island turn left. Walk to the cliff and use the Hookshot on the wooden crate to get to the other side. Go up and turn left. Put a Scale in the Mermaid Statue. The statue will move and reveal the stairs hidden under it. Go downstairs and enter another room. Take the Magnifying Lens and come back to the first room. Now you'll be able to see previously invisible monsters.
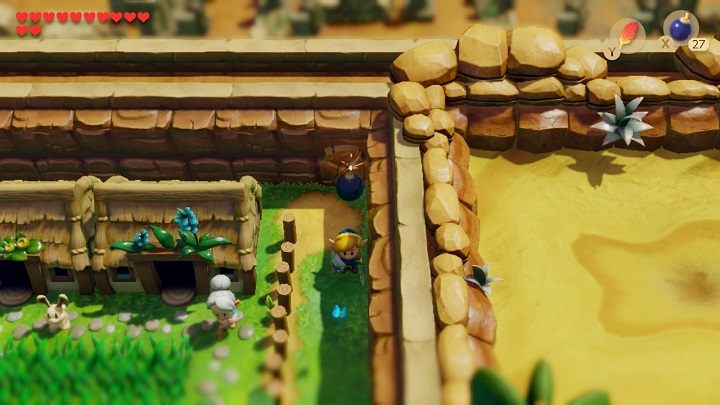
Leave the cave and go to Animal Village. Enter the last house in the east of the village. Talk to the strange creature swimming in the pond. He'll give you a Secret Seashell and tell you to look for someone like him in the Toronbo Shores. Leave the house and go through the southwestern exit of the village. Go down and walk around the pond. Turn up and walk by the fence. Turn left and at the end of the road, above the first house of the village, you will find a Piece of Heart. Return right and plant a bomb in the corner by the cracked wall. Enter the cave.
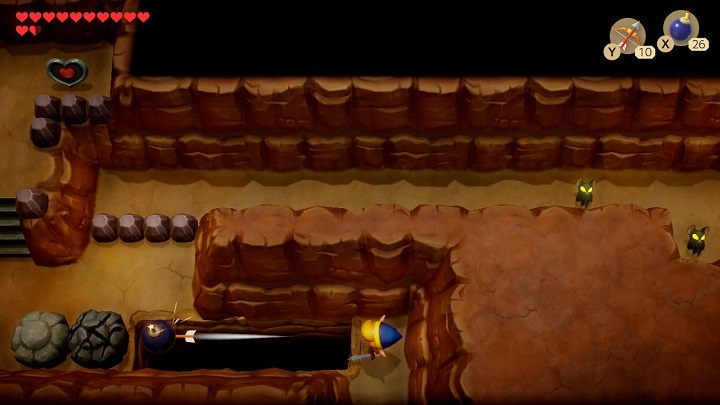
Move the stone at the entrance to be able to jump over the hole and go left. Avoid the trap and go through the corridor to the next chamber. Equip yourself with a bow and bombs. Press the Y and X button simultaneously to release the arrow with the bomb to destroy the cracked stone. Hook to the second stone and get safely over the hole to the other side. Take a Piece of Heart and jump down between the gap in the barrier. Go to the end of the corridor and place a bomb against the cracked wall. Go through the newly created hole and exit the cave through the next room.
Getting a boomerang and learning the Frog's song of soul

Teleport yourself near Mabe Village and go to the beach. Before entering the sand dash into the tree by pressing the Left button to find another Secret Seashell. Go to the place on the beach where you found Marin earlier. There will be a downed bough between two trees. Dig out a Secret Seashell near the wall on the left. Go back a bit to the left. On the wall, you will find a crack. Place a bomb and go inside. Talk to the animal. In exchange for one of your items, you will receive a Boomerang. It's best to give him a shovel. Don't worry, you'll be able to trade again at any time.
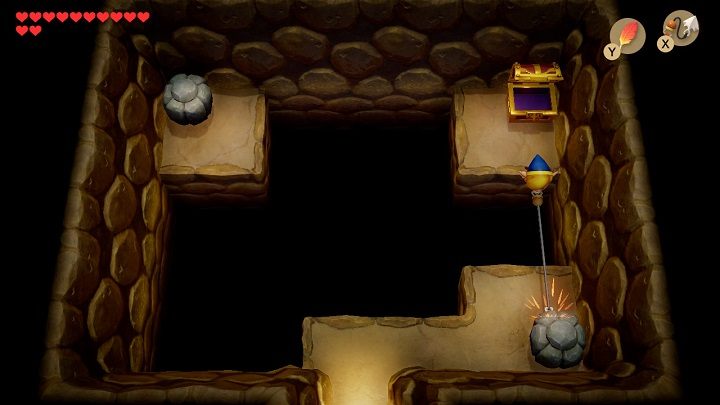
Play the Manbo's Mambo on you Ocarina to teleport yourself in Manbo's Pond. Go to the Mysterious Forest an head west until you reach a cave with three stones in front of the entrance. Remove one of them and go inside. Use the hook on the chest to get to it and take 50 rupees. Then use the hook on the stone to get to the left side of the room, move the second stone to get to a Piece of Heart. Leave the cave.
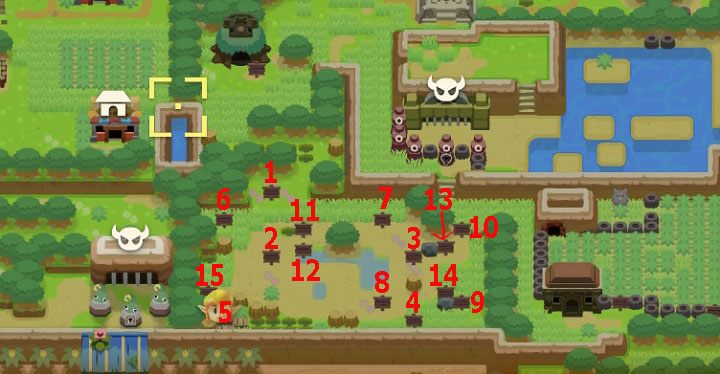
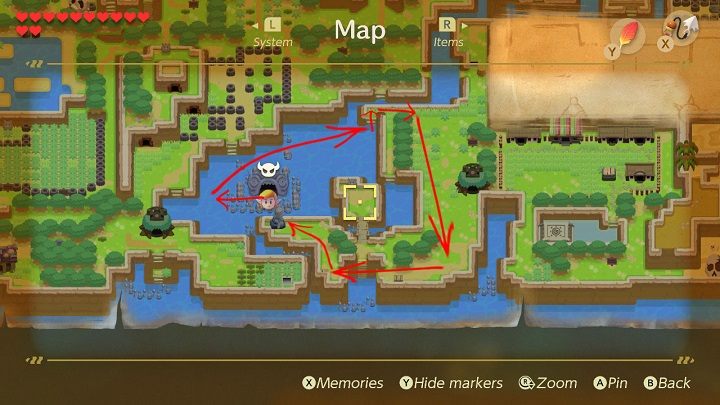
Go out of the Mysterious Forest and head to Mabe Village. Exit the village through its eastern exit and head south. Go by the Telephone Booth and continue down. You will reach two rows of five holes in the ground. Use a hook on the small stump to jump over them safely. Go down and read what is on the nearest sign. The picture above shows the correct order of reading the boards to unlock the entrance to the Mamu's cave. Go down the stairs and give Mamu 300 rupees to learn the Frog's song of soul.
Getting a Face Key in the Ancient Ruins
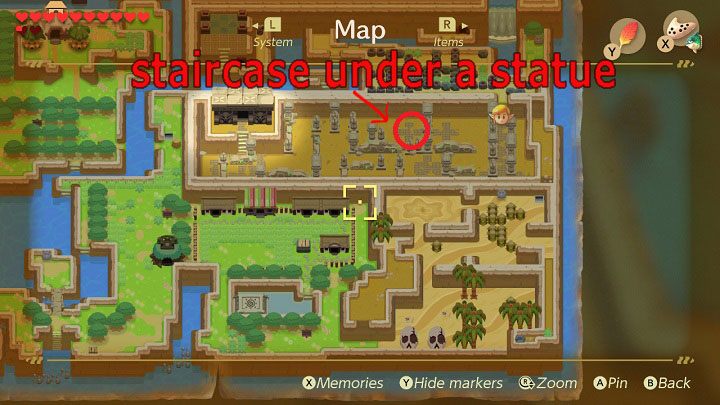
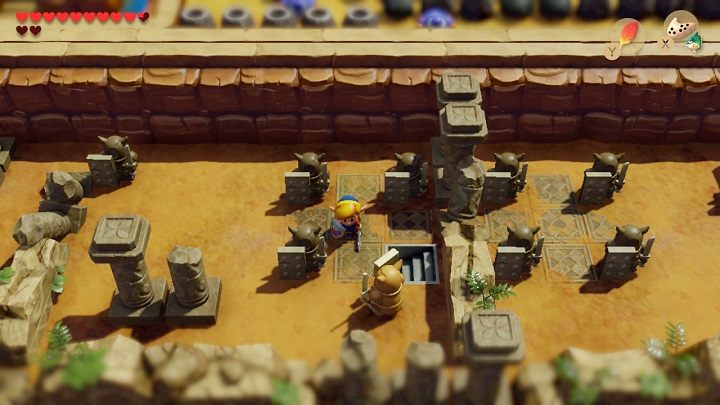
Teleport yourself near the Animal Village. Go out of the pond and leave the village through its west exit. Go north and turn right when you reach the end of the island. Go through the narrow corridor and remove obstacles in your path. Turn south to enter the Ancient Ruins. Follow west, if a statue blocks your path hit it with a boomerang. It will activate the statue. You'll get an arrow for defeating it. Collect them as much as you can. The picture above shows the place of the secret staircase under one of the statues. Go underground and take a Secret Seashell from the chest.
Go back upstairs and continue west until you find the entrance to the Shrine in the Ancient Ruins. In the Shrine you will have to fight with Armos Knight. First, you have to destroy his shield. Hit him twice with a spin attack (pressing the B button). Armos Knight is able to stun you by slamming the ground. Use the Roc's Feather to avoid stunning. Once his shield is wrecked you can finish him with the bow and arrows. Take the Face Key and go to the next chamber. Light the torches using magic powder and get a closer look at the wall painting. Learn the secrets of the island and leave the temple.
Finding the Coral Triangle in the Face Shrine
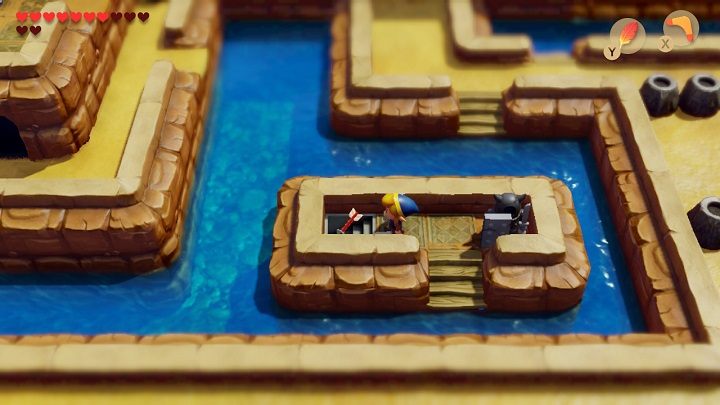
After a short conversation with an Owl, leave the ruins. Remove rocks and plants covering the passage between volcano-shaped stones and enter the river. Swim to the tiny island with two statues. Eliminate the statue on the left and go down the stairs.
Go through the underground passage and you'll come out near the Face Shrine. Insert the Face Key to the large statue on the lower level of the islet. An entrance to the Face Shrine will rise from the ground. Go inside and move left.
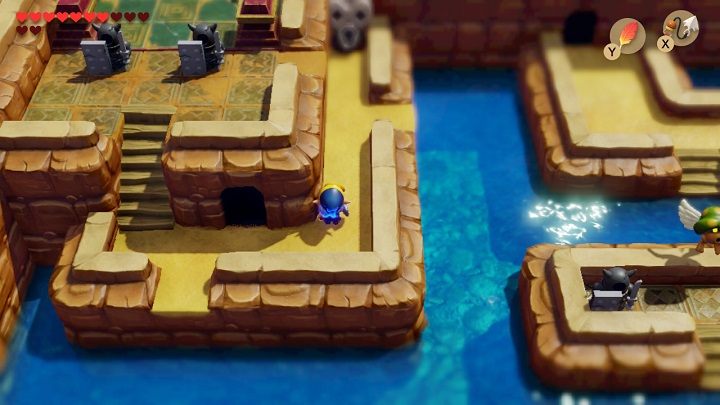
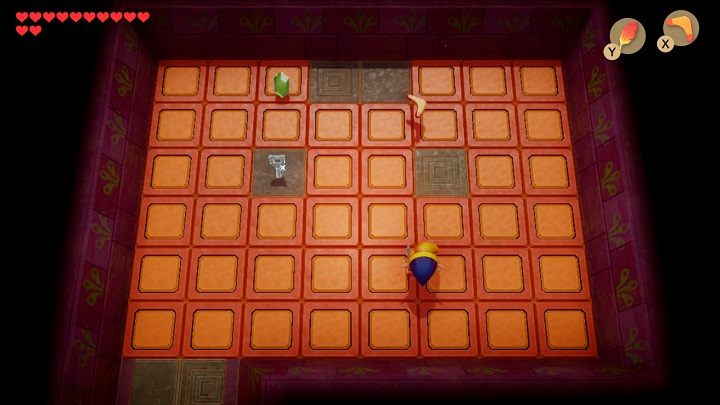
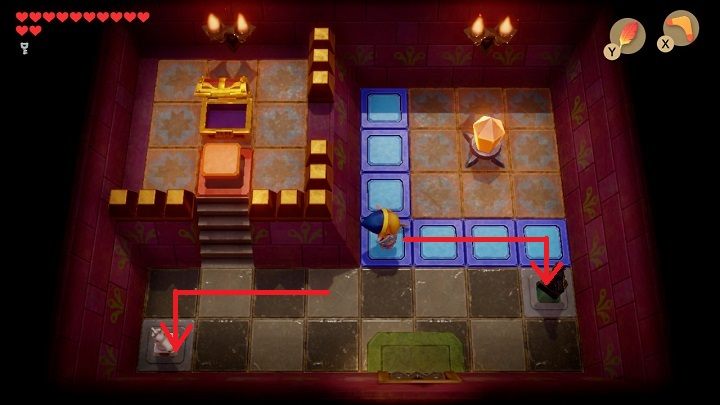
Go to the next room following the tiled corridor. Follow the corridor until you can reach a room with a crystal and an elephant statue. Place a bomb next to the crystal and quickly stand behind the upper right orange brick. When the bomb explodes and the crystal turns orange, go up. Place a bomb next to the cracked piece of wall on the right. Go through the newly created hole, kill all the monsters in the next chamber to unlock the secret staircase.
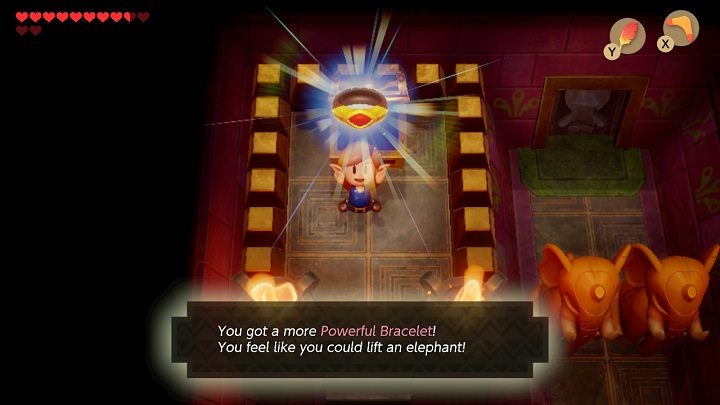
Go through the underground tunnel and climb the last ladder to the higher level of the shrine. To open the door in the next room you have to kill all the enemies. Disappearing monsters with green hats can be tough to defeat. Stan in front of the place where they appear, cover yourself with a shield and as soon as they emerge throw a boomerang at them. Go to the next room and take the More Powerful Bracelet form the chest. Remove one of the elephant statues so that you can go through the revolving door.

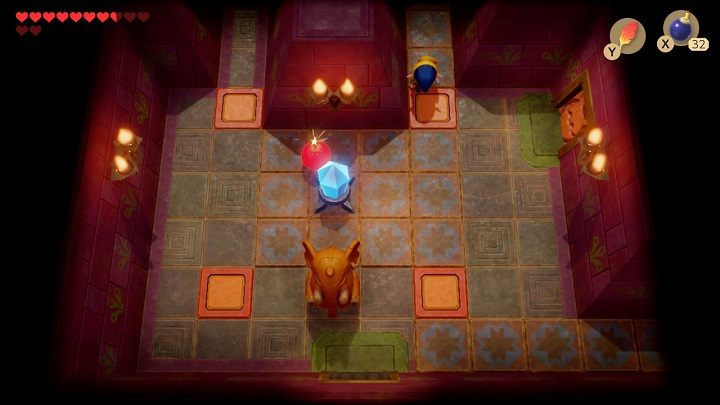
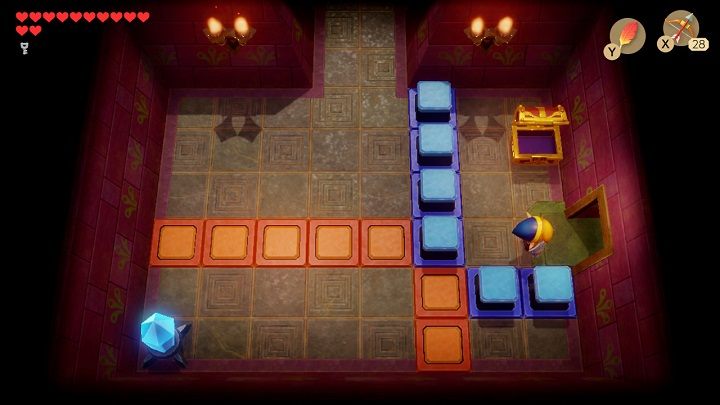
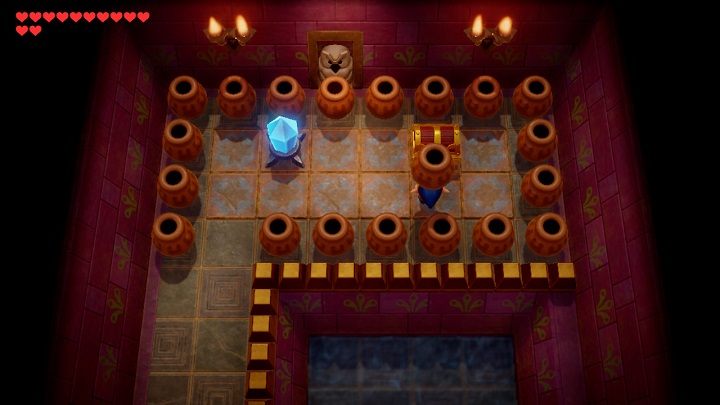
You'll find yourself in a room with a crystal in the center and an elephant statue. Tap the crystal to turn it blue and plant a bomb under it. Go quickly behind the upper left orange brick and wait for the bomb to explode. Go through the corridor to the upper room. Under one of the vases, you will find a button that opens the door on the left. Go through the door and defeat all the monsters. To get to the monster behind orange bricks, throw an arrow at the crystal to turn it blue. Kill the last monster and take a Map from the chest. Make sure the crystal is orange when leaving the room. Head up to the next chamber.
Go right and take a Stone Beak from the chest. Go back left and throw a vase at the door to smash it. Go through the door and then go right. Take a Compass from the chest and tap the crystal to turn it blue. Go down the corridor. Follow the corridor until you reach a room with orange bricks on the floor. Defeat all the monsters and take a Small Key that will fall from the ceiling.
Go back down the corridor to the previous chamber and go to the room on the left. The blue bricks on the floor should be raised. Watch out for Sparks and smash the door with an elephant statue. Go to the next room and take 100 rupees from the chest. Use a staircase to reach the surface and take a Secret Seashell from the chest. Return to the shrine.

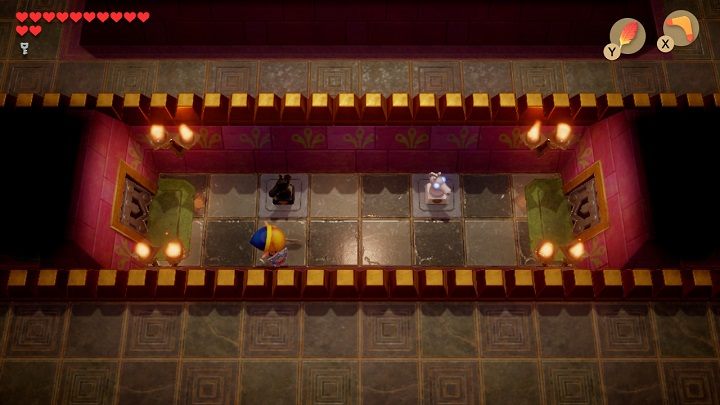
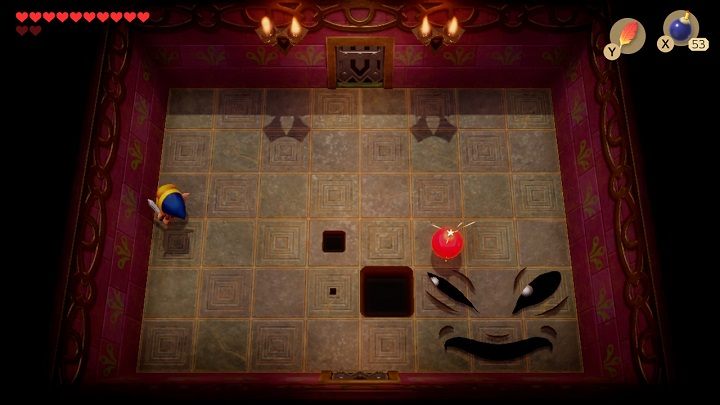
To open the door you need to throw Horses chess on two green-gray pieces of the floor. You have to stand in the right place to succeed. In chess, horses travel in an L shape. The picture above shows the place from which you should throw the black chess horse.
Go through the door and head two rooms down. Go to the bottom of the chamber and stand between the blue and orange bricks. Throw an arrow at the crystal to make the orange bricks rise. Throw another arrow at the crystal and quickly go near the door on the right before the arrow hits the crystal. Leaving the room the crystal should be blue.
Go down the tiled corridor. Tap the crystal to turn it orange and smash the door on the left with an elephant statue. Go through the door and take 100 rupees form the chest. Smash another door with an elephant statue and go down. Take 50 rupees from the chest and smash the door. Go through the door, turn right and you'll find yourself in the first room of the shrine.

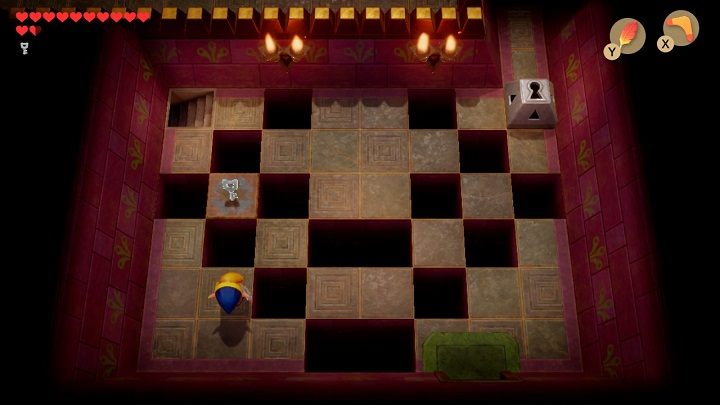
Go to the room on the right. Watch out for traps, go through the moving floor and go to the next chamber. Stand in the corner and cover yourself with a shield because you will soon be hit by orange tiles from the floor. When all tiles break, the door will open. Go to the next room. Smash the door on the right with one of the statues. Defeat all the monsters in the next room and go down. Climb the stairs on the left and jump onto the orange bricks. Jump to the next brick to climb the stairs on the right. Follow the tiled corridor to take a Secret Medicine from the chest. Jump down from the corridor to the left.
Go up, go down the stairs ad follow the water corridor until you reach the chest with a Small Key. Go back through the water corridor, go up the stairs and return to the previous room. Go to the room on the left and then use a Small Key on the upper door. In the next room, place a bomb under a cracked piece of wall and then go through the hole. You will fight with the Smasher there. Stand as far as possible and wait for him to throw the big ball at you. Pick it up quickly and throw it at him. Repeat this several times until he'll be defeated, then go to the next chamber.
Lift the elephant statue on the left. Under it, you will find a staircase. Go down and go through the underground tunnel. After entering the next room quickly stand in the bottom left corner and cover yourself with a shield. Wait for all orange tiles to crash into you. A Small Key will fall from the ceiling. Pick it up and use it on the grey stone. Go down the hall, lift the elephant statue and smash it into the door. Go further.
You'll find yourself in a narrow room where you will again have to place the chess horses on the grey tile. The picture shows the place where you should stand to throw the horse. The doors will open and you will be able to go left. Go down the stairs and go through the tunnel. To avoid falling traps run quickly by pressing the Left button. Climb the last ladder to leave the tunnel.
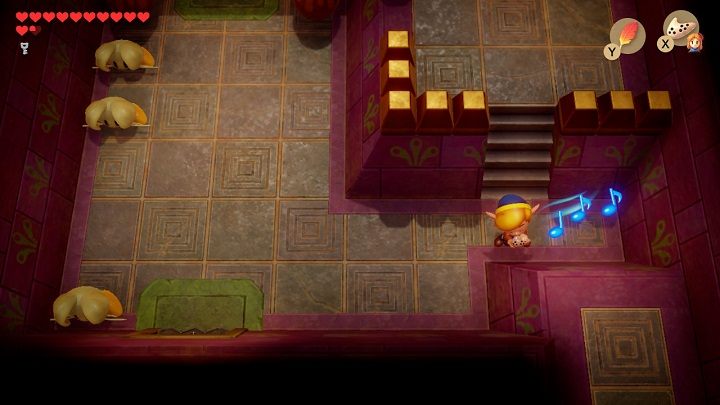
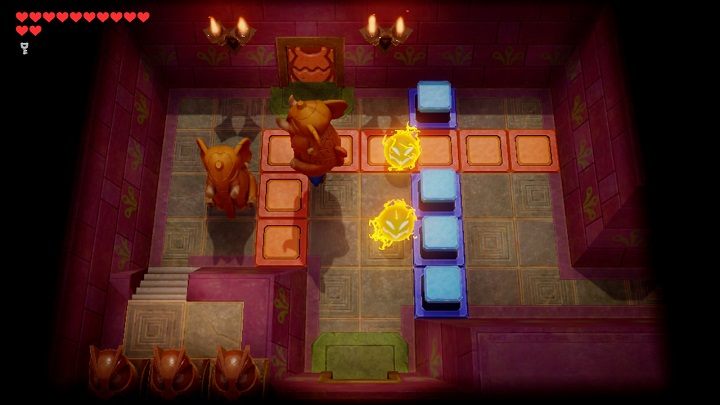
In the next chamber, you will have to play the first song on your Ocarina for the rabbits to disappear. Go through the upper door. Go through the next room by removing vases from your path and jumping over the traps.
After entering the room, the door will slam behind you. First, you need to stand in front of the blue bricks on the floor and throw the boomerang at the crystal. Take 300 rupees from the chest. Stand in front of the blue brick on the floor again and hit the crystal with your boomerang so it turns orange. Remove the vase in the lower-left corner of the chamber. Underneath it is a place where you must throw a chess horse. Throw the chess horses on the grey bricks to open the door. Before leaving the room, throw the boomerang at the crystal so that it turns blue.
Go two rooms down. You'll have to beat two Dodongo Snakes there. Just feed them with bombs. Go to the room on the left. Stand by the hole in the barrier and use the Hookshot on the brick to get to the other side. Use a Small Key on the stone and go up the corridor. Throw the vase at the chest to take the Nightmare's Key from it.
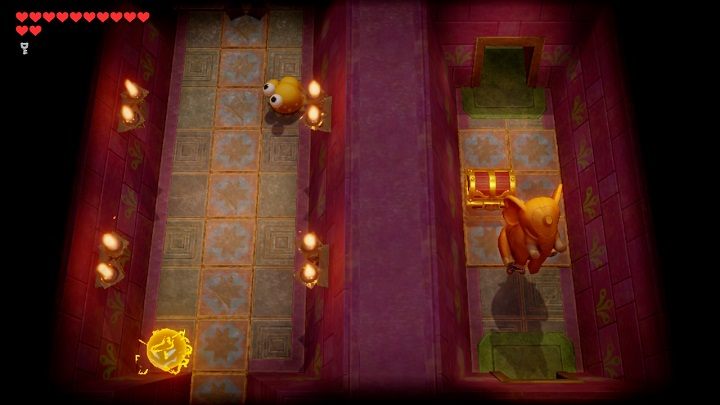
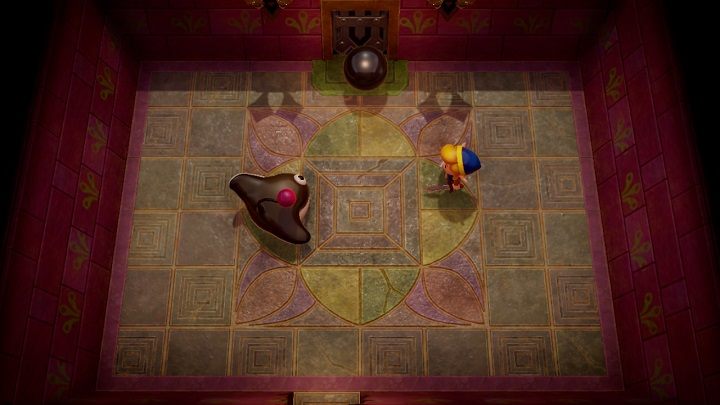
Go back down the corridor and jump into the water. Go down the water corridor and take the stairs to the floor. Go down and then to the room on the left. Go three rooms up and go down the stairs. Go through the tunnel and climb the last ladder to the upper level of the shrine. Go through the door downstairs. Watch out for the purple ball that draws you in. You have to walk around the room for the green creatures to show up. The ball will suck them in and the door will open again. Go through the door on the right. Jump over the hole, kill the monster and move the brick to the hole to go through the upper door. Avoid the Sparks and use the Nightmare's Key on the next door.
Your last opponent in the shrine will be the Facade. You can kill him by placing bombs where he appears. Watch out for the flying tiles. After defeating him take a Piece of Heart and go up to grab the Coral Triangle.