Catfish's Maw | Link's Awakening Walkthrough Link's Awakening guide, walkthrough
Last update: 04 November 2019
In this section of the guide to The Legend of Zelda: Link's Awakening, you will find information about Manbo's Mambo song, and how to get to the Raft Shop. You will also read about how to help Pink Ghost. We will lead you through the Catfish's Maw in the search for the Wind Marimba.
Level main goals:
- Learning the Manbo's Mambo and taking a raft ride.
- Helping the Pink Ghost and finding the entrance to the Catfish's Maw
- Searching the Catfish's Maw for the Wind Marimba
Learning the Manbo's Mambo and taking a raft ride.
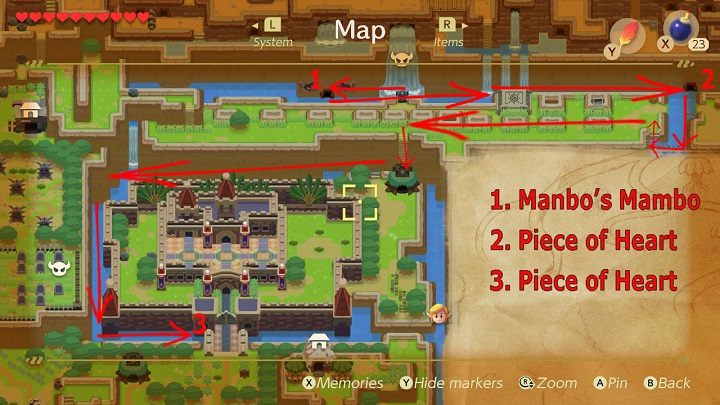
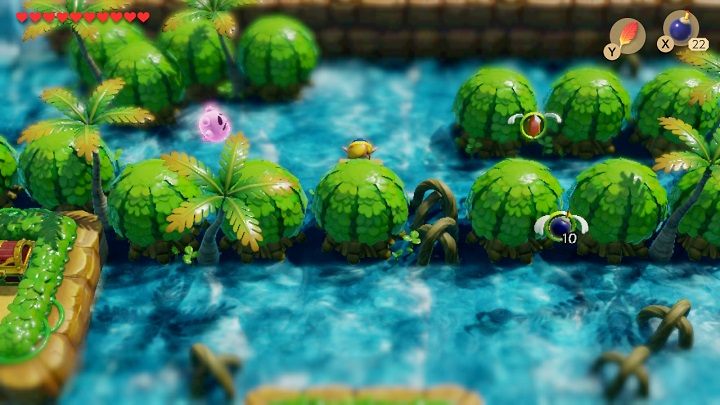
After exploring the Angler's Tunnel you will receive a message about traveling to the bay. Swim left into the cave with two fish statues at the entrance. Swim to the big fish and talk to it. It will teach you how to play Manbo's Mambo. By playing this song you will teleport to the chosen Fast Travel Point. Exit the cave and swim right until you reach the next entrance to another cave. Swim inside, dive by pressing the B button and take a Piece of Heart. Swim out of the cave, swim down to the stones and climb ashore using the stairs. Go left until you find a long ladder. Go down into the castle moat and swim left, then turn down. A Pink Ghost will start to follow you. Don't worry, he won't hurt you. Continue on the moat, turn right and dive near the bridge to catch a Piece of Heart.
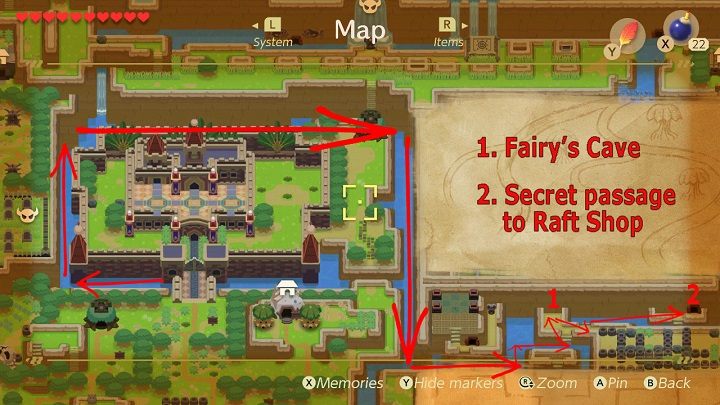
Swim around the castle and the swim down to leave the moat. Take the next right turn. An Owl will fly by again and say that you should find two shrines. The first one is in the south. Swim further and turn up. Climb the stairs to the narrow island and place a bomb near the cracked wall. Inside the cave, there'll be a fairy who can renew your life. Go outside and go down the stairs to the river flowing by the high wall of the hill. Swim right and go ashore to a small island with a cave entrance. Go inside. Go through the cave until you find stairs to the surface.
Go down to the south side of the island and enter the Raft Shop. For a 100 rupees you'll be able to buy a raft ride or a raft race. During the raft ride you can collect a lot of items, such as rupees, bombs, etc. After the race or ride, you'll be near the cave you have recently enter.
Helping the Pink Ghost and finding the entrance to the Catfish's Maw
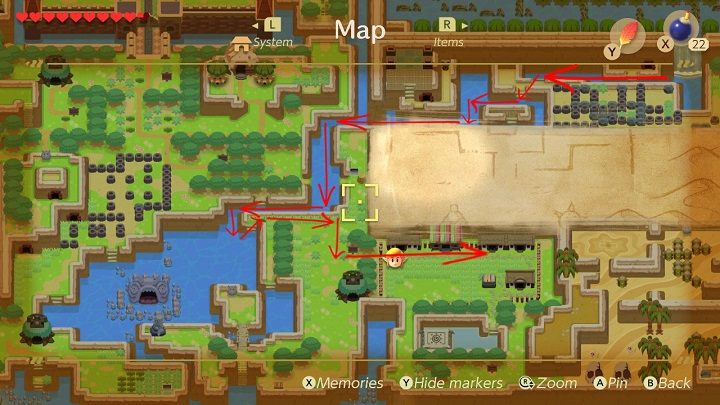
Swim southwest in the river to the Martha's Bay. Go ashore and follow right to get to Animal Village. Go to the end of the village and enter the first house from the left. Exchange the Hibiscus for a Goat's Letter.
Leave the Goat's House and return to the water the same way. Swim southwest passing the entrance to the fish-shaped cave along the way. Climb the stairs ashore near the Telephone Booth. Go down towards the booth and enter the tiny island with one plant on it. Under the plant, you will find a Secret Seashell.
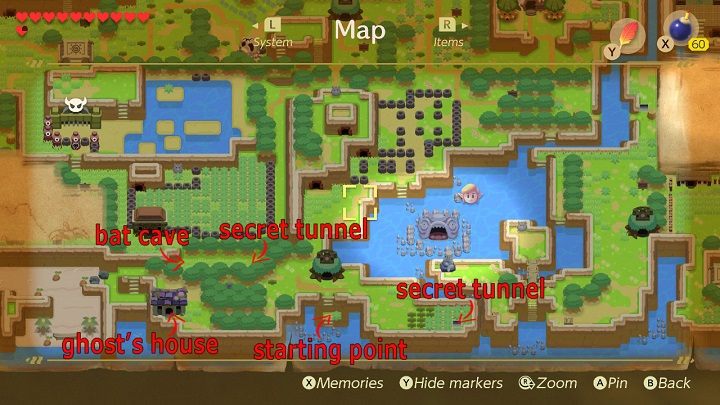
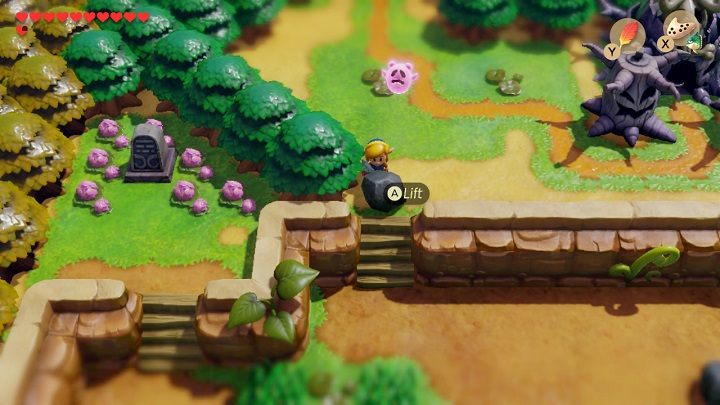
Go back to the Telephone Booth and turn right. Jump over the holes in the ground and remove the grass to clear the path to the staircase. Passing through a secret tunnel dive into the water to catch a Piece of Heart. Go up the stairs to the surface on the other side of the tunnel. Go left and find the underground entrance to the bat cave. Pour magic powder into the bowl to wake up the bat. This time he'll give you more bombs. Return to the surface and then through the tunnel the same way. It's time to take care of the ghost that follows you all the time. Go left and pass the Telephone Booth again. Go down a bit and jump to the left, over three holes in the ground. A house with a purple roof will stand by the shore. After a short look inside the house, the ghost will ask you to escort him to his grave.
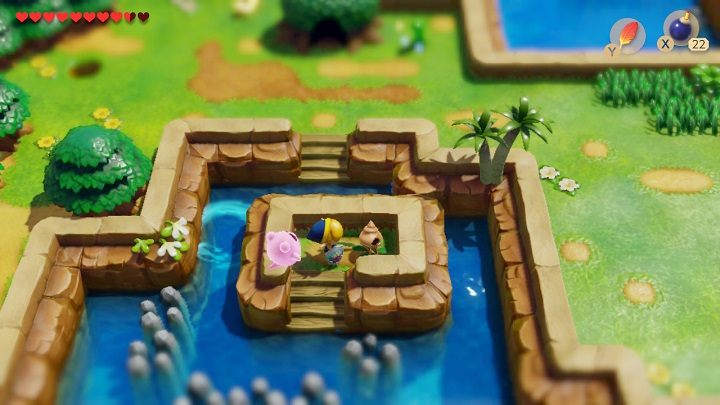
Leave the house and play Manbo's Mambo on your Ocarina to teleport to Manbo's Pond. Go left, turn down and remove a stone in front of the stairs. Approach a single gravestone among pink flowers. The ghost will happily return to his grave and reward you with a Jar. You can catch a little fairy into the jar and use her for renewing your life later in the game. After a moment an Owl will fly over and say that it's time for you to enter the Catfish's Maw.
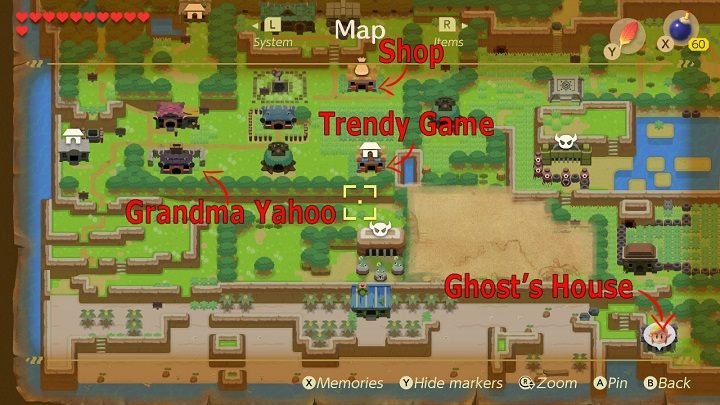
Go back up and enter the Mysterious Forest. Keep heading left until you find its north-west exit. Enter the house with the yellow roof and give Mr. Write the Goat's Letter. In return, he will give you a Broom. Go to Mabe Village and approach the Grandma Yahoo standing next to the house in the south of the village. Exchange the Broom for a Fishing Hook. Go to the Trendy Game and win a Secret Seashell. Now go to the store and buy a Bow and Arrow Set for 980 rupees. Leave the village through its southwestern exit and go down to the beach. Keep heading right. Remove the stones blocking your way out of the beach and go to the Ghost's House. There will be a Secret Seashell under one of the vases.
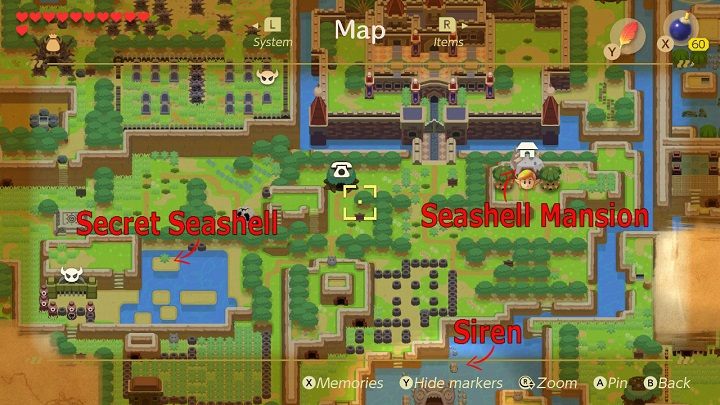
Leave the house, turn right and jump over three holes in the ground. Turn up, pass the Telephone Booth and enter the water of Martha's Bay. Swim to the siren located north of the entrance to the Catfish's Maw. She will tell you that she lost her Necklace. If you find it, she'll give you a Scale in return. Take the nearby stairs ashore and go up towards Kanalet Castle. Find a path and follow it northwest. When you get to the Telephone Booth, turn down and follow the road until you are near the Key Cavern. Swim to a small island with a single plant, under it you'll find a Secret Seashell. Return to the Castle area and go to the Seashell Mansion. If you've collected enough Secret Seashells you'll get a Seashell Sensor. This sensor will let you know if any Secret Seashell is nearby.
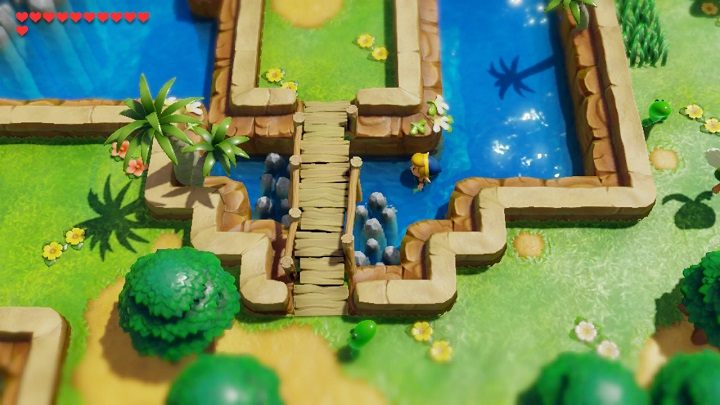
Return to the Martha's Bay and enter the water. Swim left and circumnavigate the islet with the Owl Statue until you find a bridge. Dive under the bridge. Swim to the fisherman and jump into his boat. Give him the Fishing Hook an he'll catch a Necklace for you. Go back to the Siren. As promised, you will get a Scale from her tail for the Necklace.
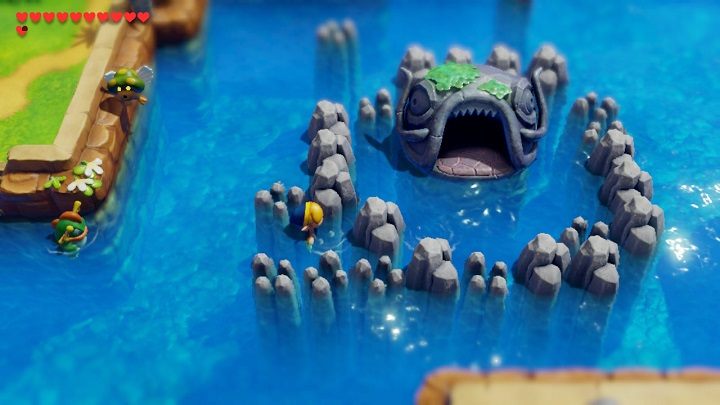
Swim down to the entrance of the Catfish's Maw. On the left, by the stones, there is a place where bubbles come out. Dive there and swim through the underwater tunnel. Swim to the surface and go inside.
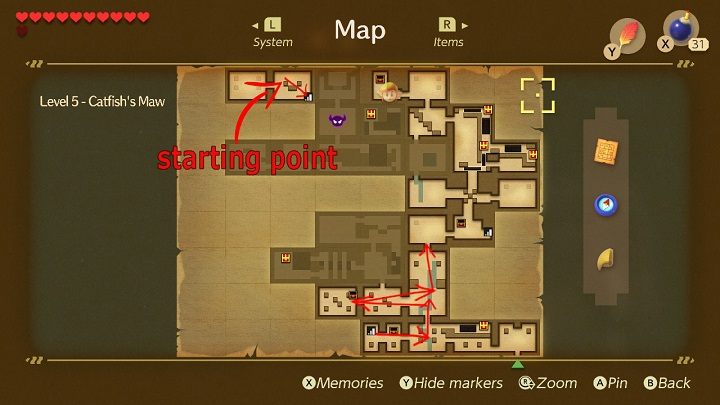
Searching the Catfish's Maw for the Wind Marimba
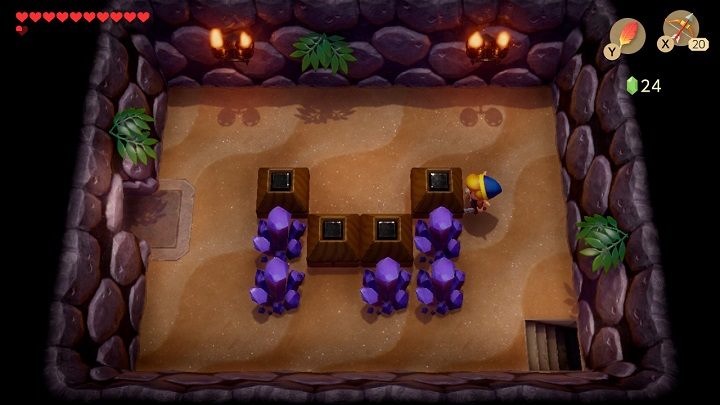
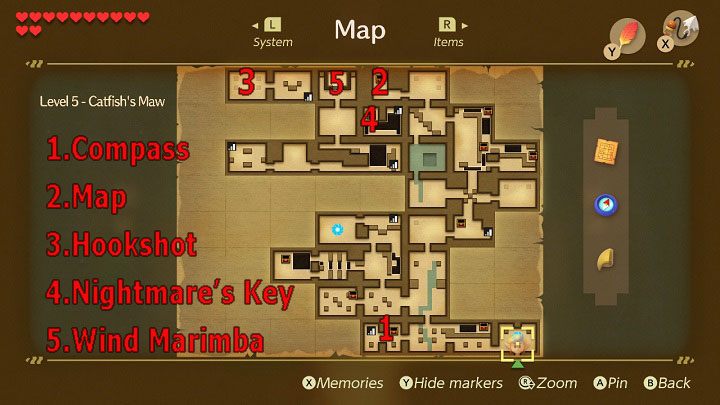
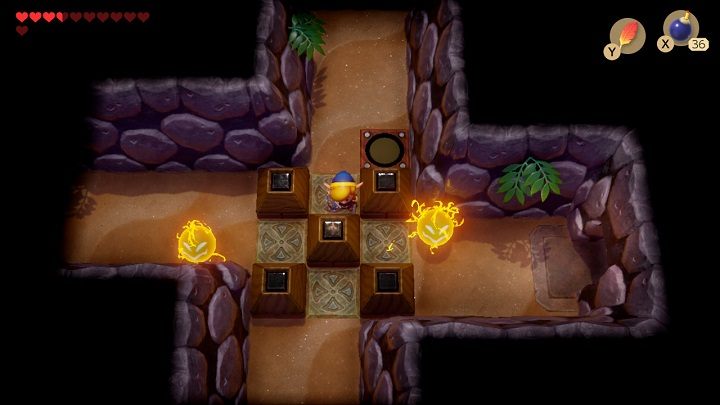
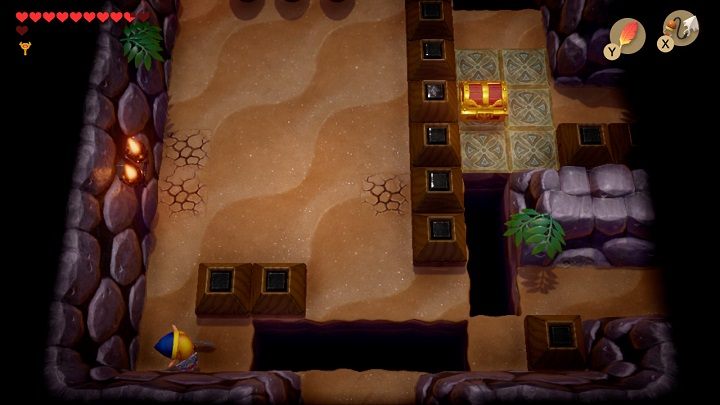
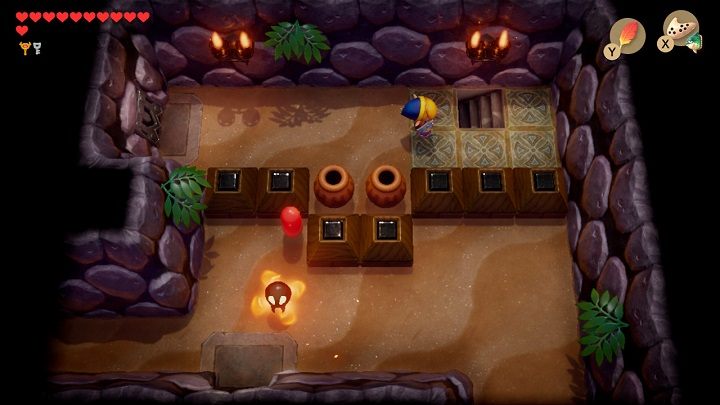
Go left, watch out for the Spark and go to the next room. Kill all the enemies to open the door on the left. Monsters with a blue helmet on their heads can only be defeated by hitting them from behind. Go to the room on the left. Take a Compass from the chest and take the stairs down. Step on the stone hanging on the chain, wait for it to lower slightly under your weight and jump to the next one. Use all the stones to get to the ladder on the left side of the room and go upstairs. In the room above you have to push the bricks together so that a Small Key will fall down.
Go back downstairs and go through the lower level. Go right to the next room and use a Small Key on the upper door. Move left and watch out for traps. Go to the next room on the left and kill all the monsters. A chest with a Stone Beak will appear. Go back two rooms to the right and go up. Defeat all the enemies, take a hint from an Owl and go up.
In this room, you will have to fight with Master Stalfos. Hit him when he starts swinging his sword. He will then fall to the ground for a moment so you must quickly plant a bomb on him. Repeat it until he has had enough and runs away. Go through the door on the right. There'll be a massage from Master Stalfons in the chest. Go up.
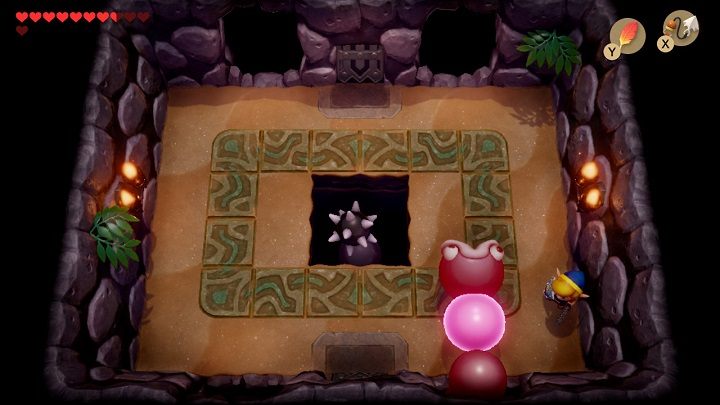
Move the middle brick and go left. Go back to the previous room, move the brick to be able to go up. Go back down again, step on the button on the floor, move brick and go through the door on the right. You will fight with Master Stalfos again. After a few of your blows, he'll run away.

Go through the door, move the brick and go up. If enemies cause you problems, use the bow. Jump over the holes in the floor and go into the narrow corridor on the right. Take the bombs and come back. Go higher and then go through the door on the left. Kill all the monsters to open the door to the room above. One of the monsters will be on the other side of the bricks, move them to get to it. When the door opens, go through and fight the Master Stalfos again.
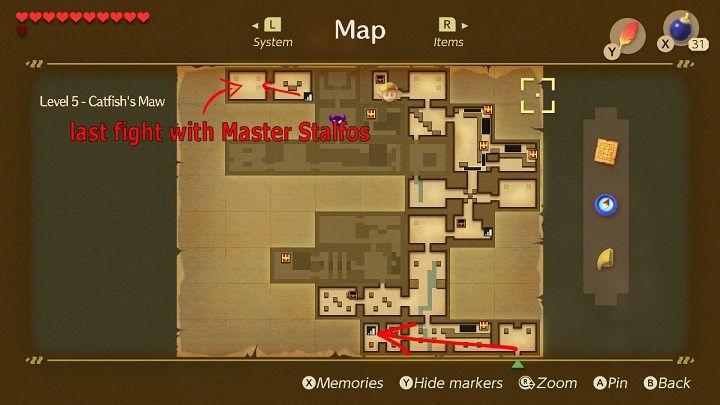
After winning the fight go to the room on the left to get the Map from the chest. Play the Manbo's Mambo on your Ocarina to teleport to the first room of the Catfish's Maw. Go to the last room on the left, where there are stairs to the lower level. Use the stairs, go through the tunnel and climb the ladder up. Go to the second room and fight the last time with Master Stalfos. After defeating him you will receive a Hookshot.
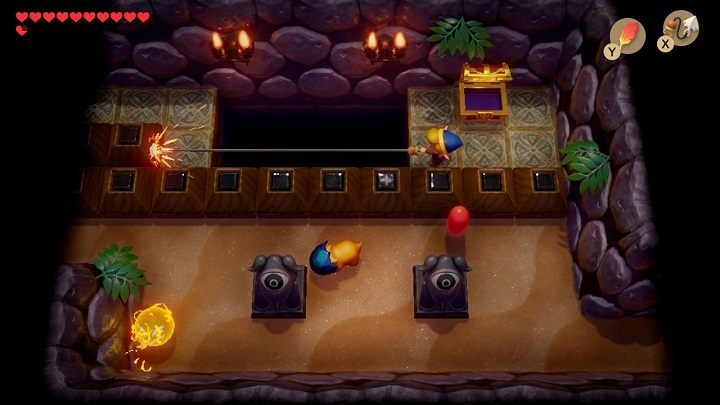
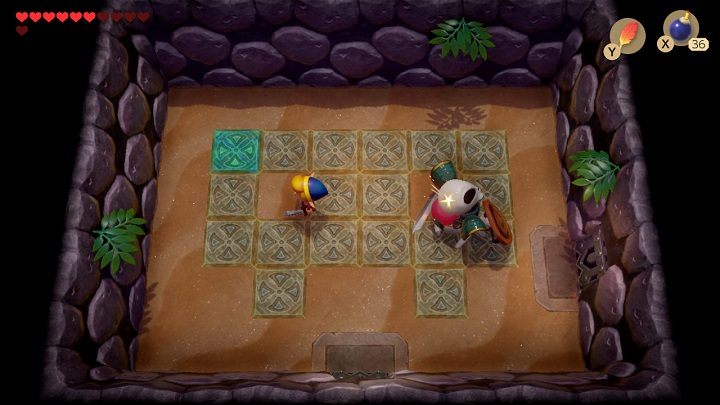
Go back to the previous room and go down the stairs. Go through the tunnel again and climb the ladder up. Go right and then go through the narrow corridor with tiles on the floor. Approach the end of the floor and use the Hookshot on the chest to get to the other side safely. Take 100 rupees from the chest. To come back use a Hookshot on the brick.

Go through the door up and turn left. Move to the next room up and then left again. Use the hook on the brick to get to the end of the room and go through the corridor on the left. Use the hook to get to the chest with a Small Key and go back to the previous room using the door. Use the hook on the brick to quickly get to the other side of the room. Go right.
Use the Hookshot to pull out the wooden bridge and go through it to the next room. Use a Small Key on the brick and enter the room on the left. You'll fight two mini-bosses there. Cover yourself with the shield and as soon as the Gohma bug will stop moving, stand in front of it and shoot its open eye with a bow.
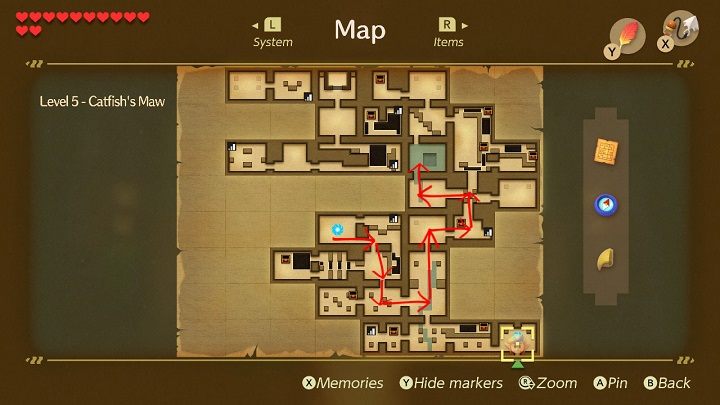
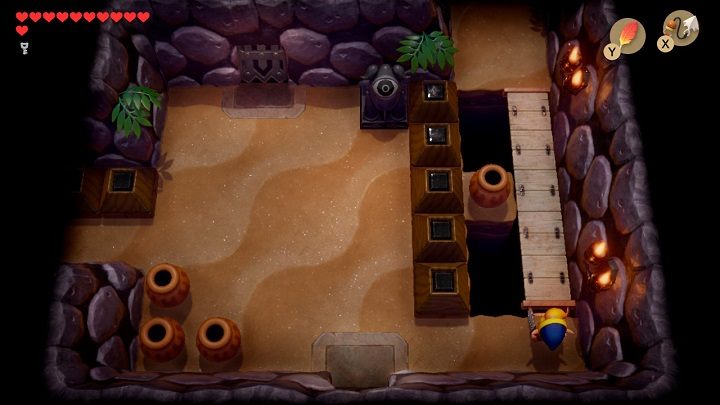
Go back to the previous room and go two rooms down. Go right and go up two rooms. Go right, move the brick to be able to go to the room on the left and then go up. Enter the deep water and dive in. You should find a secret water tunnel. Swim to the left until you find the ladder to the upper level. Unfold the wooden bridge to get to the chest with the Nightmare's Key. Come back through the water tunnel.
Go down and turn right. Move the brick to go up, jump over the hole and go to its left side. Use the Hookshot on the brick to get to the tiny piece of floor in front of the chest. Use the hook on the chest and take 50 rupees from it. Go right and use the hook to get to the chest with a Small Key. Go back to the previous room and go up. Unwind the wooden bridge to get to the chest with 50 rupees. Play the Manbo's Mambo to teleport to the first room of the Catfish's Maw and enter the portal.
You will teleport to the room where you killed two bugs. Go through the door to the right and go down the stairs. Go left and hook to the thing sticking out of the ceiling to get to the last ladder. Use a Small Key on the stone and come over to the hole in the floor. Use the hook on the brick to get to the left side of the room. Open the door with the Nightmare's Key and go fight the last battle in the Catfish's Maw.
Watch out for Slime Eel's tail. As soon as his head appears in one of the four holes in the wall, approach it and use the Hookshot when he's opening his mouth. It will disable him for a moment and you will have a chance to attack his neck. Repeat this until you defeat him. Take a Piece of Heart and go to the upper room and grab the Wind Marimba.