Guides & Walkthroughs New Guides Popular RPG Action Strategy Adventure YouTube Guides Mobile App
Free iOS App iPhone & Ipad
Download Game Guide PDF, ePUB & iBooks

Star Wars: The Force Unleashed Game Guide & Walkthrough by gamepressure.com

Star Wars: The Force Unleashed Game Guide & Walkthrough

Table of Contents

Mission 08: Imperial Raxus Prime - part 2 | Walkthrough SW: The Force Unleashed Guide

Last update: 11 May 2016

1 - Mission 08: Imperial Raxus Prime - part 2 - Walkthrough - Star Wars: The Force Unleashed - Game Guide and Walkthrough
Find the elevator platform, which is located in the distant part of the hall and step on her - Mission 08: Imperial Raxus Prime - part 2 - Walkthrough - Star Wars: The Force Unleashed - Game Guide and Walkthrough

Find the elevator platform, which is located in the distant part of the hall and step on her. You will reach landing platform, where Starkiller will steal gunship.

2 - Mission 08: Imperial Raxus Prime - part 2 - Walkthrough - Star Wars: The Force Unleashed - Game Guide and Walkthrough
You are now on the landing platform, which is located near to the ore mine - Mission 08: Imperial Raxus Prime - part 2 - Walkthrough - Star Wars: The Force Unleashed - Game Guide and Walkthrough

You are now on the landing platform, which is located near to the ore mine. Kill the enemies and ride up on the higher level. Run to right edge of the ramp and take the holocron. After that, return to lock, which is placed in the middle of the area and enter inside the complex.

3 - Mission 08: Imperial Raxus Prime - part 2 - Walkthrough - Star Wars: The Force Unleashed - Game Guide and Walkthrough
You will find yourself in the round room, which is blocked by the force shields - Mission 08: Imperial Raxus Prime - part 2 - Walkthrough - Star Wars: The Force Unleashed - Game Guide and Walkthrough

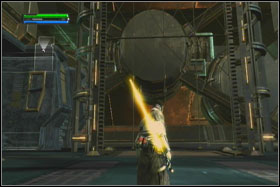
You will find yourself in the round room, which is blocked by the force shields. First jump on the central round platform. Use there Force Lightning on the five switches. Thanks to this, you will able to complete the secondary objective. To shut down the barriers, target every of the devices which are located above the barriers and slip them off with the Force.

4 - Mission 08: Imperial Raxus Prime - part 2 - Walkthrough - Star Wars: The Force Unleashed - Game Guide and Walkthrough
On a top level of the round room (along the ramp), you can find the entrance to the next area - Mission 08: Imperial Raxus Prime - part 2 - Walkthrough - Star Wars: The Force Unleashed - Game Guide and Walkthrough

On a top level of the round room (along the ramp), you can find the entrance to the next area. Open the door with the Force and take the holocron (Unstable Purple Lightsaber Crystal).

5 - Mission 08: Imperial Raxus Prime - part 2 - Walkthrough - Star Wars: The Force Unleashed - Game Guide and Walkthrough
Next room is blocked by the gate with two locks - Mission 08: Imperial Raxus Prime - part 2 - Walkthrough - Star Wars: The Force Unleashed - Game Guide and Walkthrough

Next room is blocked by the gate with two locks. First kill the stormtroopers. After that, jump down on the one of the side ramps. At the end of the each ramp, use the Force (R2) and move the blockade up. On the left side of the room, you should be able to see thirteenth holocron (Force Combo Sphere).

6 - Mission 08: Imperial Raxus Prime - part 2 - Walkthrough - Star Wars: The Force Unleashed - Game Guide and Walkthrough
The pass is leading to the long corridor, which is running around the central core of the mine - Mission 08: Imperial Raxus Prime - part 2 - Walkthrough - Star Wars: The Force Unleashed - Game Guide and Walkthrough

The pass is leading to the long corridor, which is running around the central core of the mine. Start running in the left. Eliminate all stormtroopers and take the holocron.

7 - Mission 08: Imperial Raxus Prime - part 2 - Walkthrough - Star Wars: The Force Unleashed - Game Guide and Walkthrough
After a while, you should be able to see the exit, which is located on the left side - Mission 08: Imperial Raxus Prime - part 2 - Walkthrough - Star Wars: The Force Unleashed - Game Guide and Walkthrough

After a while, you should be able to see the exit, which is located on the left side. Ignore it and run forward. Thanks to this, you will be able to get the last holocron from this level. Now return to the exit and prepare yourself to the fight with Proxy, which is capable to change in enemies, which you killed earlier. Use the same tactic as in the previous fight with these opponents. The last enemy will be Darth Maul. Fight with him by combining Force Repulse (L2+O) and Force Grip (R2).

8 - Mission 08: Imperial Raxus Prime - part 2 - Walkthrough - Star Wars: The Force Unleashed - Game Guide and Walkthrough
When the Darth Maul will be defeated, exit the room by using Force Push on the metal bulkhead - Mission 08: Imperial Raxus Prime - part 2 - Walkthrough - Star Wars: The Force Unleashed - Game Guide and Walkthrough

When the Darth Maul will be defeated, exit the room by using Force Push on the metal bulkhead. Your new objective will be activation of four nods, what will give you the possibility to pull down the Star Destroyer from orbit.

9 - Mission 08: Imperial Raxus Prime - part 2 - Walkthrough - Star Wars: The Force Unleashed - Game Guide and Walkthrough
Kill all stormtroopers and use Force Lightning on every nod - Mission 08: Imperial Raxus Prime - part 2 - Walkthrough - Star Wars: The Force Unleashed - Game Guide and Walkthrough

Kill all stormtroopers and use Force Lightning on every nod. Repeat this action on every post, located around the mine core.

See/Add Comments

You are not permitted to copy any image, text or info from this page.

This site is not associated with and/or endorsed by the LucasArts or LucasArts. All logos and images are copyrighted by their respective owners.

Copyright © 2000 - 2024 GRY-Online S.A. for gamepressure.com, unofficial game guides, walkthroughs, secrets, game tips, maps & strategies for top games.