Guides & Walkthroughs New Guides Popular RPG Action Strategy Adventure YouTube Guides Mobile App
Free iOS App iPhone & Ipad
Download Game Guide PDF, ePUB & iBooks

Star Wars: The Force Unleashed Game Guide & Walkthrough by gamepressure.com

Star Wars: The Force Unleashed Game Guide & Walkthrough

Table of Contents

Mission 02: Raxus Prime - part 2 | Walkthrough SW: The Force Unleashed Guide

Last update: 11 May 2016

1 - Mission 02: Raxus Prime - part 2 - Walkthrough - Star Wars: The Force Unleashed - Game Guide and Walkthrough
Lift up (R1) the big shining platform and jump on her - Mission 02: Raxus Prime - part 2 - Walkthrough - Star Wars: The Force Unleashed - Game Guide and Walkthrough

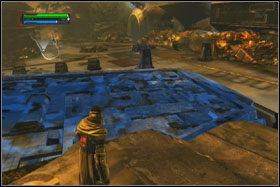
Lift up (R1) the big shining platform and jump on her. Grab with the Force one of the flying piece of junk and throw him in damaged dome in front of you.

2 - Mission 02: Raxus Prime - part 2 - Walkthrough - Star Wars: The Force Unleashed - Game Guide and Walkthrough
Now you can enter to the spaceship - Mission 02: Raxus Prime - part 2 - Walkthrough - Star Wars: The Force Unleashed - Game Guide and Walkthrough

Now you can enter to the spaceship. Make double jump (X+X) and in adequate moment, press (L1). On the other side (in open area) you will be have to eliminate large group of the droids.

3 - Mission 02: Raxus Prime - part 2 - Walkthrough - Star Wars: The Force Unleashed - Game Guide and Walkthrough
Just before end of the cliff, you will find the holocron - Mission 02: Raxus Prime - part 2 - Walkthrough - Star Wars: The Force Unleashed - Game Guide and Walkthrough

Just before end of the cliff, you will find the holocron. When you take him, back yourself. Find the crushed hatch. Use Force Push and again enter inside the spaceship.

4 - Mission 02: Raxus Prime - part 2 - Walkthrough - Star Wars: The Force Unleashed - Game Guide and Walkthrough
In the corridor, you will have to fight with few Jawas - Mission 02: Raxus Prime - part 2 - Walkthrough - Star Wars: The Force Unleashed - Game Guide and Walkthrough

In the corridor, you will have to fight with few Jawas. Just before the place where you can jump on the higher level is hidden holocron. Use the Force Push, take him and go straight.

5 - Mission 02: Raxus Prime - part 2 - Walkthrough - Star Wars: The Force Unleashed - Game Guide and Walkthrough
When you reach the closed gate, curve one of her parts and go trough - Mission 02: Raxus Prime - part 2 - Walkthrough - Star Wars: The Force Unleashed - Game Guide and Walkthrough

When you reach the closed gate, curve one of her parts and go trough. You will find yourself on the big open area, full of the scavengers.

6 - Mission 02: Raxus Prime - part 2 - Walkthrough - Star Wars: The Force Unleashed - Game Guide and Walkthrough
In this area you can find two holocrons - Mission 02: Raxus Prime - part 2 - Walkthrough - Star Wars: The Force Unleashed - Game Guide and Walkthrough

In this area you can find two holocrons. First of them is located in one of the corners (Force Combo Sphere). Second (Gold Lightsaber Crystal) can be found on the platform, which is rising above the abyss, on the left side of the entrance.

7 - Mission 02: Raxus Prime - part 2 - Walkthrough - Star Wars: The Force Unleashed - Game Guide and Walkthrough
Your main objective in this area will be shutting down the generator of the shield, which is blocking the pass - Mission 02: Raxus Prime - part 2 - Walkthrough - Star Wars: The Force Unleashed - Game Guide and Walkthrough

Your main objective in this area will be shutting down the generator of the shield, which is blocking the pass. Find the elevator and ride down. When you will leave short corridor you will be have to beat another group of the scavengers.

8 - Mission 02: Raxus Prime - part 2 - Walkthrough - Star Wars: The Force Unleashed - Game Guide and Walkthrough
In this part of level, you can also find two holocrons - Mission 02: Raxus Prime - part 2 - Walkthrough - Star Wars: The Force Unleashed - Game Guide and Walkthrough

In this part of level, you can also find two holocrons. First (Force Talent Sphere) is located on the right of the elevator's exit (just after entrance to the open area). Second (Compressed Yellow Light Saber Crystal) is located next to destroyed skiff, under power generator.

9 - Mission 02: Raxus Prime - part 2 - Walkthrough - Star Wars: The Force Unleashed - Game Guide and Walkthrough
To deactivate the shield, use the Force and move from the left to the right the generator, which is standing on the platform - Mission 02: Raxus Prime - part 2 - Walkthrough - Star Wars: The Force Unleashed - Game Guide and Walkthrough

To deactivate the shield, use the Force and move from the left to the right the generator, which is standing on the platform. After that, return to the previous area with elevator. When you do this, you will able to reach corridor, which was blocked by energy shield. Go straight. After a short while you should meet the levitating probes, which will be sucking the force from the Starkiller.

10 - Mission 02: Raxus Prime - part 2 - Walkthrough - Star Wars: The Force Unleashed - Game Guide and Walkthrough
The probes are very dangerous, so try to destroy them in the first order - Mission 02: Raxus Prime - part 2 - Walkthrough - Star Wars: The Force Unleashed - Game Guide and Walkthrough

The probes are very dangerous, so try to destroy them in the first order. When you destroy two probes, jump down on the lower level. Destroy another droids and jump on the junk, on the left of the entrance.

See/Add Comments

You are not permitted to copy any image, text or info from this page.

This site is not associated with and/or endorsed by the LucasArts or LucasArts. All logos and images are copyrighted by their respective owners.

Copyright © 2000 - 2024 GRY-Online S.A. for gamepressure.com, unofficial game guides, walkthroughs, secrets, game tips, maps & strategies for top games.