
Walkthrough - Jupiter Quests - Part 3 STALKER: CoP Guide
Last update: 11 May 2016
15. Hypothesis
Received from: Professor Ozersky, after finishing mission 14
Beginning location: point 23 on the map
Target location: point 30 on the map
Mission description:
Talk with the professor about your last task. He asks you to research the increased activity of mutants during the measurements. Head over to the fire anomaly and place the sensor at the spot marked on the minimap. Don't move and wait for jumping enemies (screen) to appear from the north and south. You are surrounded by anomalies that will hurt and set fire to your enemies, helping you in the fight. After some time you will be informed about the end of the experiment. Take the device and return to the scientist.

16. Anomalous Activity
Received from: Professor Hermann
Beginning location: point 25 on the map
Target location: point 33 on the map
Mission description:
Ask Hermann about the results of the anomaly scanning (mission 14). He will send us to the tower (point 33). Get to the top of the building, stand by the destroyed barrier and take out the detector prototype. An anomaly will appear (screen) and after a few seconds corpses will start falling out of it. Cross the barrier and search the bodies. There's a PDS in one of them.

17. Duty History
Received from: automatically after obtaining the PDA from mission 16
Beginning location: point 33 on the map
Target location: point 11 on the Zaton map, or point 35 / 34 on the Jupiter map
Mission description:
You have to hand over the found PDA to the right person. Depending on who do you want to like you, you can give the PDA to Loki (Freedom) [point 35], Shulga (Duty) [point 34] (screen), or sell it to Owl [point 11] if you want to stay neutral (this way you will unlock an achievement thanks to which you will gain discounts at the mechanic and the trader at the Stalker base in Jupiter sector).
Notice - the PDA you have just found and the one from mission 11 (Transaction) of the Zaton sector are extremely important. If you give both of them to Owl and stay neutral, you won't be able to finish mission 21 (Monolith Survivors). In order to avoid it, you should make a choice between Duty and Freedom and give both devices to the proper leader in the Stalker base of Jupiter sector (giving one to each won't give you anything, you'll still stay neutral).

18. Anomalous Activity
Received from: Professor Hermann, after the previous scientists' tasks
Beginning location: point 25 on the map
Target location: point 36 on the map
Mission description:
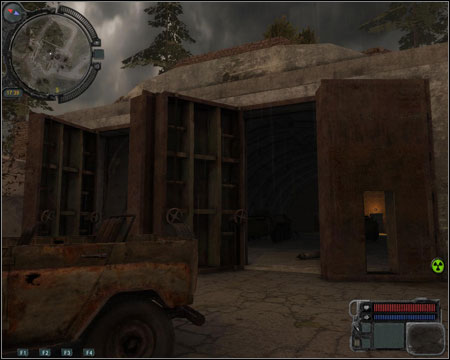
After talking with the professor about another job, he'll ask you to search for documents on the terrain of the factory (point 36). Search for the entrance in the marked spot (on the left side of the screen). Search for the documents on the last floor, on a desk (follow the marker on the minimap). After collecting them, save the game. You will have to return to the professor, but as you try to exit the factory, it will turn out that the soldiers have set a trap for you. You have 7 enemies to eliminate. One of them will have a PDA, which you should show to Hermann.

19. Guarding the Scientists
Received from: Professor Hermann
Beginning location: point 25 on the map
Target location: point 13 on the Zaton map, or points 34 / 35 on the Jupiter map
Mission description:
Ask the scientist about the soldiers guarding the bunker and he'll tell us to find a replacement. If you want to stay neutral - ask the mercenaries (screen) from the Zaton sector (point 13). On the other hand, you can improve your relations with one of the Jupiter fractions - talk with Loki (Freedom) [point 35], or Shulga (Duty) [point 34]. Eventually you can ask Bread and his men, if you haven't killed them during mission 10 of Zaton sector.

20. UAV
Received from: after examining the wreck at the marked spot
Beginning location: point 37 on the map
Target location: point 28 on the map
Mission description:
At the point marked on the map, you will find a plane wreck. Take the memory module out of it. Take it to the scientists' mechanic and ask him to unlock it. It will cost 2 000 and you will have to wait for 2 hours before he completes the work. Now you can sell the module to Owl.

Phase 2
Target location: points 38, 39, 40 on the map
This phase isn't a mission itself, but requires a description. In the previous phase of mission 20 you received the coordinates of three hiding places which you will now visit. Begin from north (point 38). Find the sewer entrance with chemical anomalies at the marshes. One of the gratings is unlocked (screen). At the end of the sewer you will find a chest with a letter.

At point 39 you should find a crooked tree on a hill, growing in the direction of the big "digger". You have to carefully walk it and get to the upper part of the machine. On the right you will find the entrance to the cabin with a chemical anomaly and a backpack by the wall (screen). The next letter is inside.

The last letter, and what's more important - a rifle - is waiting for you at point 40. The order isn't important here, the weapon will just appear at the last of the 3 spots. At the marked spot you will find a structure with chemical anomalies inside (entrance from the north-west side, down the ladder). You have to check the sticking out pipe (screen). You can sell the letters to Owl for a silly amount of money.

21. Monolith Survivors
Received from: Major Degtyarev
Beginning location: point 41 on the map
Target location: points 34, 35 on the map
Mission description:
A group of soldiers (screen) will ask you for help in getting the trust of the Stalkers in the Jupiter base. You have to ask the fraction you you're sticking with (if you're neutral, look at the paragraph below). Afterwards head with your friends to the group of soldiers and watch a scene (screen). After the ceremony, you will find your own armour of the fraction you're friends with in the chest at the lower part of the Stalker base.
Notice - this mission is strictly connected with two missions - 11 (Transaction) from Zaton sector and 17 (Duty History) from Jupiter. In case of trouble, I'd say you should look at their walkthrough.

22. Evacuation locations - B205
Received from: automatically, after completing mission 16 of Zaton sector
Beginning location: point 27 on the Zaton map
Target location: point 44 on the Jupiter map
Mission description:
After reaching the base, you have to get rid of some zombies. At the house located exactly at the marked point, you will find the documents that will end the mission on the table. You can give them to Sokolov (a soldier inside the scientists' bunker - next to point 22).
Phase 2
Before you leave the terrain, it's worth to take a look around the nearby tunnel (screen).
You will have to kill some dogs. On the right there's a door lightened by a bulb above, which will lead you to a room with a sluice and an electric lock (you will be able to open it only after collecting the documents mentioned before). In the newly opened room, destroy the planks on the right side (screen). Go through the shaft and exit through its left side.

There's a Byurer in the big room. As you remember, he will raise his hands from time to time and create a force field - don't attack him then. Go through the next door and go up a ladder. You will reach a room full of weapons.