
Walkthrough - Zaton Quests - Part 1 STALKER: CoP Guide
Last update: 11 May 2016
0. Emission
Received from: random event
Mission description:
After hearing the radio announcement about an incoming emission, you should quickly find a shelter. The nearest hiding place will be automatically marked on your map. It doesn't need to be a building, a cave or a big hole will do just fine. Once you're there, wait for another announcement, this time about the end of the emission. Surviving in an open area, without proper medicine (look - mission 28 [Anomalous Plant] in Jupiter sector) is impossible.

1. Reach Skadovsk
Received from: Kostik Agent
Beginning location: a little to the south of the starting point
Target location: point 1 on the map
Mission description:
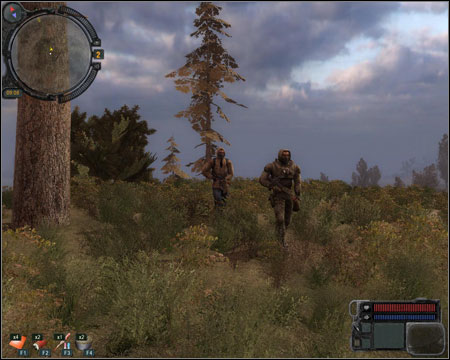
After beginning the adventure, you should meet two wandering Stalkers. Hide your weapon and ask the leader about the nearest camp and he will direct you to the ship wreck at the south. Hide your weapon and enter the ship.
2. Strange Phenomenon
Received from: Bread
Beginning location: point 2 on the map
Target location: point 3 on the map
Mission description:
Bread will order you to check Dredge Station. Head to the marked spot from the south side. With a little luck you'll be able to find some Stalker's body and rob him. Use the detector (screen) to localize the artifact and take it out of the water.

Use the ladder (on the left, near the boxes) to get to the top and further - through the hole (screen) inside. The stairs will lead you up to a radiated helm which has evolved into and artifact. A radiated corridor, parallel to the one through which you got to the stairs, will lead you outside.

There will be three Stalkers waiting for you outside (two of them are hiding at the beginning). You will be "asked" to give away the artifact. If you let him have it, he will take it to Bread and receive the prize. The fight is unavoidable. You can give the artifact away and then follow the Stalker (he'll start running) for a couple of second and kill him away from his buddies with a few god shots to the back. It's up to you if you want to come back and finish them off. Don't forget about collecting the prize.

3. Three Comrades
Received from: Cardan (after giving him 2 vodka bottles)
Beginning location: point 4 on the map
Target location: points 5, 6 on the map
Mission description:
Head to point 5 and find a hole in the ground through which you will fall right into a cave. Take out the detector and head to the marked spot (you should notice a grey dot on the mini-map, showing a nearby body (screen) which you should rob). You should find two more moving artifacts in the caves. You should keep an eye on the frequent anomalies. The corridor behind the Stalker's body will lead you outside.

You will find the skeleton of the second mechanic's friend at point 6, to the south from Oakpine Anomaly (screen). You should be ready for nearby dogs to attack you (finish them off with short series from a machinegun). Take his PDA and mask. From the transmission, you will learn about an artifact on top of the tree anomaly.

Before you go to the top, collect the artifact from the very bottom. Start climbing the tree from the branch going south, first from the left (western). Go up all the time. Eventually the detector should point towards an artifact lying at some branches (screen).

4. Unreachable Stash
Received from: Snag
Beginning location: point 7 on the map
Target location: point 8 on the map
Mission description:
Claw Anomaly hides two artifacts inside itself. One is at the bottom; the second one can be found by climbing the twisted construction. Turn towards west and you should see two corridors (screen). They're connected, but jump (it's worth to save before doing this) to the right one, as the left one has strong anomalies by the entrance. Take out the detector and you'll find the artifact by the exit.

Now you should go and inspect the deeper corridors. To the south-west you will find an entrance placed low enough for you to use it. Take out a weapon (a rifle works well here) and head along the corridor while fighting off the jumping monsters. Reach the car at the green points (screen) and take the box from inside it. Use the corridors heading up by the exit.

Return to the Stalkers headquarters. You can give the box back or show it to the mechanic who will open it for 500 coins. You will cancel the task this time, but will gain a few interesting items (including one artifact). If you finish the mission normally and give back the box, Shag will share its content with you. You can decide which item you want to take and it pretty much should be the artifact. You can choose it together with any other item, apart from the helmet.
5. Helping a Stalker
Received from: Awl
Beginning location: point 9 on the map
Target location: point 9 on the map
Mission description:
You will find two Stalkers by the Boiler Anomaly. After s short cutscene, one of them will fall into trouble and you will be asked to help. Awl will give you a first-aid kit and ask to hand it over to his friend. Before you move on, it's worth the check the inner part of the anomaly, because there are moving artefacts to be found there. Medicine will be needed because of the burns. The Stalker will give you another artifact in the end.

6. Mercenary Camp
Received from: Owl
Beginning location: point 11 on the map
Target location: point 12 on the map
Mission description:
You can get to the mercenaries headquarters through the marshes. If you go there by night (you can, for example, rest till 10 p.m. in the Stalkers base), you can sneak in from the west side, where you will find a sewer entrance by the fundaments. Move high enough to not make a noise and low enough to stay unnoticed. Thanks to it you will get inside without anyone knowing (of course using the flashlight isn't a good idea).

In order to get upstairs, choose the furthest ladder. At this moment the stealth part ends, because the game doesn't allow you to silently kill the enemies in any way. Silenced weapons and a knife won't do any good, the soldiers will notice you anyway. You will have to fight a big group of enemies, so focus on staying behind covers, saving frequently and headshots.

On the 3rd floor, search for a table with a laptop which you should take. Find two standing out soldiers (screen) and take two PDAs from their equipment. Now you can return to your employee and give him back the found items.

7. Take the food to the mercenaries
Received from: After (peacefully) entering the mercenaries' terrain
Beginning location: point 13 on the map
Target location: point 1 on the map
Mission description:
The mercenaries can let you in if only you bring them food. If you don't want to kill them (you should spare them, as they can be used in the later part of the game), you should bring them 6 pieces of: canned food, bread and sausage. You can buy everything from Bear in the Stalker's headquarters. Now you should go to the back of the complex (point marked on the map), where you will find a good set of tools in one of the boxes.
