Theta station | SOMA Game Walkthrough SOMA Guide and Walkthrough
Last update: 27 November 2018
On this page of SOMA Guide you'll find a walkthrough for Theta Station location.
Security Code
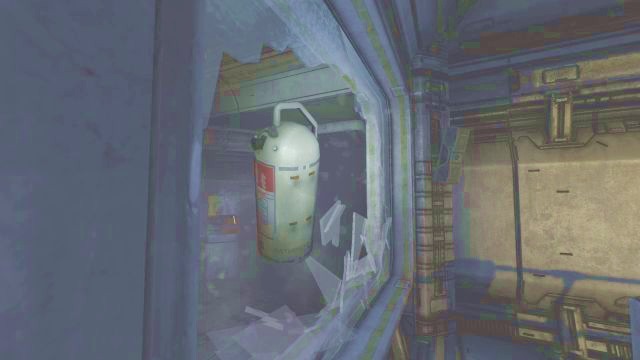
When the gate opens, get inside and look around the area. The doors on the left side of the room can be ignored for now, as those are blocked, so just go to the right, until you reach another pair of doors, or to be more specific, a cracked window. As you've probably guessed, you must smash the window to get inside - grab a nearby fire extinguisher and hit the window a couple of times to do so.

Jump through the new passage and approach the computer on the other side of the room, where there's a socket for the Omnitool. Insert the tool, and after a short while Catherine will turn the power in the area back, opening the doors on the left side of the lobby. Look inside the computer nearby, where you will find a map of the buildings.
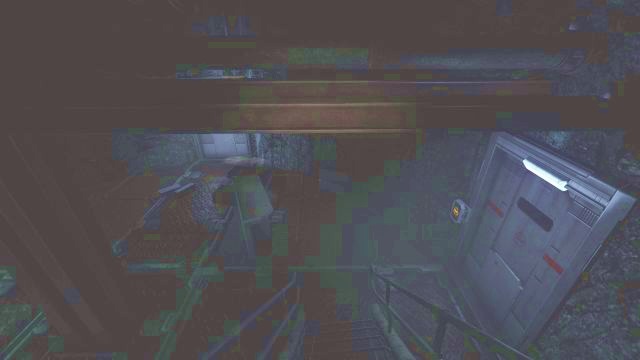
Jump back through the window and get back near the gate, and from there go through the left door. Ignore the "first one" and go to the one located further (a "Server Access" sign is hanging above them). Run across platforms and get to the lowest level, where a three pairs of doors await you. Those located straight ahead of you don't hold any secrets, while the right one are just a dead end, so just pick the left one and enter the room.
On the other side of the pitch-black room there's a router, which must be restarted. There's a catch - an enemy patrolling the area. Fortunately for you, the enemy is blind as a mole, especially because it's so dark in here, but you can't do two things while moving around the area - don't use flashlight and don't sprint. Move while crouched, hiding in the darkness, or behind a cover when the enemy is nearby. Remember to not stand on the monster's path - it will immediately notice you and attack.
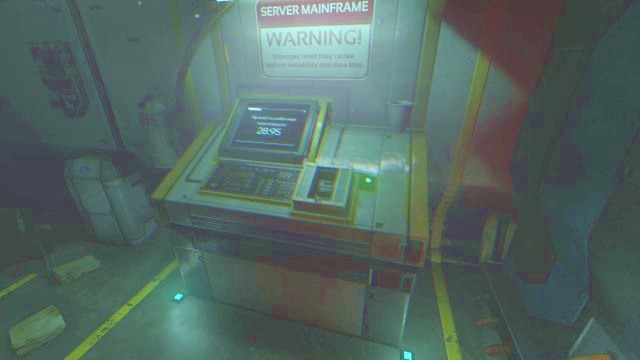
When you reach the console responsible for restarting the equipment, press the yellow button and flip the lever located near it. Afterwards, immediately hide in the shadows, as the enemy will be drawn to your position. Don't move away too far, as you now have about half a minute to flip the lever again. Wait for the enemy to move away, do the activity and hide in the shadows again, as the monster will return to check what is making a noise.

Now you must go back to the very beginning, to the lobby with the enormous gate - and as you've probably guessed it, enter the "first" doors on the left. Go straight ahead until you reach a crossroads - from here take a turn to the right, take off the pneumatic lock of the doors at the end of the tunnel and then enter the room.

Afterwards, go to the right. There's a computer in this room, located on the right side, from which you will learn a couple of things about this place. Ignore the computer on the other side of the room, and the small storeroom connected to it.

Get back to the entrance to the laboratory and head towards the room on opposite side - Catherine will tell you about the place, and how human brains where scanned here. There's a Data Buffer terminal on the wall on the left side of the room. After it ends, ignore the nearby terminal for now (but remember its location) and enter the small room on the opposite side. From the terminal there you will learn about a few things, mainly associated with the main character.

Get back to the previous room of the laboratory and enter the small storeroom. You will find 5 banks filled with memory cards (Memory Chip) - you can spin every single one of them, and your task is to find a working, undamaged one. The proper one differs greatly from the others, so it shouldn't take too long.
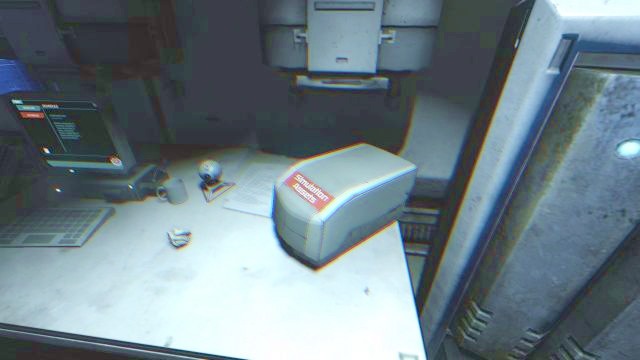
When you collect it, get back to the previous room and approach the desk near the entrance - on the right side of the desk there's a small box, called "Stimulation Assets". Open it up and collect another chip from inside.
Brandon Wan

Afterwards, go with both chips to the other room, with the armchair in the middle of it. Approach the desk located in the corner of the room and place the chip inside the socket lying on the said desk. After you've done it, activate the computer, press OK and wait for the data to be loaded. Select the option "Scan Room" from the list, and then press the "Copy to Chip" button. The rest of the data is either on the chip already, or is damaged, so ignore it. Leave the computer, take the chip off the socket and get back to the previous room.

Approach the second computer in the room and place both chips in the sockets present there. Afterwards, start up the program on the computer and "click through" the alerts on the screen. You now must find a person who knew the security cipher. From the author: I found the code with the help of "Wan, Brandon" character - this guide will focus on choosing this person.

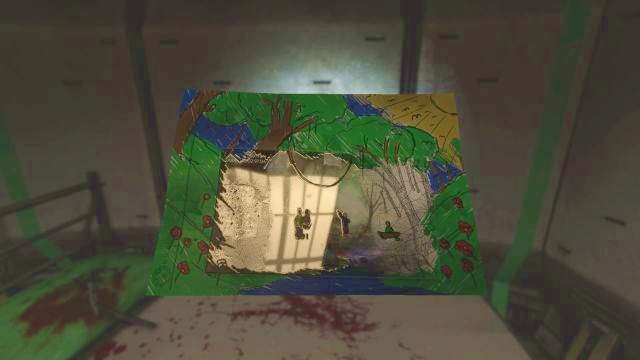
Select the option "WAN, Brandon" and then press the UPLOAD button. After a few seconds a screen to perform the simulation will appear - during it Catherine will try to get the security cipher from the selected person. Pick a couple of sceneries (Environment), and then run the test a few times by pressing the "Run".
You won't be able to get the data from the person, so just leave the laboratory and go back to the crossroads. Afterwards, turn right, to the doors hidden in the dark. Those are living quarters of the people who were living on the station, and where a huge amount of information can be found. Get to the toilet on the left side to see how the main character looks like.

Leave the toilet (and ignore the next one) and go to the passage in front of you. There are over a dozen of doors in the tunnel, all leading to different rooms of various people who lived here. You won't be able to access all of them, but those which are unlocked are certainly worth visiting, as they hold an immense amount of data.

In the "Guy Conrad" room you will find a note lying on the desk, on the left side of the room, and on the opposite side, in the locker on the right, there's a couple of photographs. Additionally, right above the bed there are two additional photos.
Get back to the corridor and enter the room of "Catherine Chun". There's a tablet lying on the desk in front of the entrance, which holds some valuable information, and in the locker, right next to the entrance, there's a plushie - after you pick it up, a conversation between Catherine and Simon will start.
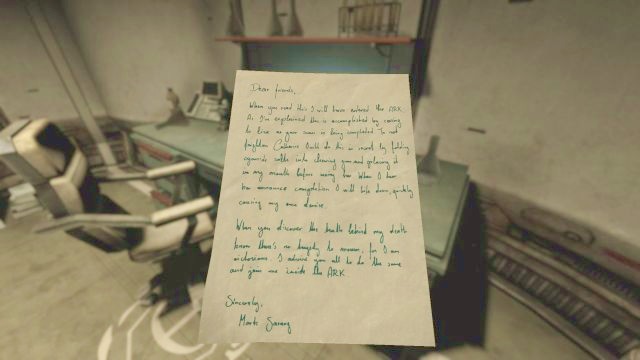
Leave the room and enter the one marked as "Mark Sarang", on the left side of the corridor. There's a note lying on the desk, and in the upper drawer, on the right side, there's an audio recorder. In the upper drawer, this time on the left side of the desk, there's a notepad. A nightstand, located near the bed holds a book, and in the first and second drawer a document and a notepad can be found. Now move around and check the 6 photographs hanging on the map.

Another stop is the room of "Martin Fisher". Here, just straight ahead from the entrance, you will find a familiar growth, which can be interacted in order to restore any lost health (which will this time be commented by Catherine).
Get back to the corridor and enter the room vis-a-vis, with the "Robin Bass" sign on it. Directly in front of the door there's a bed, with two photographs hanging above it, and four more above the desk on the left side of the room. Additionally, there's another photograph, as well as a notepad lying on the desk itself. After you've collected all of that, leave the room and head towards the one marked as "Brandon Wan".

Turn the light on by pressing the switch near the doors, and then start up the Data Buffer, from the terminal located on the right side of the room. Both lockers around the terminal hold a photograph as well. When you're done, turn around by 180 degrees and approach the desk. The drawer on the left side holds a note, in the right one there's an ID card, and on the desk itself, as well as on a shelf hanging above it you will find a photograph. When you're finished, interact with the computer.

Get back to the laboratory and the computer through which you can run the simulation. There will be a new option there - besides selecting the scenery (Environment), you will be able to place the friend of Brandon, Alice, in it. Select her and then run the simulation on the "Beach", "Ski Lodge" and finally in the "Scan Room", to get the security cipher. You now have a choice - you can either delete the data and scans of brains of all of those patients, or just shut down the computer (or do both of them).
Get back to the very beginning, to the room to the right of the gate, where your Omnitool is still connected. Take the tool, leave the room and run down - in the right corner of the room there's another terminal that can be activated with your tool. Approach it, activate it and get inside.

There's no additional content here, so just go straight ahead to the terminal on the right side. It lacks the power, so you must attach the cable lying on the ground to the side of the terminal. When you're done, approach the terminal and turn a few of those taps (doesn't matter which one) to overload the system.

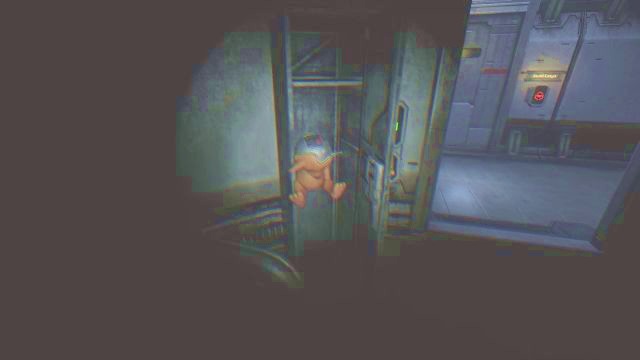
After a short cutscene you will regain control over your character. Go straight ahead from the terminal to the mobile staircase - stand behind them and push them towards the little hatch located above ground. As soon as you do that, run upstairs, open the hatch and enter it. After a few steps you will end up in a ventilation shaft.