Guides & Walkthroughs New Guides Popular RPG Action Strategy Adventure YouTube Guides Mobile App

Sniper Elite 5 Guide, Walkthrough by gamepressure.com

Sniper Elite 5 Guide, Walkthrough

Table of Contents
Sniper Elite 5 - Mission 5
This is the default mission starting area. There are no enemies in the vicinity of the cove. You'll encounter first soldiers after heading north towards main and side mission objectives.
There's a radio communications spot here and you can sabotage it (optional mission objective). There are two ways of doing that - sabotaging 2 cables which are holding up the tower or destroying the radio equipment from the bunker. There's intel here on other locations from the map.
There are 2 tanks on the map - you can avoid them or try to get rid of them. Destroying the tanks can be achieved using panzerfausts, satchel charges (install the charge by the exhausts) or using armor piercing weapons/ammo.
The area around the tower is being patrolled by a tank (orange 3 on the map) and you can avoid it or try to destroy it. You also have to watch out for the enemies from the tower and the jager sniper. There's a panzerfaust at the top of the tower and you can find even more in the buildings to the north and to the west of the tower.
The hospital has 3 entrances - southern, north-western and north-eastern. Exploring it is a main objective, but it may be skipped if you find other clues earlier. There's a document-collectible in the northern part of the hospital containing a clue on the hidden facility (orange 6 on the map). There's intel here on other locations from the map.
You can find out about the facility from the documents in the underground bunker (orange 5 on the map) or in the fortifications (orange 7 on the map). There are two entrances - southern and eastern (watch out for the tank - orange 3 on the map). You'll find a U-boat and you must destroy the Kraken prototype (3 different sabotage options).
There's a small group of enemies here. Exploring the fortifications allows to find the documents and to find out about the hidden facility with the Kraken (orange 6 on the map). This is an alternative to visiting the hospital (orange 5 on the map).
This is a Kill List target. You can complete an optional objective if you kill him by burying him in concrete - sneak up on Baumann, pacify him (don't kill him!) and carry his body to the area where you can throw him towards the concrete.
This battery is still under construction and it's connected to a side objective. You can drop a hanging object to cause a big explosion.
You can reach the battery from the trenches or using the main path. Sabotaging the gun is the main mission objective and there are 3 available options.
There are 2 buildings on the map that may become alternative mission start areas. In both cases you have to climb the vines on the outer wall and unlock the building from the inside.
It's guarded by several enemies. You can find Panzerfausts, Satchel Charge, mines and other loot. All of these items may come in handy to destroy the tanks (orange 3 on the map) and the vehicles to the west of the bunker. Climbing to the roof of the bunker will allow you to attack enemies surrounding the main battery (orange 9 on the map).
The letter is in the inventory of the officer next to the tower - you must eliminate him and search his body.
The collectible is inside the building, on a large table.
The collectible is in the possession of a soldier patrolling the second Mirus battery build site. Eliminate him and check his body.
The collectible is inside the Nazi fortification.
The document is inside a locked hut - use a lockpick or the bolt cutters, crawl and use the ladder.
The document is inside the safe on the upper floor. You can get there by climbing the vines on the exterior wall. Use a Satchel Charge or find the combination on the ground floor.
The collectible is underground, in the Hidden Facility. You must check the room which also contains a safe.
The collectible is in the underground hospital, on a desk in one of the rooms.
The collectible is in the northern part of the hospital and collecting it allows to learn about the Hidden Facility.
The collectible is inside the Nazi fortification.
The item is inside the building next to the Second Mirus Gun construction site.
The artifact is inside the building, on a large table.
The bag is in the bedroom, on the upper floor of the farmhouse.
The eagle is on the roof of the north-western fortification.
The eagle is at the top of the central fortification.
The eagle is at the top of the eastern munitions bunker.
The workbench is in the upper room of the fortification - climb the vines to get there.
The workbench table is inside a locked hut - use a lockpick or the bolt cutters, crawl and use the ladder.
The workbench is in the trenches next to the entrance to the Hidden Facility.
The gnome is on the table near the mission starting area.
The gnome is in the fortifiaction's tower and you must climb the wall.
The gnome is in the garden in the farmhouse.
The gnome is in the shooting range above ground, between the targets.
The gnome is inside of the tents in the enemy camp.
The gnome is in the toilet in the underground hospital, behind a partially opened door.
The gnome is next to one of the windows of the closed hut.
The gnome is on the upper floor of the building used as alternative starting area. You must climb the vines.
The gnome is in one of the dark corners of the trenches in front of the Mirus battery.
The gnome is on the upper floor of the building used as alternative starting area. You must climb the vines.
There are 2 buildings on the map that may become alternative mission start areas. In both cases you have to climb the vines on the outer wall and unlock the building from the inside.
There are 2 tanks on the map - you can avoid them or try to get rid of them. Destroying the tanks can be achieved using panzerfausts, satchel charges (install the charge by the exhausts) or using armor piercing weapons/ammo.
Enlarge this map

Sniper Elite 5: Map of mission 5 (Festung Guernsey) and location description - walkthrough Sniper Elite 5 guide, walkthrough

The island of Guernsey is the setting for mission 5 in Sniper Elite 5. Our guide includes a world atlas map for Festung Guernsey with important locations and finds.

Last update: 14 June 2022

Key points of Sniper Elite 5 - Mission 5

Main locations on the map

Kill List target

Secrets and collectibles

Gnomes (easter-eggs, minor collectibles)

Nazi fortifications adjacent to the English Channel are visited in Sniper Elite 5 mission 5 - Festung Guernsey. On this page of our guide, you will find the map of Guernsey, thanks to which you will be able to reach its important locations more easily and avoid threats (e.g. enemy tanks). In addition, we've marked on the map all 19 secrets and collectibles available in the fifth story mission.

The most important locations on the Guernsey map

You have to pass this point while traveling from the starting point to the northern part of the map - Sniper Elite 5: Map of mission 5 (Festung Guernsey) and location description - walkthrough - Mission 5 - Festung Guernsey - Sniper Elite 5 Guide, Walkthrough
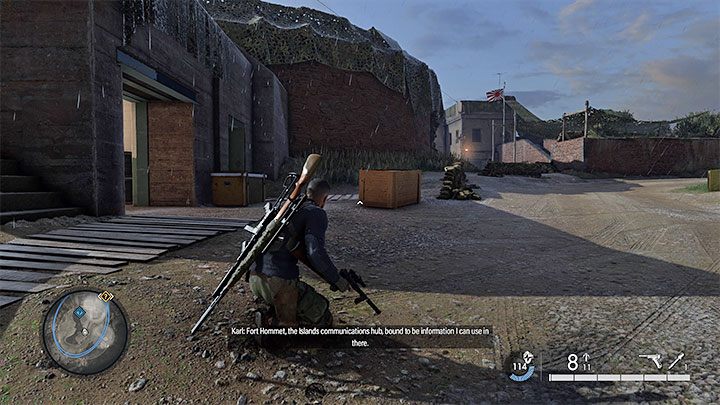
  1. Radio communication point - point 2 on the map

You have to pass this point while traveling from the starting point to the northern part of the map. Sabotaging the enemy communications system is linked to an optional mission objective. In addition, you can find there, among others, panzerfaust and a generator to sabotage - it will allow you to safely shoot from the roof of the building and get rid of many soldiers in the area.

There are two tanks on the map, and the one near one of the entrances to the Hidden Facility may be more problematic as it may interfere with completing the mission - Sniper Elite 5: Map of mission 5 (Festung Guernsey) and location description - walkthrough - Mission 5 - Festung Guernsey - Sniper Elite 5 Guide, Walkthrough
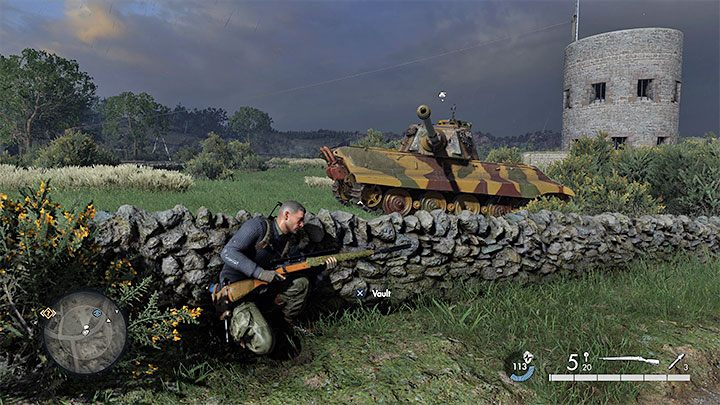
  1. Tanks - 3 points on the map

There are two tanks on the map, and the one near one of the entrances to the Hidden Facility may be more problematic as it may interfere with completing the mission. You can try to avoid or destroy tanks - you can use explosives, TNT, Panzerfausts, or special weapons with armor piercing rounds.

Investigating the Underground Hospital is one of the ways to obtain information on Kraken and find out about the Hidden Facility - Sniper Elite 5: Map of mission 5 (Festung Guernsey) and location description - walkthrough - Mission 5 - Festung Guernsey - Sniper Elite 5 Guide, Walkthrough
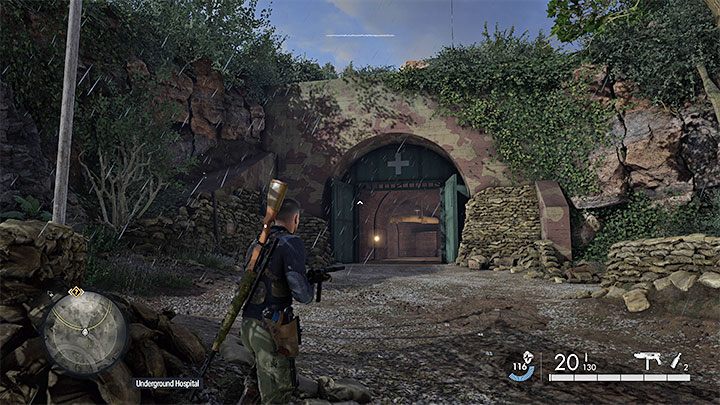
  1. Underground Hospital - point 5 on the map

Investigating the Underground Hospital is one of the ways to obtain information on Kraken and find out about the Hidden Facility. It has 3 entrances (south, north-west, and north-east), and they have a similar level of guard. The most important document is in the northern part of the hospital.

You can find out about it in the northwestern part of the map in the Underground Hospital or fortification south of it - Sniper Elite 5: Map of mission 5 (Festung Guernsey) and location description - walkthrough - Mission 5 - Festung Guernsey - Sniper Elite 5 Guide, Walkthrough
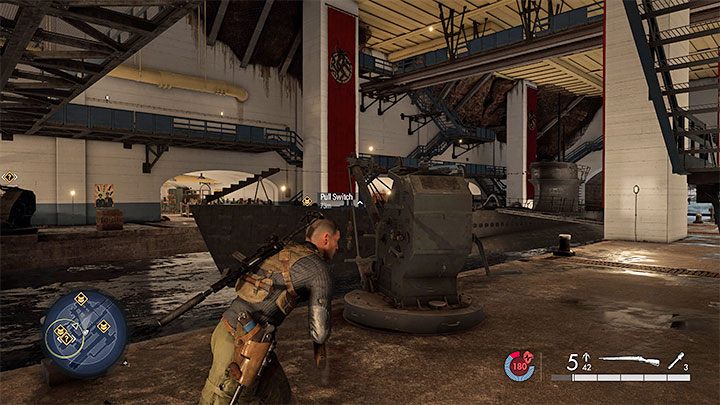
  1. Hidden Facility - point 6 on the map

You can find out about it in the northwestern part of the map in the Underground Hospital or fortification south of it. It has two entrances - the southern one is safe, and the eastern one is guarded by e.g. tank. There is a dock with U-boat in the hidden facility, and you have to destroy this location (you can choose 3 possible ways).

There are two Mirus batteries on the map, but only the one in the northern part of the island is active and linked to the main mission objective - Sniper Elite 5: Map of mission 5 (Festung Guernsey) and location description - walkthrough - Mission 5 - Festung Guernsey - Sniper Elite 5 Guide, Walkthrough
  1. Mirus battery - point 9 on the map

There are two Mirus batteries on the map, but only the one in the northern part of the island is active and linked to the main mission objective. On your way there, you can hide in the trenches or eliminate enemies from a nearby bunker. There are 3 variants of destroying the gun, and you can choose any.

Mission 5 – general information

In the fifth mission of Sniper Elite 5, you visit Guernsey island with German fortifications - Sniper Elite 5: Map of mission 5 (Festung Guernsey) and location description - walkthrough - Mission 5 - Festung Guernsey - Sniper Elite 5 Guide, Walkthrough

In the fifth mission of Sniper Elite 5, you visit Guernsey island with German fortifications. This level has vast open spaces, but while you play it, you will also visit two larger underground locations related to the main mission objectives: a hospital and a hidden facility. It is worth exploring these locations because each has several noteworthy rooms.

A serious threat while exploring the island is 2 enemy tanks, which can easily pinpoint and attack the hero. You can avoid tanks or try to destroy them. An example of a technique to eliminate an enemy tank is described on the Finding Stealth Plates page in our walkthrough because one of the tanks is stationed near the main mission objective.

The default starting point for the mission is the southern end of the map, but you can unlock 2 farms in the eastern part of the island as alternative starting locations. They can make it easier for you to complete mission objectives when repeating a stage. Mission 5 has various main and side quests. We discussed them on the following pages:

  1. Finding Stealth Plates - this is one of the main objectives of the mission. You have to search 2 locations on the map - Underground Hospital and Hidden Facility.
  2. Destroying the Kraken's prototype - this is the next main objective of the mission to complete after reaching the hidden facility. Your task is to destroy the U-boat, and we've described 3 variants for completing this task.
  3. Neutralizing the Mirus Battery - this is the last of the three main objectives of the mission. The Battery in the northern part of the island can be neutralized in 3 ways, and our walkthrough describes them all.
  4. Side quests - in the fifth mission of the campaign, you have 2 optional quests to complete. They are related to neutralizing radio communications and stopping the construction of the second Mirus gun.
  5. Lanzo Baumann - is one of the Kill List Targets, and there is an optional challenge related to him. Our walkthrough describes how to get rid of Baumann by burying him in concrete at the construction site.

Mission 5 has 19 secrets and collectibles . There are 3 workbenches, as well as various artifacts or letters. We have marked their locations on the map. Additionally, you can find gnomes - easter eggs associated with one of the medals.

See/Add Comments

You are not permitted to copy any image, text or info from this page.

This site is not associated with and/or endorsed by the Rebellion or Rebellion. All logos and images are copyrighted by their respective owners.

Copyright © 2000 - 2024 GRY-Online S.A. for gamepressure.com, unofficial game guides, walkthroughs, secrets, game tips, maps & strategies for top games.