Senpou Temple | Sekiro Shadows Die Twice Walkthrough Sekiro guide, walkthrough
Last update: 03 April 2019
This page in our guide to Sekiro: Shadows Die Twice focuses on Senpou Temple region. This is one of the most important locations in the game. Thanks to our walkthrough you will learn how to reach Senpou Temple and read about its most important areas. Many of them are inhabited by bosses and other challenging enemies.
- How to reach Senpou Temple?
- Reaching Shugendo
- The merchant in Senpou Temple
- The left climbing path (optional)
- The right climbing path (main storyline)
- Boss: Armored Warrior
- Exploring the Temple
- Mini-boss: Long-arm Centipede Sen'un
- Reaching the main chamber
- Getting Temple Arts Esoteric Text
- Moving to Halls of Illusion
- Bosses: Folding Screen Monkeys
- Meeting with Divine Child of Rejuvenation
- Additional activities at the Senpou Temple
How to reach Senpou Temple?

The passage to Senpou Temple is well-hidden. However, you shouldn't have problems with reaching that region - the majority of the enemies encountered on your way can be avoided.
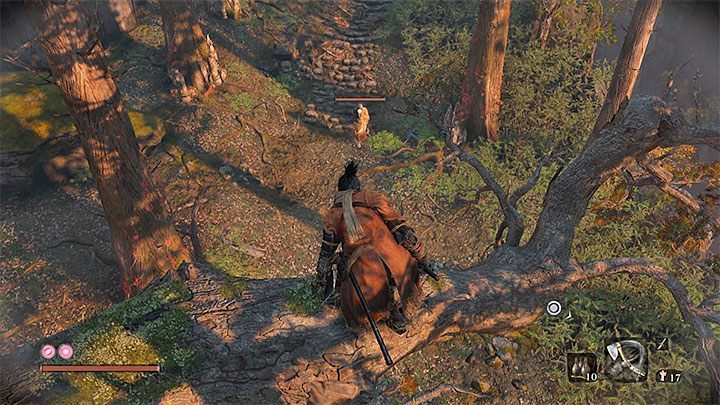
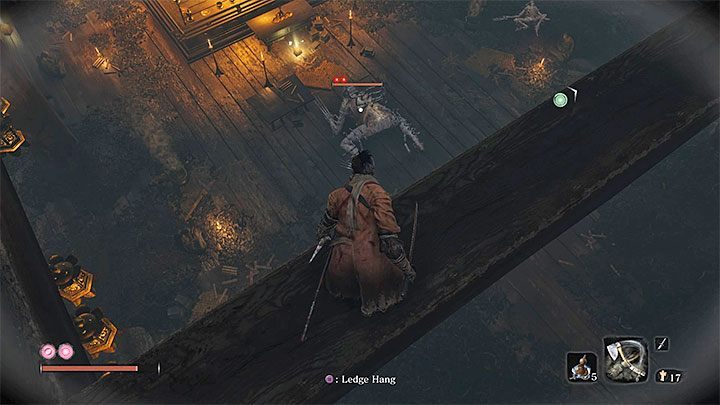
The earliest moment when you can visit Senpou Temple is after you reach Ashina Castle. Start at the first Sculptor's Idol in the Castle - the one called Ashina Castle. This is the camp near the large set of stairs leading towards the Castle's gate. Go back to the draw bridge and then go left (see the picture above). Use the grappling hook to reach the ledge.

Cross the larger bridge and ignore the enemies. Use the grappling hook on the hook point above and then jump down on the yard - the one with wolves and a giant enemy carrying a bell. You can ignore them, too.
Follow the linear path - it will lead you to the entrance to Abandoned Dungeon (see the picture above).

You can ignore all enemies in this location. Keep moving straight. When you reach the caves, jump into the water and start swimming. Don't waste your time fighting with enemies.
The lift, presented in the picture above, is your destination. Interact with the mechanism to move it down. Enter the lift and press the interaction button to go up. The first Sculptor's Idol for Senpou Temple is at the top. Leave the building to receive confirmation about reaching this region.
Reaching Shugendo
Your most important goal during your first visit to Senpou Temple is to reach Shugendo Sculptor's Idol. On your way, you will come across a few NPCs and locations related to additional activities. Sadly, you aren't able to do them yet. The optional activities are described at the bottom of the page.
You have to go through a forest full of monks. Try to eliminate single enemies. Be cautious during fights with groups of enemies. Monks are great at close-quarter combat - they can deal you massive damage. Remember, you can use the grappling hook on many trees in this forest. This is a great way to eliminate monks without alarming them - Wolf will jump down on them. Each monk is worth about 90 XP. These enemies are great for leveling up.
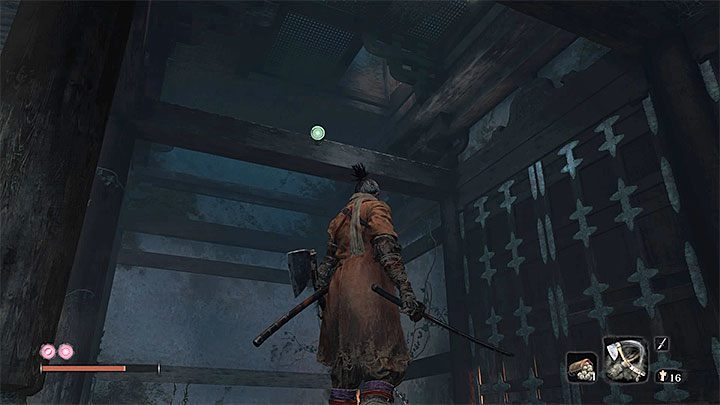
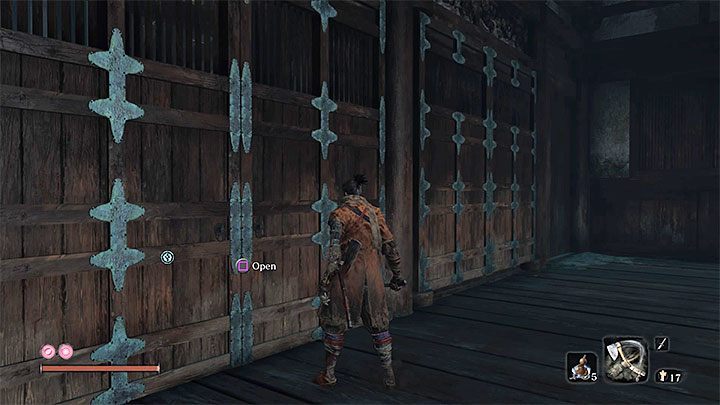
You need to reach the large locked building. You can do that by using the trap door in the ceiling (see the picture above). Get there by using the grappling hook.
There are a few insects inside the building (they give you a small amount of XP). Besides them, you will also face more monks. Deal with the "immortal" and infected monk sitting on the floor. The container standing in front of him contains a Gourd Seed.
The exit is on the left. Watch out for the two enemies equipped with a scythe - they are in the next location. You can recognize them by the large bamboo hats. They are difficult to defeat in a regular fight - these enemies deal a lot of damage, have a lot of health, and can use various attacks (e.g. "rotating" attacks that are difficult to block). The best way to eliminate these enemies is to perform stealth kills on them. You can also escape them or lure out and hunt them down once they lose your track.
The bridge guarded by the enemies is damaged. However, you can grab the left handle near the cave's entrance (see the picture above). You can do that even before you eliminate the enemies. Walk a few steps forward and you will reach Shugendo Sculptor's Idol.
The merchant in Senpou Temple
Look around Shugendo Sculptor's Idol. You can follow the narrow passage near the chasm (see the picture). Jump over its destroyed part. You reach Shugendo Memorial Mob. This merchant can sell you, e.g. Dragon's Blood Droplet (neutralizes Dragonrot), Five-color rice (marks locations you have already visit), pouches or crafting materials.
The left climbing path (optional)
The first larger fork is right after you pass the Sculptor's Idol by. You can choose from two mountain paths. The one on the left is optional. However, it leads to a unique location with a small quest item.
Keep moving left. The main character will encounter numerous short enemies. Don't underestimate them - they can deal a lot of damage and push you down from the ledges. Your goal is to reach the hook point presented in the picture. The only way to grab it is to sprint and then jump. You also have to press the interaction button to catch the interactive ledge while your character is still in the air.

Continue climbing. Soon, you will reach a ledge with White Pinwheel - you will need this quest item later. You need to reach the small building located on the hill, near the chasm (see the picture above). Watch out for the monster with blades instead of hands inside the building. In the Bell Demon's Temple you can find:
- Bell Demon's Temple Sculptor's Idol.
- Monkey Booze.
- A secret passage leading to the lair of Headless, one of the bosses - hug the wall and interact with the rotating wall.
- Large bell. Ring the bell to inflict a temporal curse on the hero - more information on Is it worth to ring the great bell? page.
When you are done, go back to Shugendo Sculptor's Idol and choose the path on the right.
The right climbing path (main storyline)
Keep moving to the right. Watch out for short enemies - they deal a lot of damage and can push you into the chasm. At least one of them is standing on the boards near the chasm - this enemy will try to stop you from moving forward. You can jump over him to avoid fighting.
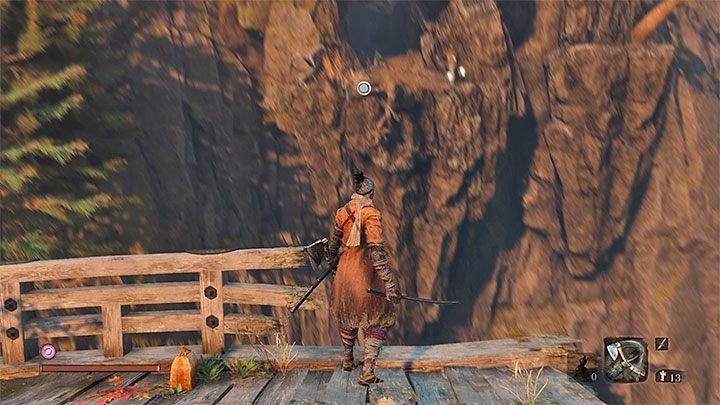
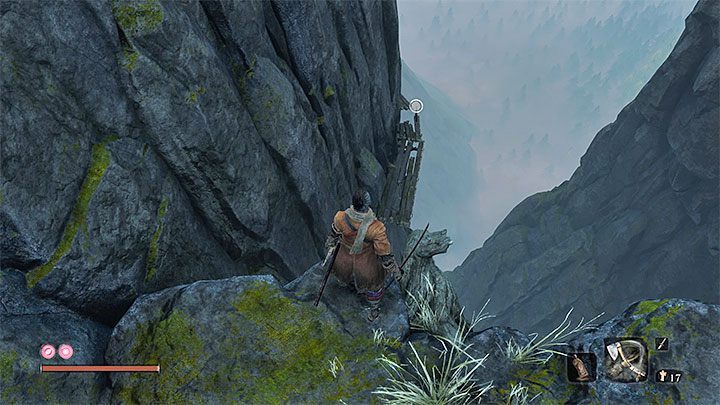
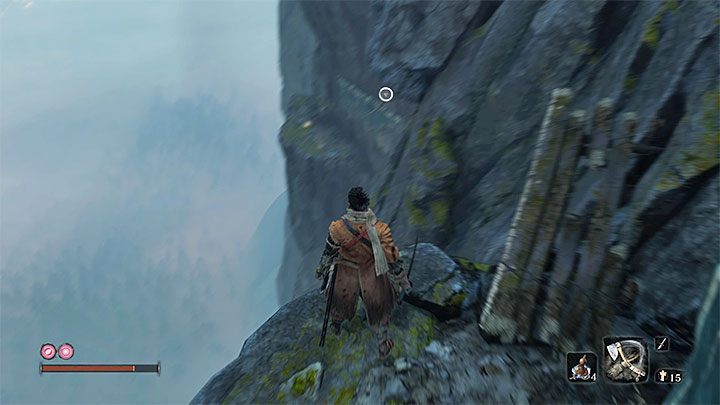
Soon, you will reach vertical walls with interactive ledges. Move from one ledge to another. The last part requires you to grab the tree protruding from the rocks and then use the grappling hook on the interactive point on one of the ledges located above. Red and White Pinwheel, one of the quest items, is nearby. It grows next to the small red tree close to the chasm.
Boss: Armored Warrior

You reach a large bridge - time for another boss fight. Defeat the Armored Warrior to continue the main storyline. This is an unusual enemy - the boss is immortal. Focus on depleting Armored Warrior's posture bar. You can do that by attacking the boss or performing perfect deflections and using Mikiri Counter.
The boss will keep destroying the elements of the bridge - this is a good thing. The only way to defeat the boss is to push him off of the bridge. When you perform a Deathblow, the enemy must stand near the balcony or the destroyed part of the bridge. If you fail to push the boss off the bridge, the Armored Warrior will regain a part of his posture. Defeat the boss to receive a Prayer Bead and Breath of Nature: Shadow ability. This skill allows you to regain posture when you are performing a Deathblow. The full strategy for the fight with the Armored Warrior is in the Bosses chapter.
Exploring the Temple
Leave the bridge and go to Temple Grounds Sculptor's Idol. This exploration will take you a while. During it, you will examine the area carefully, find loot and new enemies. This region has multiple "floors" - look for hook points and don't be afraid to jump down.
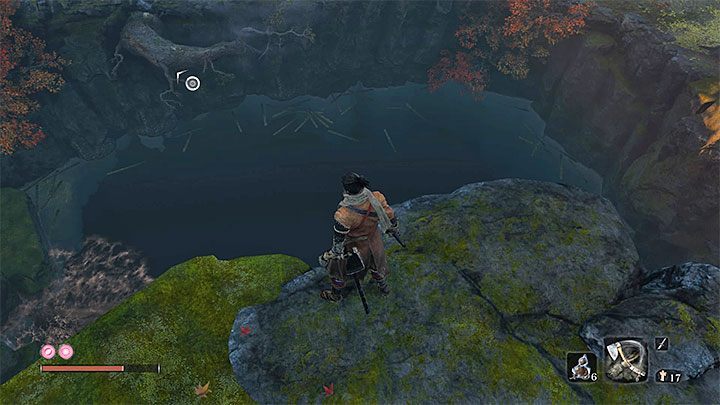
In this part of Senpou Temple, you will find, e.g. the small water body presented in the picture. The only enemies you can kill during your first visit to this place are two carps - they drop 2 Treasure Carp Scales. Go back here after you learn how to dive (you can get this skill in Ashina Depths). The container hidden in the water has a Prayer Bead.

Besides more monks and "rats", you will face:
- Single large enemies - Try to perform a Deathblow on them after using a stealth attack. One of the enemies carries a large shield (see the picture above) - you can destroy it with the Loaded Axe.
- Monks throwing bombs - Try to reach them as fast as you can. Eliminate them first.
- Wolves, monkeys, and lizards - all of these beasts are easy to kill.
- New immortal enemies - It is best to ignore them. However, they can guard valuable loot.
Mini-boss: Long-arm Centipede Sen'un
This path leading downwards is on the right side of the path leading to the Temple's main buildings. There, you will encounter a large pack of wolves and a few lizards. You reach a single building. Inside, you will find enemies with blades instead of hands. Watch out for their fire traps - jump over them. Kill the monsters that are close to you and then catch the beams located above. Move to the main room (you can also get there by jumping down through the opening in the rooftop).
Inside, you will face a mini-boss called Long-arm Centipede Sen'un. Jump down on the enemy to perform the first Deathblow. The beast attacks with a series of rapid attacks - try to deflect them all. Luckily, the enemy doesn't have a lot of health. You can make him vulnerable by using Shinobi Firecracker. This mini-boss drops a crafting material and a Prayer Bead. This room also has a few containers with loot. The full strategy for this fight can be found in the Bosses chapter.
Reaching the main chamber

Your goal is to reach the largest building in the Temple - you can see it in the distance. You can get there by following two paths. You can follow the main path leading towards the hill. All enemies encountered here can be attacked or avoided. The alternate way starts near the aforementioned small water body - this place is presented in the picture above. Climb up by using the grappling hook and grabbing interactive ledges.
The area near the Temple's main building is roamed not only by a few monks but also by three new enemies equipped with scythes. The best solution is to run away - fighting them is too risky.
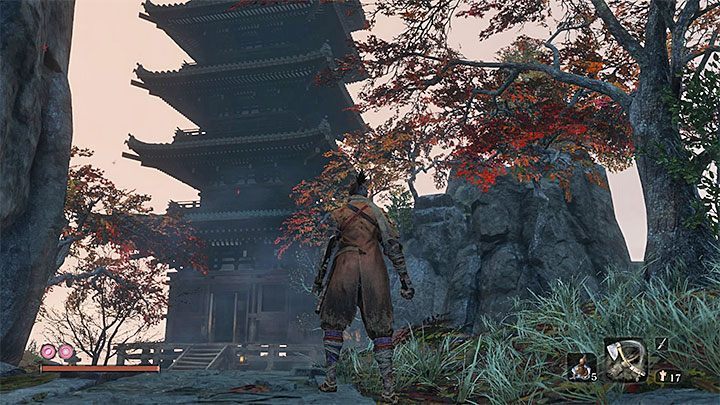
You can get inside the building by opening the large gate (the picture above). Inside, you will find more "indestructible" and infected enemies. You also encounter a single monk - speak with him. He gives you Holy Chapter: Infested text. Memorize the location of this place - you will go back here at the later section of the game ("Moving to Halls of Illusion" section).
Search the entire building carefully - look for containers with loot and Main Hall Sculptor's Idol.
Getting Temple Arts Esoteric Text
Finding this text is optional. However, we don't recommend skipping it - this esoteric text is easy to find.
The entrance to the caves is near the Temple's main building. Once you reach the caves, watch out for a single monk and crawling monsters (they can set the ground on fire). There are two paths in the caves - they have the same exit. You can reach it by using the grappling hook on the upper hook point. You have to reach the multi-story building (see the picture above). Temple Arts Esoteric Text is behind the door at the bottom floor.
These are all the main locations you can explore during your first visit to Senpou Temple. However, this doesn't mean that you have to stop exploring this place. After making enough progress in the main storyline, you will unlock new attractions in Senpou Temple. We have described them below.
Moving to Halls of Illusion

Halls of Illusion are a unique additional location that can only be accessed from Senpou Temple (there are no Sculptor's Idols in Halls of Illusion). You can enter that location later in the game.
Below you can find the most important steps you need to finish in order to reach Halls of Illusion. This also means that you will be able to face Folding Screen Monkeys.
- Defeat Genichiro Ashina on the rooftop of Ashina Castle.
- Meet Kuro in his chamber in the Castle.
- Meet with Isshin Ashina in one of the Castle's upper buildings and learn about the Mortal Blade.
- Speak to Kuro again. This time, talk about the Mortal Blade.
Once you complete these requirements, go back to the Main Hall Sculptor's Idol. Interact with the bell standing on the altar - see the picture above. Watch a short cut-scene. After that, Wolf will appear in the Halls of Illusion. The folding screens in front of Wolf inform you that you have to track down and kill four monkeys - purple, orange, green, and invisible.
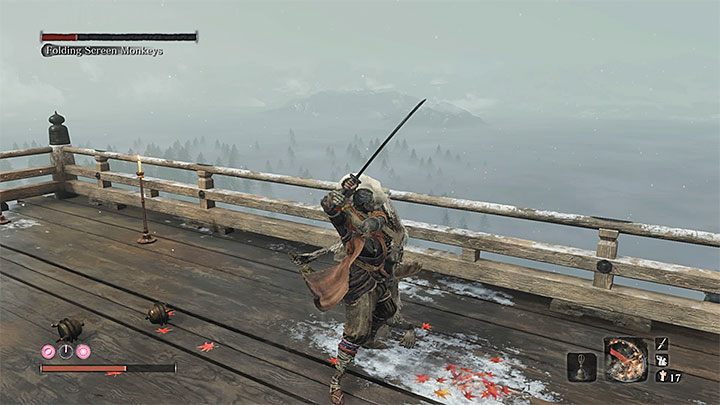
Bosses: Folding Screen Monkeys

This topic has been broadly discussed on How to find and kill Folding Screen Monkeys? page. Below you can find the most important information on how to catch each of the Folding Screen Monkeys.
The green monkey has exceptional hearing. Use the grappling hook on the large tree in the center. The monkey will start running away. Reach the bell presented in the picture and interact with it. The bell's sound will stun the monkey for a brief moment. Reach the small ledge right above the bell (the place where the monkey has escaped to). Perform a Deathblow on the monkey.
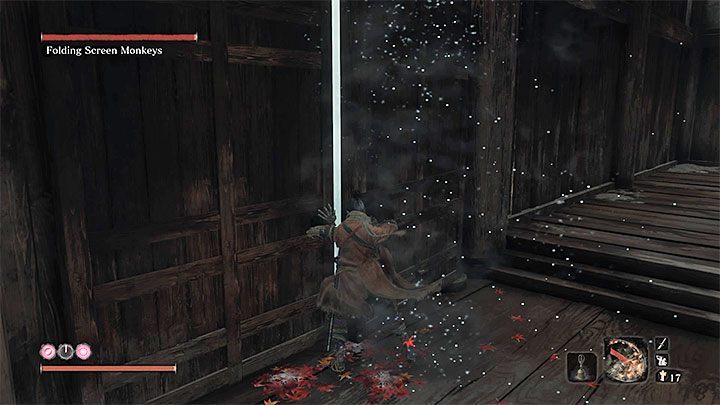
The purple monkey has fantastic eyesight. Find the large side room where you can open the door presented in the picture above. The wind will put out the lights - the room is now covered in darkness.
Scare the monkey by letting any of them see you. The purple monkey will run to the dark room. It can't see you here - approach it and perform a Deathblow.
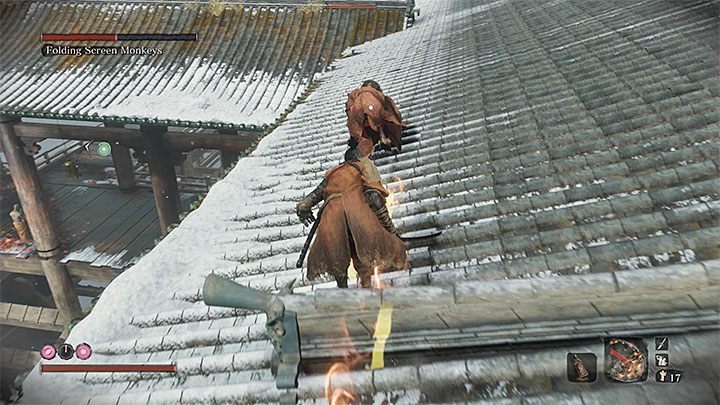
The orange monkey can alarm others with its scream. You can kill this monkey in a simple way. It moves on the rooftops leaving tracks of fire. Find it and start sneaking. Get close to the monkey and perform a Deathblow on it. This monkey doesn't have heightened senses - you shouldn't have problems with sneaking up on it.
The invisible monkey is the easiest to kill. Place the Illusive Hall Bell on the quick items bar. Activate it to teleport to the starting location. Turn 180 degrees and swing your katana a few times. The monkey is hiding right behind you.
Defeat the four monkeys to receive a trophy/achievement, Memory: Screen Monkeys (increases attack), and Puppeteer Ninjutsu.
Meeting with Divine Child of Rejuvenation

After you kill all the monkeys, the game will automatically take the hero to a new place in the Senpou Temple - Inner Sanctum. You can go to a large building where the hero is going to meet meeting with the Divine Child of Rejuvenation. NPC will give the hero a very important quest item - the Mortal Blade. Obtaining this weapon allows for (automated) killing of some immortal enemies, and also opens up a powerful martial art Mortal Draw, which is useful in reducing health and posture of many bosses and strong enemies.
You can additionally ask Divine Child of Rejuvenation for Rice. It's a new kind of medicine. After consuming rice you can always return to Inner Sanctum for another free serving of rice.
You will meet with the Divine Child in the next stages of the game. Next to the Inner Sanctuary is also a pillar of light that allows you to return to the Halls of illusion.
Additional activities at the Senpou Temple
Kite and Great Serpent

The most important optional activity is related to the use of a kite, and it concerns the achievement of reaching the lair of a Great Serpent. Before you take interest in this issue, make sure that you have met with a Great Serpent in the Sunken Valley - the information concerning this can be found on the page of this location, in our guide.
The hero will need the Puppeteer Ninjutsu ability, which was obtained by defeating the Folding Screen Monkeys. Go to the character menu, select the ninjutsu techniques and set the Puppeteer Ninjutsu as an active ability. Also, make sure you have at least 5 Spirit Emblems, because that's the number of these items you need to activate your ninjutsu puppeteer skills.

Start with the first sculptor idol in Senpou Temple - Senpou Temple, Mt. Kongo. When you exit the building, slightly turn right and jump to the lower shelves. Make your way to one opponent from the above image, which is the "operator" of the kite.
Make a deadly stab in the back of the "halfling" and immediately press the attack button (default R1 / RB) to activate the ninjutsu puppeteer skill. The enemy will be "tamed". He will become a temporary ally of the hero. He must approach the coil and use it to move the kite to another place.

Now you need to go to the further areas of the Senpou Temple, specifically to the area called Shugendo.
If you have correctly completed the previous steps, then the kite should be in this area. You just need to approach the kite. Turn left and hold on to more hooks. Climb a large rock, go to the edge of the abyss and look at the kite (image above). Use your grappling hook on the kite and let the hero make a very long jump to a new part of the map.
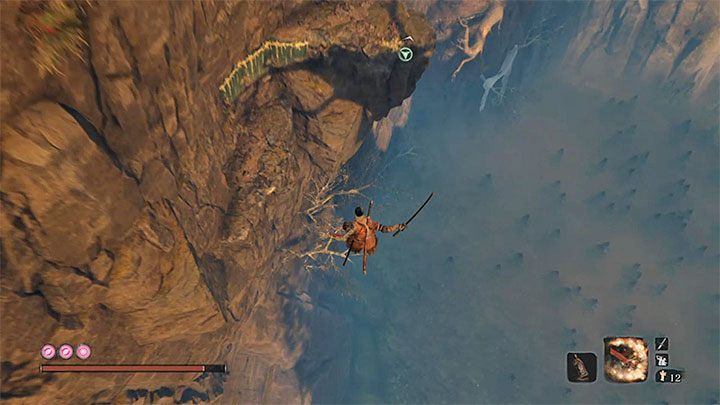
The recently opened part of the Senpou Temple has many new containers to open. Perform a jump in the direction of the lower shelves and use grappling hook in flight (as soon as the green icon appears - an example is shown in the picture). In the same way, keep attaching until the hero lands on a harder surface.
Soon you will get to the new sculptor idol - Sunken Valley Cavern (as part of an exception, it is displayed in the camp menu in the list of idols of the Senpou Temple). Continue the journey to get out of the cave.

As soon as you find yourself in the open air, you will notice that Great Serpent is resting under you. Get on the beam that protrudes from the rock and go to its end.
Make a jump towards the snake and press the fatal blow button on the fly. After the hero will hit the monster with the first blow, get ready to strike again a fatal blow. This action will lead to the ultimate defeat of the Great Serpent. As a reward you will receive a quest item Fresh Serpent Viscera.
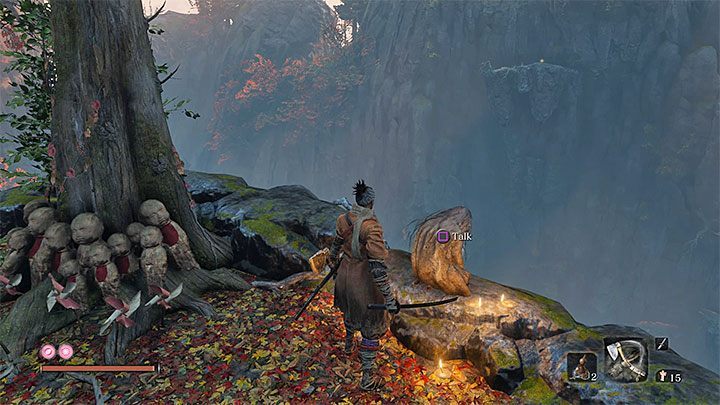
Monk Kotaro

The monk Kotaro could be met soon after your first exploration of the temple. Return to the sculptor idol Senpou Temple - Mt. Kongo. After leaving the building, turn right. Kotaro resides near a tree and during a conversation you can ask him why he is crying.
You have to bring Kotaro the White Pinwheel flower. Go back to the Shugendo camp and choose the left climbing route. You will encounter the flower during a trip to a small temple with a bell.

The second request of Kotaro concerns his ascension - Spirit Me Away. This is a very obscure request and requires the use of prosthetic tool called Divine Abduction - information about the circumstances of the acquisition of this gadget you will find in the Prosthetic Tools section in our guide (crafting materials can be obtained from the boss in Sunken Valley).
Set Divine Abduction as one of three active tools. Come near Kotaro and use the tool on him, so he gets successfully sent (as shown in the picture).

Now you can return to the Inner Sanctum and go through the pillar of light to find yourself again in the Halls of Illusion, where you previously killed monkeys. Kotaro will sit on the left and he gives youTaro persimmon. This item significantly improves the speed of hero's posture regeneration rate, and it is valid only for a certain period of time.
Old lady
The old woman can be found on the way to the sculptor idol Shugendo, passing through the first large building with monks. It's around the area where the flying the kite is going to travel. You can give the woman some rice that you've received from Divine Child. As a reward, she will share with the hero how to get to the other side of the abyss. This knowledge is useless if you took the advice from our guide and already reached the lair of the Great Serpent.