Return to Monkey Island: Terror Island Golden Key - walkthrough Return to Monkey Island walkthrough
You can find the golden key of Terror Island in part 4 in Return to Monkey Island. Our walkthrough tells you how to go through the labyrinth on Terror Island and how to reach the cave with Herman and the key.
Last update: 29 September 2022
The fourth chapter of Return to Monkey Island involves visiting different islands of the archipelago in search for Golden Keys. This time, we show the way of obtaining Terror Island Golden Key - during the task, you'll face a puzzle involving finding a correct passage through a maze. We also offer tips how to navigate Terror Island and show how to get the Golden Key from Herman.
Exploring Terror Island

Terror Island is the name of an inhospitable island of the archipelago and one of the Golden Keys has been hidden there. You can visit the location as soon as you unlock the option to freely travel to different islands of the archipelago.

After reaching the island, follow the path to the exit - using it will trigger the Terror Island map for the first time. Select the Mysterious Clearing location from the map.
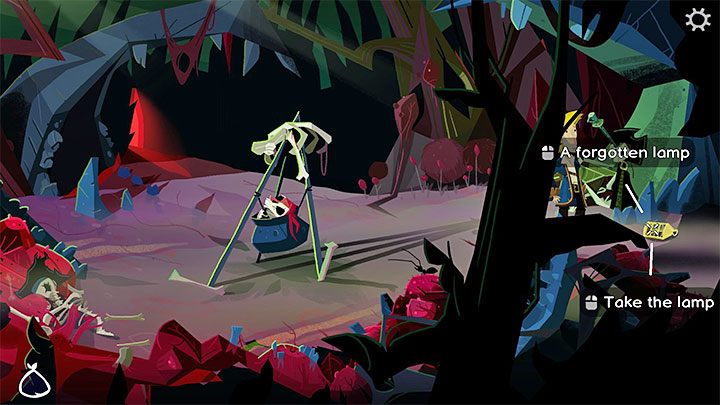
Go right and you will find a Lamp . It doesn't light up, but we'll get to that later.

Another available location is the Unlucky Place .

In the area, you'll find a Silver Key .

Reload the island map and this time travel to Twisting Path.

Follow the titular twisted path right - its next fragments will be revealed. You will reach the mysterious XYZZY Sign . You have to use the knife on the sign - it will be added to your inventory.
This action will uncover a keyhole - use the recently acquired silver key on it.

After entering the cave, you will determine that it is very dark - you need to get a light source .
Go back to the island map and then to the archipelago map. LeChuck's Ship has appeared on the world map - choose to travel to it. You will not encounter hostile pirates on the ship and you can immediately enter the upper deck. Go to the right and you will find a few burning torches. Use the Lamp on one of the torches .

Go back to the dark location. Thanks to the lit lamp, you can go further right and safely avoid chasms.
Reach the warning sign. You will learn that you are about to enter the labyrinth .
Maze puzzle

This puzzle is divided into 3 main parts:
In the first part, your task is to find 5 Curious Notes . They will appear on the ground as you explore the maze (you can choose any path you like).

In the second part you have to return to the place where you started exploring the maze . This may cause some problems. To return to the starting point easily, use the XYZZY sign from your inventory.

In the third part , you need to use the notes to deduct the correct passage through the maze . It is worth remembering here that the solution to the puzzle is random with each playthrough and, similarly to the previous puzzles, we cannot supply you with a ready-made solution - here are some ground rules:
- Look at the notes in your inventory - all 5 of them should appear on the screen.
- From the content of each note, you must read the season and the symbol .
The solution to the puzzle is to choose passages related to the seasons of the year :
- Find the card in which Spring appears in the text - this is point 1 in the example from our picture. Read its symbol and choose the correct passage.
- Find a card with Summer in the text (point 2 here). Choose this passage.
- Find the Autumn card in the text (point 3 here). Choose this passage.
- Find a card with Winter in the text (point 4 here). Choose this passage.
- Find the note with Spring coming once again in the text (point 5 here). Choose this passage.

If you chose passages 1 to 5 correctly, you will find a new location with a warning on the wall and a water reservoir . Jump into the water.

Guybrush's lamp will go out and you must get out of the water before Guybrush drowns. Open your inventory and use the XYZZY sign a second time .

You have to get a better light source for the lamp . To do this, leave Terror Island and return to LeChuck's ship . Walk right over the main deck and climb onto the crow's nest .

At the top you will find a sleeping Flambe. You have to use the lamp on Flambe's Head . The lamp will turn orange.

Return back to the Twisting Path. Enter the cave. Guybrush will automatically go through the maze - you don't have to solve the puzzle a second time.
Jump into the water - this time the lamp will not go out . Go right to reach a new pathway.
Acquire the Terror Island Golden Key

Read the new sign - Guybrush will fall into the cave where Herman Toothrot is staying . You can optionally select all available dialogue options or take a look around the new area right away.

The Golden Key is on the left . Try to pick it up. Continue with the dialogue - ultimately you will need to resort to collecting the key by force .

In the course of the cut-scene, the lamp will break and darkness ensues. Use the XYZZY sign from the inventory again to get out of the dark cave. You can now leave Terror Island, as you have the golden key.