Isle of Demons part 1 | Main missions | NiOh NiOh Guide
Last update: 04 November 2019
This section of NiOh game guide includes the first part of a thorough walkthrough description of the Isle of Demons main quest, which involves exploration of the beach and the cemetery. There, you will fight Yoki for the first time.
Beach

The beginning of the mission will greet you with this view. First, pick up the item that lies directly before you. The found weapon differs, based on the type of weapon you've chosen between the missions. Then, proceed to the Shrine seen on the screenshot above.

After the prayer, you can notice that the Shrine offers new options - get familiar with them. Before you proceed further, visit the left side of the beach and canvass the area to gather the items. You can also notice an incomplete ladder, used as a shortcut - we'll unlock it in the nearest future. Before you begin to explore the right side of the beach, return to the Shrine and save your progress.

The right side of the beach will lead you to your objective. Gather items found along the way and proceed to the building from the screenshot. The building is guarded by a single samurai, allowing you to test some of the skills you've learned in the first level. Once you eliminate the enemy, search his body, and destroy all destructible elements found around the area, such as chests or barrels. Some of them contain additional items which may prove to be useful.

Before you visit the upper parts of the level, explore the last part of the beach. Defeat the samurai and gather the remaining items. You've probably noticed the red sword (visible on the screenshot). If you interact with it, an enemy ghost will appear. If you manage to defeat him, you'll receive additional items, as well as glory points. The sword itself is connected to Isuke the Brick. More on summoning points can be found in the separate chapter of the guide. Regardless of whether you've fought the spirit or not, you have to proceed further.

You'll notice another building once you enter a small gorge. The area is guarded by two enemies. Lure the one who is closer to you, but make sure you're headed in the direction where you've came from - thanks to this move, the second enemy will stay at his post. Eliminate both of them and search the house and its vicinity. There are additional items behind the building, while one of the rooms is a home to a Kodama spirit. Interact with it to ask him to join your Shrine.

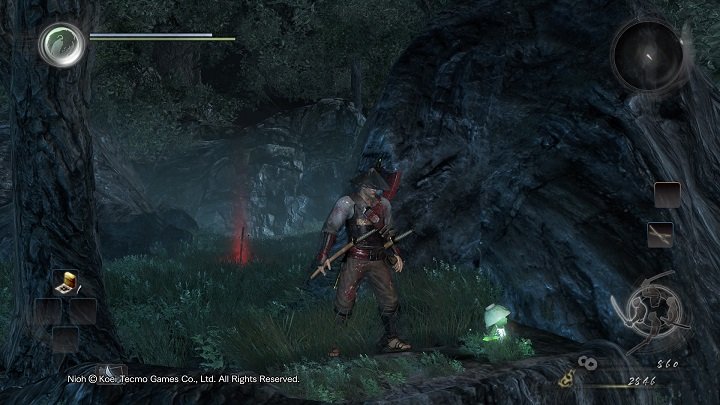
Once you've completed your search, proceed deeper into the gorge. Eliminate the samurai armed with a spear. You should be standing in the location shown on the screenshot. Eliminate the enemy[1] and search the body which he had guarded - you'll loot your second melee weapon. Equip it, and proceed to the cemetery[2]. The sword[3] is a waypoint to a different area, which can be ignored for now, as it's inhabited by enemies that may prove to be too strong.
Cemetery
Once you enter the cemetery, pick-up the items lying around and proceed to the upper level. You should encounter a samurai with a torch - lure him to you. However, be wary, as a second enemy may jump onto the scene. Try to eliminate the first one as quickly as possible. Proceed ahead once you emerge victorious from the clash.

The next part can be a bit troublesome. Take a look at the screenshot above. One enemy is waiting for you in the bushes[1], while the second one is placed at a vantage point up on the hill[2]. Approach the area just so the first enemy engages you, and retreat a bit so you're out of the range of the archer. The matter is complicated by the fact that the archer will notice you first, and you should avoid being hit.
Once you defeat the spearman, run around the rock on the right[3] and proceed forward. The hill near the building is another location in which you need to defeat an archer, and then a samurai armed with a sword. Use the ledge to reach the previous archer[2] that had a shooting practice earlier. The area is secure - you can now gather all the items found along the way. Once you're through, return to the location of the first archer.

The passageway shown on the screenshot leads to the ladder that you've seen on the beach. However, before you use it, turn left. You'll encounter two characteristic enemies armed with pickaxes. They may prove to be problematic, so lure them one by one.

Take your time to defeat them, as the same ledge is a home to a Kodama spirit.
Once you sent the ghost to your Shrine, proceed to the lower plane. You'll quickly encounter another "civilian" with a pickaxe. Defeat him, take the items, and proceed to the ladder nearby. Descend to the ledge below and kick the ladder to unlock the way below. If you've died, you can use the ladders to avoid most enemies appearing along the way.

Skip the Shrine for now, and check if the ladder is active. Retrace your steps back to the building next to which you've killed the archer. Go left[1] and pray at the encountered Shrine. By now you've managed to gather some Kodama spirits - you can choose the active blessing. Once you're done, return to the building where you've eliminated the archer and proceed to the area marked with[2].
Descend to the lower plane, gather the items and proceed to the elevated area to the right - you'll retrieve another Kodama spirit. Send it to your Shrine and use the land formation to access the upper part of the cemetery. Gather all the items from this area, return to the Shrine, and use the gathered Amrita to increase your experience level if you haven't done it yet.
Yoki
The way further leads to the top of the hill. Defeat the samurai and gather the items. At this stage you should have a ranged weapon - use it to eliminate some of the samurais guarding the house. Remember that most of them can be eliminated with a single headshot.

Finally, you'll find yourself behind the house that can be seen on the screenshot - take a look at it as it contains further denominations. Don't enter the area yet, and be wary of the guard patrolling the area. There is a well to the left - hit the stone on its edge to absorb some Amrita. Now for the action. The gate[1] is closed shut, but you can enter the smaller building[2]. There is a samurai inside, guarding the chests with numerous valuables. Choose the weapon that you're comfortable with and move for the front gate.

Take a look at the passageway on the left (marked with a red rectangle). Use it to access an area with a single treasure and summoning point, and a new Kodama spirit, found on the left side of the fence. Now you need to choose whether you want to face a strong enemy at once, or stay in the area to amass some experience and equipment by defeating leftover enemies. While you're at it, visit the front gate of the outpost and pick-up the remaining treasure.

To continue the mission, you'll have to handle Yoki, a demon that will materialize as soon as you'll approach the Yokai realm (the entrance is seen on the screenshot). Yoki is quite strong, but also vulnerable to fire. You can reinforce your attacks with elemental power using magic points or gunpowder bombs. Remember that staying in Yokai makes you incapable of amassing Ki, so your visit should be as quick as possible (avoid using dodges while you're there).
Circle slowly around your opponent, engage him with 1-2 strikes, and then move away to see his reaction. If he froze, throw a few bombs or use a ranged weapon. You can also have a Living Weapon charge ready, and use it in the right moment.

Once you emerge victorious, search the bodies in the vicinity of the battlefield. You should find a key that unlocks the gate leading to the next part of the level. Once you open the gate, you'll see the view similar to the one from the screenshot above. Turn right - you'll reach another Shrine in a moment. Use it to save your progress and spend the amassed Amrita.
More along the way - Chapter under construction.
