
NieR Automata: Chapter 4 Route A - walkthrough NieR Automata guide, tips
NieR Automata: On this page you will find walkthrough for the 4th chapter of Route A - Amusement Park
Last update: 19 August 2021
This page of the guide to NieR Automata contains a walkthrough of Chapter 4 which is a part of Route A and features the first visit to the Amusement Park . From the following walkthrough, you will learn e.g. how to cross the sewers and reach the Amusement Park, how to reach the main building in the Amusement Park, and how to defeat the bosses - the Goliath Tank and the Opera Singer.
- MIA - search for the missing YoRHa squad
- Optional Goliath Tank boss - fighting the tank
- Rollercoaster
- Opera Singer boss - the first stage of the fight
- Opera Singer boss - the second stage of the fight
- Reaching the Machine Village
MIA - search for the missing YoRHa squad

You will receive this mission objective after completing your first visit to the Desert Zone, namely after leaving the Resistance Camp and receiving orders from the Commander.
To search for the missing squad, you will need to visit a new area adjacent to the City Ruins. On the way to the mission destination marked on the map, you will encounter a barricade, but also an entrance into the sewers. Use it.

When exploring the sewers, you can use the Pod's flashlight - activated by pressing the left analog stick. You can follow the main path or explore its small offshoots. This second option will allow you to find loot.
Interestingly enough, you can fish in the sewers. If you decide to do so (hold the circle and press X to throw the Pod as bait) , then you have a chance to catch the unique Iron Pipe weapon.

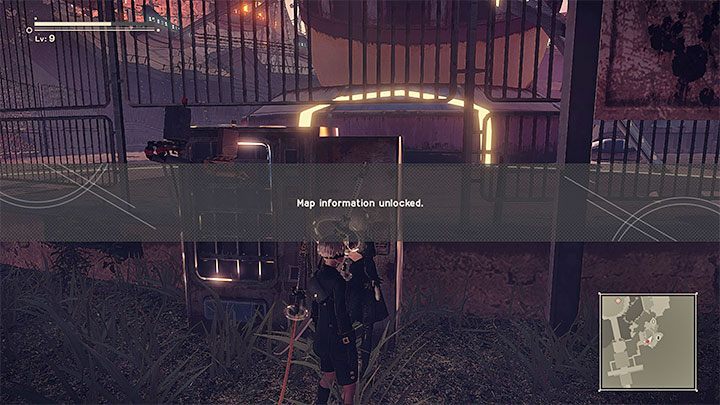
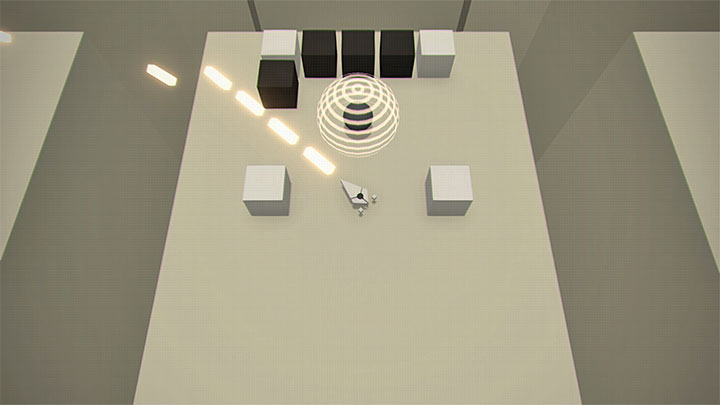
You'll eventually find a second ladder, but before you use it, examine the adjacent tunnel. It will lead you to the third ladder, and after going to the top you will get to the secret area shown in the attached picture. Here, you can most importantly find another unique weapon - Virtuous Dignity.
Return to the sewers and the second ladder you walked past previously. If you follow it to the top, you will exit near the entrance to the Amusement Park. It's a big new location that you will explore.
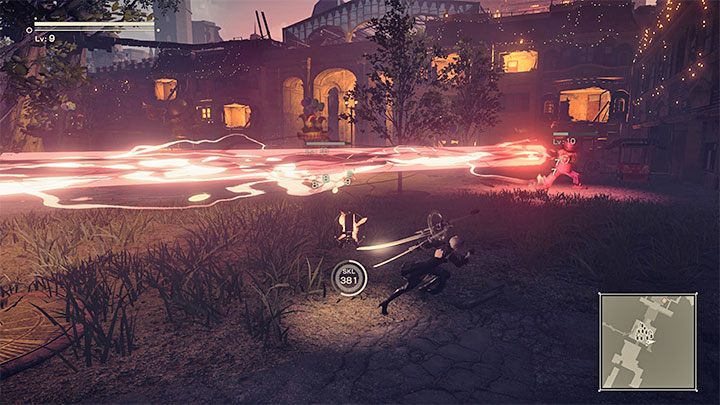
After entering the park, expect fights against disguised enemies. They should not be particularly difficult, though watch out for those that can shoot large laser beams - eliminate these enemies first and dodge to the side before the laser hits you.
Follow the main path to the central staircase and expect more fighting. The main passage is unfortunately inaccessible (the large gate is closed) and you will have to look for an alternative path.
Explore the side alleys. In one of them, you will encounter a Shopkeeper Machine that offers various crafting ingredients and dye.
Ultimately, you have to get close to the area with the ferris wheel and discover that the missing squad members' signal comes from a nearby building. There, you will also find a new Access Point. It's worth saving the game now, because two boss fights will await you in the near future.
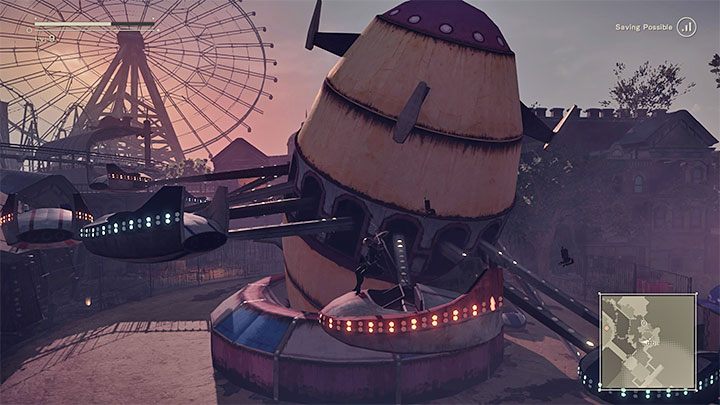
The path to the next location is blocked by a fence, and you have to figure out your way across. You need to start jumping up along the seats of the ferris wheel. The camera should shift to the side view, and to avoid any mistakes, make sure to use the double jump.
When you are in the last seat, jump towards the left path and run to the place where the camera will return to the standard position behind your back.
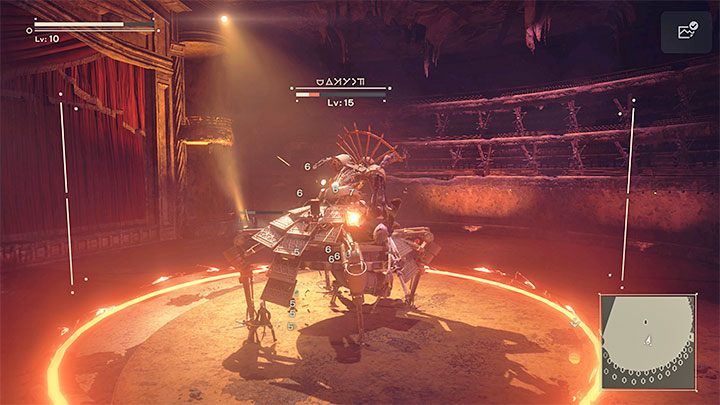
Optional Goliath Tank boss - fighting the tank
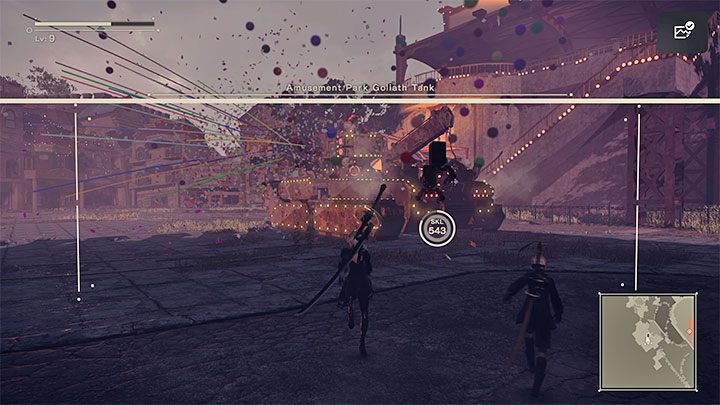
Soon, you will jump down to the "arena", where the Tank will appear. It's very important to note that the fight with the tank is optional because the machine will not attack you if you do not initiate the attack yourself. However, we recommend defeating the Tank, because it will give you XP and valuable loot.
During the fight with the tank, you can use the safer long-range attacks (remember to use laser or other Pod programs), as well as risk performing the close-combat attacks. In the latter case, however, watch out so that the moving Tank doesn't hit you.
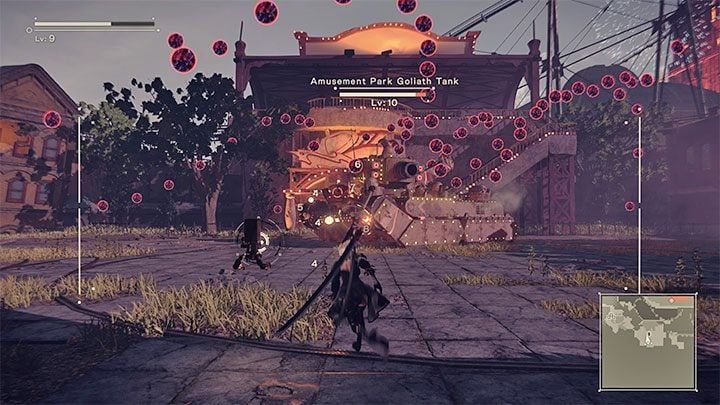
You can make the fight easier by:
- destroying the tank guns, which it uses to fire at you - then, you won't have to avoid them so carefully,
- jumping on the tank and attacking it to expose its core - this will lead to a faster victory.
The defeated tank will leave behind a Machine Core. This is a valuable item that can later be sold to a dealer at a lage profit.
Rollercoaster

Regardless of whether you fought the tank or not, you have to move on. Use the stairs to reach the platform where the rollercoaster stopped. Jump on any cart of the rollercoaster and start the ride during which you will have to fight some enemies.
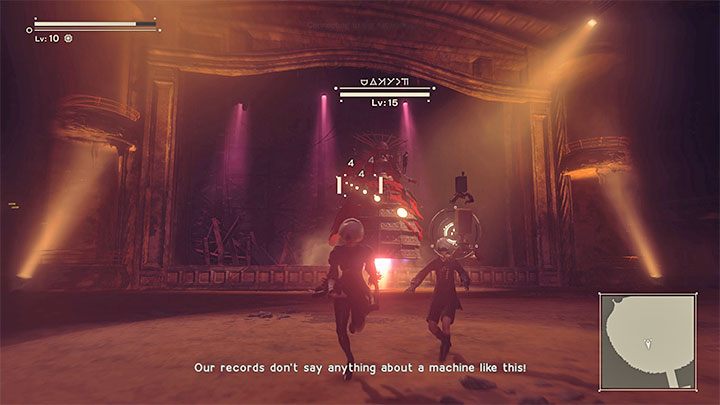
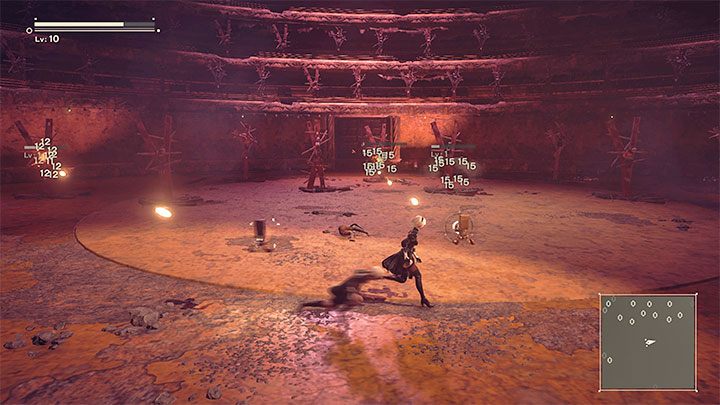
Unfortunately, you have very limited space to move around during the fights. Try to use ranged attacks to destroy projectiles and quickly get rid of the flying machines, as well as dodges when enemies attack you in hand-to-hand combat. You can also jump over your opponents if necessary. Right after the ride ends, you will meet the new main boss - Opera Singer
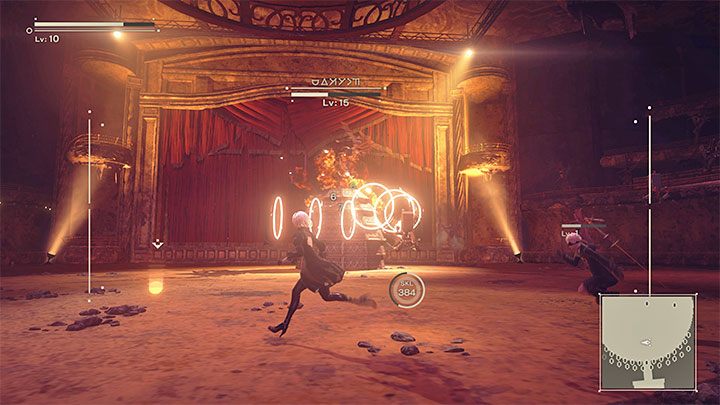
Opera Singer boss - the first stage of the fight
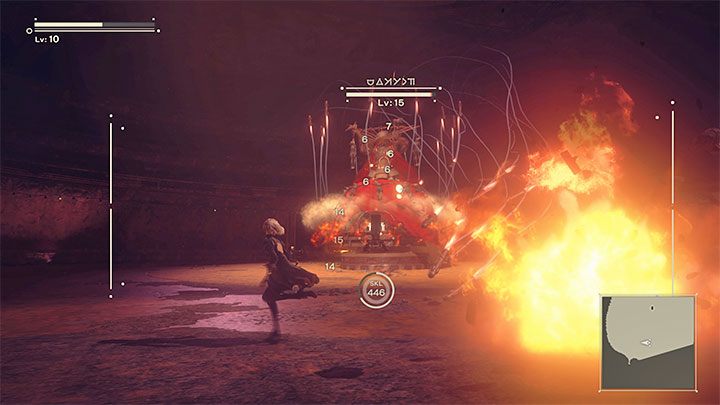
You can attack the boss from a distance (the Pod shooting program), and also run up to the Opera Singer and attack her with melee weapons. In the latter case, however, expect that she may draw some rotating blades at her base in defense. If this happens, you can temporarily move away from the boss or jump and attack the singer in flight.

The Opera Singer can shoot ordinary projectiles - stay in motion or shoot them down in mid-air.
The boss can also fire groups of red projectiles that will explode around her. In response to this attack, you can move away quite far from the Opera Singer or stay very close to her and use double jumps if necessary.
The boss can also shoot groups of homing missiles. The best reaction is a series of quick dodges sideways.
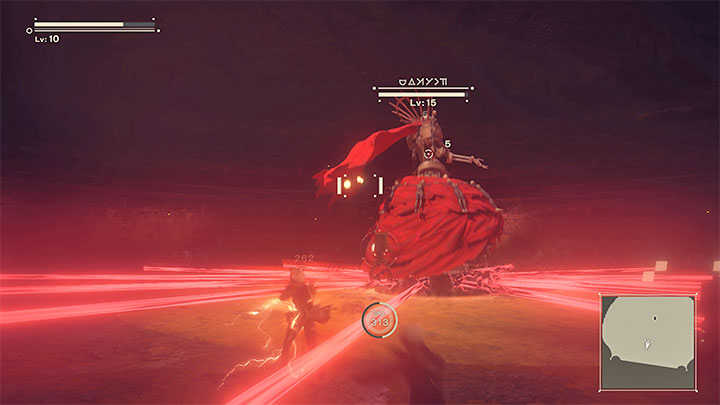
The boss's rather problematic attack are the rotating red lasers. Even though the attack is clearly signalled, it's easy to come into contact with the lasers and take damage. Try to move between the lasers while waiting until they turn off, but you might also try using frequent double jumps.
Opera Singer boss - the second stage of the fight
You will proceed to the second phase of the fight when enough time has passed. The boss will move towards the stage, but you can keep attacking her before she gets there.
The Opera Singer will generate a yellow shock wave, and for the first time in this fight, a hacking mini-game will start. Your task in the mini-game is to destroy the black blocks in order to disable the protective barrier surrounding the black ball. Destroying the ball will end the mini-game.
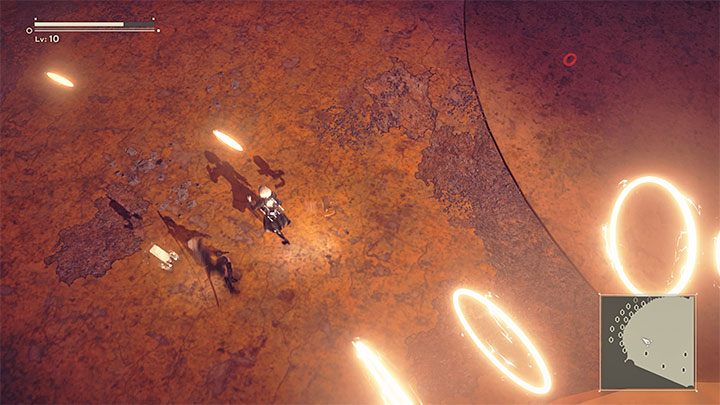
The Boss will temporarily hide on the stage and it means that you have to attack the dead androids that appeared in the arena.
It's easy at first, but later the camera will shift to a bird's eye view. This will force you to run around the arena and look for more androids to eliminate.
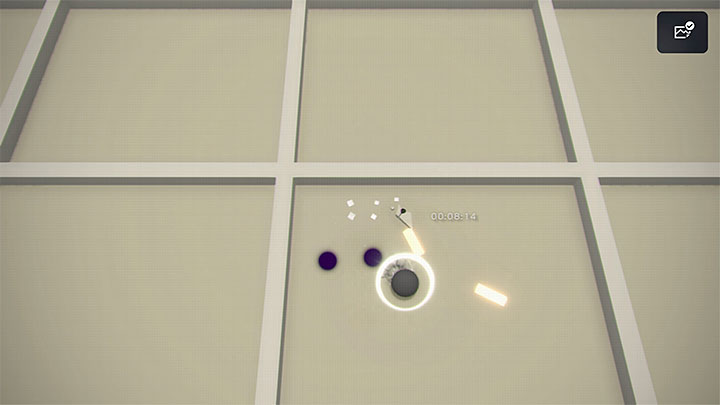
While eliminating the androids try to avoid the incoming yellow waves. Getting hit by every such wave will force you to play the hacking mini-game again. The games can vary; for example, instead of destroying blocks, you will have to avoid moving obstacles. The goal is always the same - destroying the black ball. Any started mini-game puts 2B at risk of taking damage.
In the further part of the fight, the hacking mini-game can be triggered not just by the yellow shockwaves, but also by yellow circles. In this case, try to avoid touching them as well.
Once you've destroyed all the dead androids the Opera Singer will return to the arena and you can resume attacking her. Just like in the first phase of the fight, you can use ranged attacks or attack in close combat.
Try to avoid the yellow circles during the fight, as they may trigger the mini-game again.
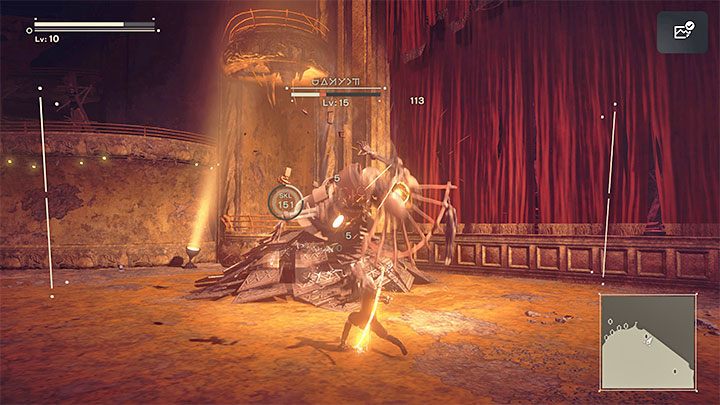
After the boss falls to the ground start attacking her with powerful attacks in hand-to-hand combat and a Pod program. The point is to deal as much damage to the Opera Singer as possible before she resumes the fight.
In the final part of the fight, the boss can jump and generate shock waves where she lands. Perform evades or double jumps to avoid being hit by any of the waves.
Keep attacking the Opera Singer until she loses her entire health bar and is defeated.
Reaching the Machine Village
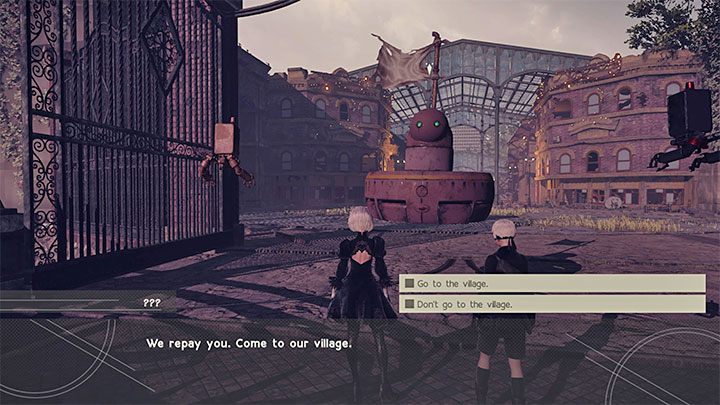
After the fight, examine one of the dead androids in the arena to determine that you can no longer help them. Exit the building.
In the main square, the characters will be stopped by a friendly machine who will invite 2B and 9S to its village. Agree to travel together.
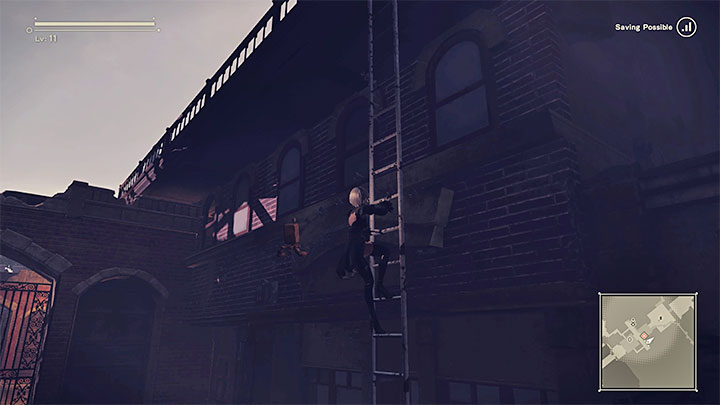
Start following the machine down one of the side paths in the Amusement Park. You need to get to the ladder shown in the picture.
When you get to the top, start going left. The camera will shift its perspective to the side view. Keep moving to the left all the time and jump up and down to the next shelves along the way. You will eventually reach the Machine Village.