
Walkthrough - Front Line* | Chapter 4 Metro 2033 Guide, walkthrough
Last update: 11 May 2016
There are two ways of finishing this mission:
1) you can decide to remain in the shadows
2) you can decide to defeat all encountered enemy units
In both cases you'll visit different locations of the base. If you choose the hostile approach it'll be more difficult to succeed, however if you choose the silent approach you won't have a chance to find and examine all the stashes.
If you've decided to remain in the shadows you should purchase a stealth armor (previous mission). Doing this will increase your chances of avoiding detection, mostly because the armor is already equipped with nightvision goggles. The lack of the goggles will make exploring some of the areas very difficult, because you won't be allowed to use the flashlight (otherwise you'll compromise your position).
If you've decided to engage enemy units in open combat you should purchase a combat armor (previous mission). Doing this will make it much easier for the main character to stay alive.
 |  |
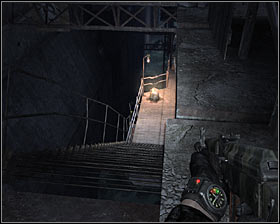
Silent approach: Start off by moving forward #1. Make sure to turn off your flashlight before leaving the tunnel, so you won't be noticed by anyone. Locate the stairs to the left of the train tracks and head down #2.
 |  |
Press and hold the crouch key while using the stairs. There are two guards to your right, however as long as you play it safe you won't be spotted by them. Head forward and then turn left #1. Choose the right passageway after reaching a junction #2 so you won't have to get closer to a burning lamp.
 |  |
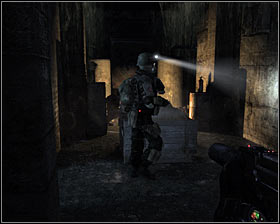
Notice a group of characters standing to your right #1. You'll have to be patient here - wait for the interrogation to end with one of the officers killing a prisoner. Both enemies will leave this area soon after that #2. Proceed towards the balcony where the prisoner was being questioned a few moments ago.
 |  |
Make a few steps forward to approach the ledge #1 and you should notice that you'll have a chance to drop down to a metal support seen below #2. Head left after you've safely landed on the support.
 |  |
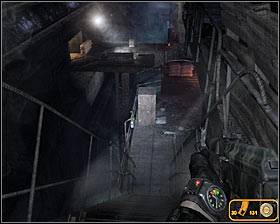
Approach the wall, turn right and make a jump towards a small ledge located directly in front of you #1. Perform a second jump to get to a balcony. Turn right and use the pipe #2 to get to the next area.
 |  |
You'll soon reach a spot where you'll have to jump to an adjacent pipe #1. Proceed towards a concrete support and head right #2.
 |  |
It shouldn't take long until you've reached a new wall. Turn left here and perform two small jumps #1 to get to an upper platform. Head on to your left #2 and you should end up standing above a small balcony. Check the area near the wall to find a dead soldier (ammunition).
 |  |
Turn right and notice that you'll have a chance to drop down to a balcony mentioned before #1. Once you're standing on a balcony drop down to a larger pipe #2 and from there you should be able to reach the ground level without risking your life. Notice that you'll have to wear a gas mask here. Thankfully you can stop using the nightvision goggles (use a flashlight instead).
 |  |
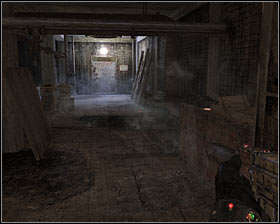
Start moving forward. You won't encounter any problems right away, however in a few moments you will find two traps #1. Make sure to jump over the traps to avoid getting killed. The last third trap can be found near the entrance to a new tunnel #2. Go past it and head inside.
 |  |
Make a few steps forward and you should find a ladder to your right #1. Use the ladder to reach an upper level of the sewers. Keep going straight and the second ladder should be located to the left #2. Turn off your flashlight before using this ladder and don't forget to stop using a gas mask after you've left the sewers.
 |  |
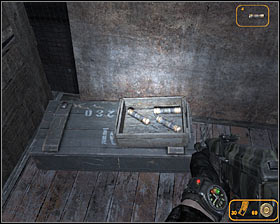
Start off by putting out a nearby lamp #1. You'll now have to wait until the soldier patrolling the left corridor returns to this area. If you don't mind taking additional risks you may consider trying to steal 5 rounds of gold ammunition from a locker located on the wall behind the lamp #2.
 |  |
Wait for the soldier mentioned above to walk past you #1 and then proceed towards the left corridor. You'll soon reach a staircase #2 and you'll have to use the stairs to get to the top floor.
 |  |
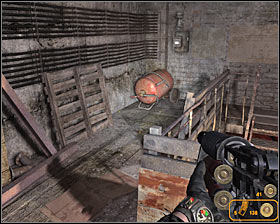
Once you're at the top you should perform two actions - destroy a nearby light source using a silenced weapon #1 and extinguish a lamp. Make a stop near the passageway leading to the tunnel. DON'T MOVE because there are glass shard nearby and you would make a lot of noise. Wait for an enemy patrol to pass by #2.
 |  |
Enter the tunnel carefully. I would recommend that you wait for a single soldier heading your way to show up #1. Once he's gone past you turn left and find his colleague on an upper balcony #2. Wait for him to turn around and then start running forward.
 |  |
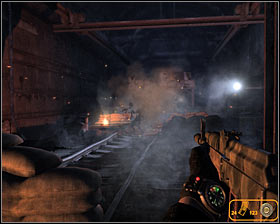
AS SOON AS you hear some noises take cover near one of the walls of the tunnel. You should notice an armored trolley heading your way #1. Assuming you're not standing near a light source you should be fine. Proceed to the next section when it's safe. Don't forget to put out a new lamp along the way #2. Watch out for one more soldier before exiting this tunnel.
 |  |
You should end up standing in a much larger area. Approach the ledge #1 and jump down. You'll now have to move under the train tracks #2. Remember to stay in the shadows. Don't run, because you would make too much noise.
 |  |
Eventually you should be able to locate a ladder - it can be found to the right of the pillars #1. Use the ladder to go back up and to find yourself near an entrance to a new tunnel. Wait for one of the guards to turn around before heading inside the tunnel #2.
 |  |
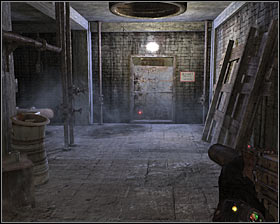
Thankfully it's going to be easier here. Slowly keep moving forward and eventually you'll find a passageway located to your left #1. Make sure that no one is looking in your direction before going there. Open the door to find yourself standing in a new room #2.
 |  |
I would recommend that you take some time to check your surroundings. There are some supplies here #1, including 10 rounds of gold ammunition. Opening a nearby door #2 will result in ending this mission.
 |  |
Direct approach: If you choose to fight enemy units instead of avoiding them you should begin by turning around. Check the tunnel from where the carriage has arrived #1. You'll encounter several soldiers here #2 and it would be a good idea to attack them from a larger distance.
 |  |
Make sure that you've eliminated all nearby enemy units and open a locker found on a wall. You'll find 3 rounds of gold ammunition here, as well as nightvision goggles #1. Return to the start area and begin attacking enemies located close to the carriage #2. I would recommend using dynamite sticks often, especially since you'll find a lot of explosives during this mission.
 |  |
Watch out for enemy units stationed to your left. Using standard weapons against them won't be effective, but thankfully you'll find a stationary gun in the area #1. Kill all the opponents you can see and then check your surroundings to find supplies and 4 rounds of gold ammunition #2.
 |  |
Return to the start area for the second time and now find a staircase leading to a lower platform #1. Watch out for two opponents located to your right - you'll have to get rid of them before they fight back #2. Head forward once they're gone and then turn left.
 |  |
Keep going straight and make sure to use a flashlight or nightvision goggles so you won't fall through one of the holes. New enemies are stationed to your right #1 and it would be a good idea to throw dynamite at them. Once they're gone use the stairs found to the left #2.
 |  |
Once you've made your way to the upper level you'll have to turn right and start attacking remaining enemy units #1. Keep using the dynamite, especially if you see a larger group near your position. Additional soldiers may also be hiding on a nearby balcony #2.
 |  |
Make sure that the surrounding area has been secured and start heading towards a large bridge #1. You won't encounter new enemies right away, however get ready to defend yourself when you're close to the opposite end of the bridge #2. Use cover and dynamite to your advantage.
 |  |
You must acknowledge the fact that a lot of opponents will use the stairs to get to you from the lower platforms. Don't move too fast and make sure to secure a second upper balcony #1. It would be a good idea to check that balcony, because you'll find a lot of dynamite sticks #2.
 |  |
Securing the lower platforms mentioned in the text is possible #1, however you wouldn't find anything interesting aside from several enemy units. If you want to focus on the mission you should proceed towards an entrance to a large tunnel #2.
 |  |
Watch out for new enemy units - you are going to be attacked near the tunnel entrance #1. Kill your opponents from a larger distance if you can. Head forward and notice a passageway to your right. Enter a small area #2. I would recommend using the stairs to get to a lower level.
 |  |
You should be using a shotgun here, because enemy soldiers will be appearing close to your position #1. Fight your way to the last room and deal with the remaining enemy troops. Find a locker on one of the walls #2 and open it to collect 5 rounds of gold ammunition. You may now return to the large tunnel.
 |  |
Head forward, HOWEVER watch out for an armored trolley heading your way #1. I would recommend hiding near the train tracks so that you won't be seen by the gunman right away. You can now either kill both guards sitting inside the trolley or ignore it and proceed towards the tunnel exit #2.
 |  |
Once you've entered a larger area you should remain near the train tracks and eliminate guards standing in front of you #1. Other opponents can be found below your position - notice that they have three prisoners #2. You can either decide to help captured allies or focus only on completing the main objective.
 |  |
You can help the captured soldiers if you want to, however you would have eliminate ALL enemy units. Start off by securing the ground level (area next to the prisoners) and then clear out a tunnel leading to the exit #1. You'll also have to destroy an armored trolley you've passed by not long ago and this can only be achieved by using dynamite #2.
 |  |
Return to the prisoners AFTER you've secured the entire area. They should be standing #1 and you'll be allowed to talk to one of them. You may now return to the train tracks. Enter a new tunnel and eventually you'll come across a passageway located to your left #2. Open the door and enter the last room.
 |  |
I would recommend that you take some time to check your surroundings. There are some supplies here #1, including 10 rounds of gold ammunition. Opening a nearby door #2 will result in ending this mission.