
Mass Effect 2: Mordin: Old Blood - walkthrough Mass Effect 2 guide, walkthrough
Last update: 02 June 2021
 |  |
Description: This quest should appear in your journal after completing several missions following your trip to the Horizon and naturally you must pay Mordin a visit to learn more about his problem. Mordin can be found in his laboratory on the second deck of the Normandy and during the conversation you should agree that you want to help him. This mission can be continued by opening the galaxy map and plotting a course for the Krogan DMZ. Confirm that you want to land on a planet named Tuchanka located in the Aralakh system
 | ![Soon after your arrival in [Tuchanka - Urdnot camp] youre going to be stopped by one of the krogan captains and hell inform you to go to the leader of this tribe - Mass Effect 2: Mordin: Old Blood - walkthrough - Companion quests - Mass Effect 2 Guide & Walkthrough](/masseffect2/gfx/word/1131196875.jpg) |
Soon after your arrival in [Tuchanka - Urdnot camp] you're going to be stopped by one of the krogan captains and he'll inform you to go to the leader of this tribe. In this case you don't have to talk to Wreav (chief), because he would send you to Chief Scout anyway. Proceed directly to Chief Scout (second screenshot). Notice that aside from starting Mordin's quest you'll also be allowed to perform a side mission for him - Mordin: Old Blood: Missing Scout.
 | ![Confirm that youre ready during your conversation with the Chief Scout and youll automatically use a transporter to travel to [Tuchanka - Weyrloc facility] - Mass Effect 2: Mordin: Old Blood - walkthrough - Companion quests - Mass Effect 2 Guide & Walkthrough](/masseffect2/gfx/word/1131196906.jpg) |
Confirm that you're ready during your conversation with the Chief Scout and you'll automatically use a transporter to travel to [Tuchanka - Weyrloc facility]. Notice that you're given a chance to change equipment, but you won't encounter any powerful opponents so may stick with your current heavy gun. Start exploring the area and get ready to defeat a group of klixens soon. You should be fine as long as you prevent the monsters from moving too close.
 |  |
Expect to encounter more klixens as well as a group of varrens after choosing a narrow passageway (first screenshot) leading to the next area of the map. You should be using guns here effective in close quarters combat. Order members of your team to take cover (second screenshot) after reaching a new area.
 |  |
Expect to encounter two enemy bombardiers in the surrounding area - they will be using rocket launchers so it's important that they die quickly. You may head forward. Turn left after reaching a destroyed section of the path and use a bridge to make your way to an upper platform. Order members of your team to get behind cover and prepare to be attacked by a new group of enemy soldiers.
 |  |
Keep pushing forward and don't forget to always remain behind cover, because you'll be going against large groups of enemy units. Watch out for armored opponents - you can't allow them to get too close, especially since they'll be using shotguns. Varrens will join the battle later on and you also must prevent them from getting closer.
 |  |
The next part of this assault will require you to eliminate a group of soldiers located to your right and it would be a good idea to wait for them to show up. Once they're gone check the area in front of you to find a med kit and a container with 600 units of iridium. Head down and expect to encounter new enemies along the way.
 |  |
A large group of opponents is guarding the entrance to a nearby hospital (first screenshot), but thankfully they will remain behind cover instead of trying to close the distance separating your from them. Additionally you can blow up a crate and the explosion would inflict some serious injuries. Once they're all gone make sure to check the area to your right. Collecting a manifold from a destroyed vehicle will trigger a side mission - Tuchanka: Combustion Manifold. You must break the lock on the main door (second screenshot) to enter the hospital.
 |  |
Use the stairs to get to a lower level and examine one of the nearby bodies to automatically initiate a short conversation with Mordin. Notice that you'll be allowed to ask your companion several questions and to show your discontent about making tests on human subjects. Head down to a lower level and find a container with 600 units of iridium.
 |  |
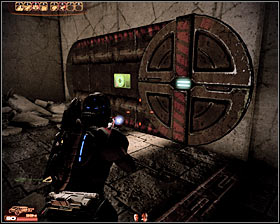
SAVE your current game and then proceed towards a large gate seen to your right. Once you're inside you're going to be stopped by a Weyrloc clan herald. There are two options here on how to react - you can wait for his speech to end and start this battle on fair terms or you can use a special renegade interrupt (second screenshot) to trigger a massive explosion.
 |  |
Even if you've decided to blow up the tank you'll still have to take part in a difficult battle. Don't forget to order your teammates to take cover and then start attacking enemy troops. You'll have to be quick about it, because otherwise the krogans will use the balcony to move to your right and your team would find itself under heavy fire. If this occurs order your colleagues to take cover under the balcony (second screenshot).
 |  |
Keep fighting until all the krogans have been defeated and then spend some time looking around. You'll find a container with 300 units of iridium here and a medical station. Use the ramp to get to the upper balcony (the one where all the krogans were organizing their attacks from). Check the next corridor to find a circuit board (3000 credits).
 |  |
I would strongly recommend that you now take some time to explore two side rooms. The room found to your right has a container with 500 units of iridium and a computer terminal (conversation with Mordin). The room to the left has a terminal (new plan for a research project) and a corpse (another conversation with Mordin). Proceed to the next section.
 |  |
Make sure to explore a room to your right (first screenshot) found along the way. Doing this will allow you to complete one of the side missions (Mordin: Old Blood: Missing Scout) and you'll find a PDA with 1500 credits. Save your game before approaching a large gate located in this area.
 |  |
Start attacking enemy troops as soon as you've entered a new area of the facility. Be careful, because most of the krogans will make attempts to get closer using a nearby passageway (first screenshot). Prevent them from doing that and don't forget to shoot at explosive objects found in the area. Search your surroundings after the battle to find a circuit board (4500 credits).
 |  |
You may now choose the same bridge which was being used by enemy troops. Be careful here, because new enemies will appear to your right and aside from new krogans you'll also be going against varrens. Use a medical station after the battle and take your time to find power cells. You may now proceed to a lower level (second screenshot).
 |  |
You'll have to find cover here as well, because new enemies will soon appear in the vicinity. Approach a nearby bridge (first screenshot) carefully and wait until you see a door opening in the distance. Start shooting at your enemies and focus your efforts on killing the main boss of this mission - Chief Weyrloc Guld. I would strongly recommend using a heavy weapon to dispose of him, especially since you'll have to destroy his defences and prevent him from moving too close.
 |  |
Before you decide to leave this area you should locate a door first (first screenshot) leading to a small room. You'll find a crate there and opening it (mini-game) will result in receiving 3000 credits. Proceed to the passageway where you've seen enemy units showing up (including the boss).
 |  |
Head down to a lower level and make sure to locate a new computer terminal (first screenshot). Interacting with this terminal will result in adding a new plan for a research project to your database. Proceed to the next room where you'll witness to a confrontation between Mordin and Maelon. This conversations can have one of two endings - you may allow Mordin to kill his adept or you may use a paragon interrupt (second screenshot) to spare his life.
 |  |
You'll also have to make a second decision, this time concerning what should be done with the data about the krogans - you can save the data or destroy it. Finish the conversation and choose that you want to spend some additional time looking around. Hack a computer seen on the wall to collect 3000 credits. Pressing the action key (F) will return you to [Tuchanka - Urdnot camp].