
Life is Strange: Dark Room, Chapter 2 Life is Strange Guide
On this page of the Life is Strange guide you’ll find a walkthrough of Chapter 2 of Episode 4 (Dark Room). We’ve listed the actions that have to be performed once back at the dormitory. There are 5 achievements to obtain during this chapter: Ambient, Time-Lapsed, Balance, Rangefinder, and Gamma Value.
Last update: 25 January 2022
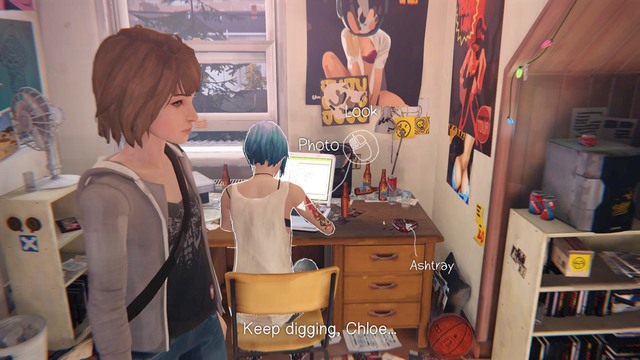
After another change of the events, Chloe will come back as the girl known from the previous episodes (before the change of the events). Now you can take your first photo to the collection. Stand in the place shown on the picture above and select Chloe - Photo. After you look around her room, leave it and walk down.

IMPORTANT! Depending on decisions made in previous episode (about David), the situation in the garage will differ. In both cases you must get to David's locker and get information from inside.
Situation in which David has been abandoned by Chloe's mom, Joyce, has been shown on the picture above. The locker can be opened in two ways. First one is using the crowbar that is lying on the shelf. All you need to do is destroy the lock and you will get inside. Second way is entering the code to the padlock. The code could have been found in the third episode of the game, when you were looking for the password to David's computer. The same (opened) padlock was lying on the shelf next to the computer with the code 7171 entered.
Situation in which David hadn't been abandoned by Joyce is similar, but the second solution is different than the one previously described. In order to open the locker you must obtain David's key. Sadly, you will have to trick him as he is standing next to them. In the room with the locker, on the other side, you will find a fuse box. Take one of the fuses out to get David's attention. Walk to the other side with the door and take the key from the shelf. You can also move back in time and take the keys before David enters the garage.

IMPORTANT! The description contains events in which Kate has been saved by you and she didn't commit suicide. If you haven't saved her, the part below won't appear in your game and immediately after leaving Chloe's house you will go together to the dormitory.
After obtaining the needed information, go back to Chloe and together you will go to hospital to visit Kate. Walk to the table shown on the picture above and read the letter lying next to the bed. After you read it, a new dialogue option will appear in conversation with Kate (pick the "Victoria" entry for Kate to help you in identifying the number of Nathan's room). After picking the "Victoria" entry, select "Nathan" and then "Vortex Club". Due to this you will obtain another ally in your investigation.

Once you reach the dormitory, your task will be to obtain information about Nathan's whereabouts. But before you do that, take the opportunity to collect all the photos to the album. First one can be found next to the totem. Walk towards the rocks shown on the picture and select the Photo option.

The second photo shows two squirrels. Walk towards Samuel and talk with him about the changes in Arcadia Bay. Pick Squirrel from the dialogue options to remind him that he must feed the animal. After he throws the food, one of the squirrels will run towards it and the second one will stand behind the fence. To take the photo you must lure the second squirrel with the food lying next to the Samuel (select the Lure option).
Talk with the teacher sitting next to Samuel after taking the photos. Select Nathan and You Know Him Better from the dialogue options to learn some interesting things. Once the conversation ends, walk towards Chloe and together enter the dormitory.

If you have saved Kate from the suicide attempt, she will text you the Nathan's room number. The room will be 111 shown on the picture above, you will find it on the left side of the hall. You must find Nathan's phone after entering the room.

Walk towards the couch shown on the picture and you will find some tracks on the ground. Select Examine and, after marking the couch, select the Move option. After taking the phone, go back to Chloe and leave the dormitory.
Nathan himself will assault you. Warren will stand in your defense and will start attacking Nathan. Now you will have to make the second important decision:
- STAY OUT OF IT - Don't get between Nathan and Warren. Warren will be mercilessly beating Nathan up.
- STOP WARREN - You will get between the two and try to smooth things over.
No matter the choice, the game will go the same. You and Chloe will leave the dormitory.