Guides & Walkthroughs New Guides Popular RPG Action Strategy Adventure YouTube Guides Mobile App
Free iOS App iPhone & Ipad
Download Game Guide PDF, ePUB & iBooks

LEGO The Lord of the Rings Game Guide & Walkthrough by gamepressure.com

LEGO The Lord of the Rings Game Guide & Walkthrough

Table of Contents

Battle of Pelennor Fields | Collectibles LEGO LotR Guide

Last update: 11 May 2016

Minikit #1

You have to destroy three chests during the horse charge to receive the Minikit - Battle of Pelennor Fields - Collectibles - LEGO The Lord of the Rings - Game Guide and Walkthrough

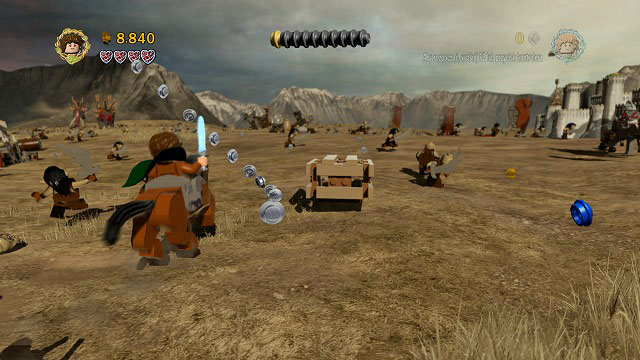
You have to destroy three chests during the horse charge to receive the Minikit. At the beginning of the level, immediately move your character maximally to the right and quickly to the left after destroying the first one (the second chest will be there).

Afterwards stay in the middle - as you head through the ramp with Minikit #2, keep staying in the middle and you should hit the third and last chest soon enough - Battle of Pelennor Fields - Collectibles - LEGO The Lord of the Rings - Game Guide and Walkthrough

Afterwards stay in the middle - as you head through the ramp with Minikit #2, keep staying in the middle and you should hit the third and last chest soon enough. This fragment is rather hard, but luckily it can be easily repeated by heading back to Middle-earth.
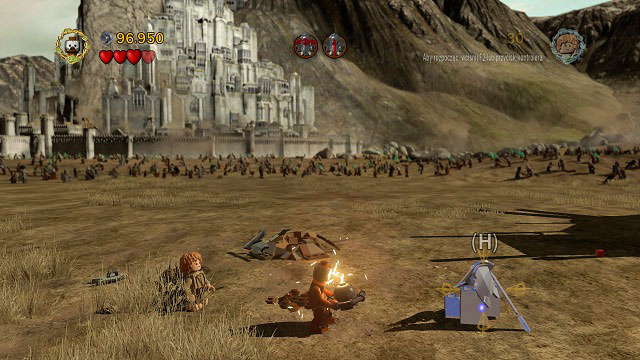
Minikit #2

During the charge, when the Mumakil appear, after passing by a group of four of them you should see a ramp in the middle of the road - ride across it to collect the Minikit - Battle of Pelennor Fields - Collectibles - LEGO The Lord of the Rings - Game Guide and Walkthrough

During the charge, when the Mumakil appear, after passing by a group of four of them you should see a ramp in the middle of the road - ride across it to collect the Minikit.

Minikit #3

During the charge, from the moment you see a falling Mumakil, you have to keep throwing spears - the third Minikit is in a chest at the very end and should automatically fall into your hands - Battle of Pelennor Fields - Collectibles - LEGO The Lord of the Rings - Game Guide and Walkthrough

During the charge, from the moment you see a falling Mumakil, you have to keep throwing spears - the third Minikit is in a chest at the very end and should automatically fall into your hands.

Treasure: Glowing Shield

Needed: bow

As you're fighting the Nazgul on a beast, you need to hit a couple targets high above the left side of the arena - Battle of Pelennor Fields - Collectibles - LEGO The Lord of the Rings - Game Guide and Walkthrough

As you're fighting the Nazgul on a beast, you need to hit a couple targets high above the left side of the arena. An Orc will join the fight, after defeating whom you will be able to pick up the treasure. To be able to choose any character you want, you first need to change to someone else than Eowyn or Merry. Only afterwards by holding down (U) you will gain access to the full range.

Minikit #4

During the fight with the Nazgul on a beast - Battle of Pelennor Fields - Collectibles - LEGO The Lord of the Rings - Game Guide and Walkthrough

During the fight with the Nazgul on a beast. Move towards the camera and you should see a brown horse on the ground. You need to destroy the local objects (including the beam in the very corner of the location), build a lever from them and stand on its end with two characters to lift the animal and receive the Minikit.

Minikit #5

Needed: axe

As you're fighting the Witch-King; move towards the camera and on the left side of the arena you will find a cracked LEGO brick - Battle of Pelennor Fields - Collectibles - LEGO The Lord of the Rings - Game Guide and Walkthrough

As you're fighting the Witch-King; move towards the camera and on the left side of the arena you will find a cracked LEGO brick. Destroy it with Gimli's axe and pick up the chest.

Minikit #6

Needed: spade, strength

As you're fighting the Witch-King; on the arena, there are two places where you can place a plant (on the left and right side of the location) - Battle of Pelennor Fields - Collectibles - LEGO The Lord of the Rings - Game Guide and Walkthrough

As you're fighting the Witch-King; on the arena, there are two places where you can place a plant (on the left and right side of the location).

They will give you green and red herbs - you need to combine them into a first-aid kit, head to the right side of the arena, dig up bricks and create an orange handle - Battle of Pelennor Fields - Collectibles - LEGO The Lord of the Rings - Game Guide and Walkthrough

They will give you green and red herbs - you need to combine them into a first-aid kit, head to the right side of the arena, dig up bricks and create an orange handle. Switch to Shagrat, pull the handle and give the first-aid kit to the wounded soldier.

Minikit #7

Needed: spade, light fire

During the fight with the Mumakil; on the ground you will find two points with a purple glimmer - Battle of Pelennor Fields - Collectibles - LEGO The Lord of the Rings - Game Guide and Walkthrough

During the fight with the Mumakil; on the ground you will find two points with a purple glimmer. One of them is a broken spear which you have to pick up and the second is loose ground. Dig it up and combine the obtained material with the first item. Afterwards light a fire by the nearby bonfire place and give the crutches to the soldier.

Treasure: Golden Carrot

Needed: spade

During the fight with the Mumakil; between two mithril bricks you will find a place to put a plant - Battle of Pelennor Fields - Collectibles - LEGO The Lord of the Rings - Game Guide and Walkthrough

During the fight with the Mumakil; between two mithril bricks you will find a place to put a plant. Plant it and pick up the treasure.

Minikit #8

Needed: axe

To the left of the save point there is a cracked LEGO brick - Battle of Pelennor Fields - Collectibles - LEGO The Lord of the Rings - Game Guide and Walkthrough

To the left of the save point there is a cracked LEGO brick. Destroy it with Gimli's axe and collect another Minikit.

Minikit #9

Needed: bomb, Pippin's bucket

To the right of the save point you will find two mithril bricks - Battle of Pelennor Fields - Collectibles - LEGO The Lord of the Rings - Game Guide and Walkthrough

To the right of the save point you will find two mithril bricks. Destroy the higher one, switch to Pippin and fill his bucket with water. Afterwards head to the right and extinguish the fire.

You will have to go get water once again in order to suppress the fire completely - Battle of Pelennor Fields - Collectibles - LEGO The Lord of the Rings - Game Guide and Walkthrough

You will have to go get water once again in order to suppress the fire completely. Now just break the crates and pick up the Minikit.

Minikit #10

Needed: Pippin's bucket

Once again fill up the bucket with water from the pond (unlocked during Minikit #9) and head to the left - Battle of Pelennor Fields - Collectibles - LEGO The Lord of the Rings - Game Guide and Walkthrough

Once again fill up the bucket with water from the pond (unlocked during Minikit #9) and head to the left. There you will find yet another fire - extinguish it to get the reward.

Treasure: Flower Hat

Needed: Pippin's bucket

You can collect the treasure together with Minikit #10 - Battle of Pelennor Fields - Collectibles - LEGO The Lord of the Rings - Game Guide and Walkthrough

You can collect the treasure together with Minikit #10. Head back a bit and pick it up from the ground.

Design: Mithril Top Hat

Needed: bomb

In order to obtain the Design, you have to blow up the mithril brick (to the left of the save point) with Berserker's bombs - Battle of Pelennor Fields - Collectibles - LEGO The Lord of the Rings - Game Guide and Walkthrough

In order to obtain the Design, you have to blow up the mithril brick (to the left of the save point) with Berserker's bombs.

See/Add Comments

You are not permitted to copy any image, text or info from this page.

This site is not associated with and/or endorsed by the Warner Bros Interactive Entertainment or Traveller's Tales. All logos and images are copyrighted by their respective owners.

Copyright © 2000 - 2024 GRY-Online S.A. for gamepressure.com, unofficial game guides, walkthroughs, secrets, game tips, maps & strategies for top games.