Guides & Walkthroughs New Guides Popular RPG Action Strategy Adventure YouTube Guides Mobile App
Free iOS App iPhone & Ipad
Download Game Guide PDF, ePUB & iBooks

LEGO Jurassic World Game Guide & Walkthrough by gamepressure.com

LEGO Jurassic World Game Guide & Walkthrough

Table of Contents

Isla Sorna | Jurassic Park - The Lost World - secrets LEGO Jurassic World Guide

Last update: 11 May 2016
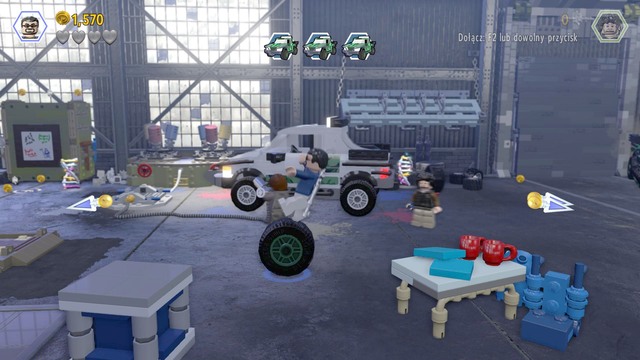
Minikit #1

Minikit #1 - Isla Sorna | Jurassic Park - The Lost World - secrets - Jurassic Park - The Lost World - secrets (missions) - LEGO Jurassic World Game Guide & Walkthrough
Minikit #1

You will receive first minikit after destroying three trashcans and building skeletons out of the scattered bricks. First one can be found right from the drawer in front of which the character on the picture is standing.

Second dumpster can be found near the tires - Isla Sorna | Jurassic Park - The Lost World - secrets - Jurassic Park - The Lost World - secrets (missions) - LEGO Jurassic World Game Guide & Walkthrough

Second dumpster can be found near the tires.

Third one is located next to the green car - Isla Sorna | Jurassic Park - The Lost World - secrets - Jurassic Park - The Lost World - secrets (missions) - LEGO Jurassic World Game Guide & Walkthrough

Third one is located next to the green car.
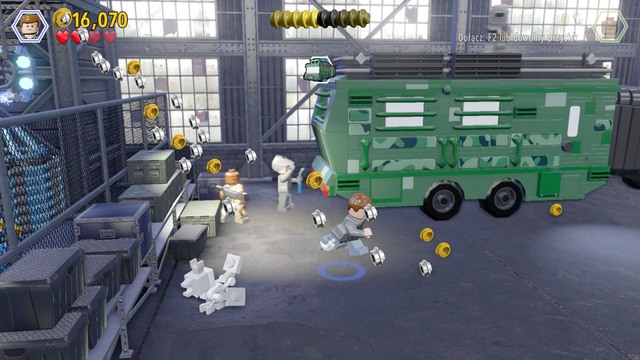
Minikit #2

Minikit #2 - Isla Sorna | Jurassic Park - The Lost World - secrets - Jurassic Park - The Lost World - secrets (missions) - LEGO Jurassic World Game Guide & Walkthrough
Minikit #2

Switch your character to Barry and shoot with an EMP at the shield shown on the right side of the picture. You will have to defeat attacking enemies. Once you kill them all, the minikit will appear in the last part of the workshop.

Minikit #3

Minikit #3 - Isla Sorna | Jurassic Park - The Lost World - secrets - Jurassic Park - The Lost World - secrets (missions) - LEGO Jurassic World Game Guide & Walkthrough
Minikit #3

After reaching the higher level, shoot as Barry at another shield. You will gain access to a nearby jump. Switch your character to a woman, jump up and get through obstacles to the right side. There you will find the minikit.

Minikit #4

Minikit #4 - Isla Sorna | Jurassic Park - The Lost World - secrets - Jurassic Park - The Lost World - secrets (missions) - LEGO Jurassic World Game Guide & Walkthrough
Minikit #4

After shooting at the shelf with tires, instead of going to the vulcanizer on the right side, take the wheel and go left. After getting at the platform, open the hatch and take the minikit.

Minikit #5

Minikit #5 - Isla Sorna | Jurassic Park - The Lost World - secrets - Jurassic Park - The Lost World - secrets (missions) - LEGO Jurassic World Game Guide & Walkthrough
Minikit #5

After getting up, as Nick open the drawer. Behind the hatch you will find the fifth minikit.

Minikit #6

Minikit #6 - Isla Sorna | Jurassic Park - The Lost World - secrets - Jurassic Park - The Lost World - secrets (missions) - LEGO Jurassic World Game Guide & Walkthrough
Minikit #6

In the place shown on the picture, take control of Nick and destroy the rock. After that, switch to triceratops and destroy the orange wall. In the cave you will find the sixth minikit.

Minikit #7

Minikit #7 - Isla Sorna | Jurassic Park - The Lost World - secrets - Jurassic Park - The Lost World - secrets (missions) - LEGO Jurassic World Game Guide & Walkthrough
Minikit #7

Another minikit can be found near the stegosauruses. As Grant, walk to the pile of ground and dig up the brick from it. Then, switch to Udesky, take the brick and follow its trail. It will lead you to another minikit.

Minikit #8

Minikit #8 - Isla Sorna | Jurassic Park - The Lost World - secrets - Jurassic Park - The Lost World - secrets (missions) - LEGO Jurassic World Game Guide & Walkthrough
Minikit #8

Eighth minikit can be found next to the seventh. As Ellie, walk to dinosaur's excrements and dig the minikit from it.

Minikit #9

Minikit #9 - Isla Sorna | Jurassic Park - The Lost World - secrets - Jurassic Park - The Lost World - secrets (missions) - LEGO Jurassic World Game Guide & Walkthrough
Minikit #9

Another minikit can be obtained by destroying dinosaur's nests. The nests have shield, so use a character with a gun (for example, Udesky).

Minikit #10

Minikit #10 - Isla Sorna | Jurassic Park - The Lost World - secrets - Jurassic Park - The Lost World - secrets (missions) - LEGO Jurassic World Game Guide & Walkthrough
Minikit #10

The last minikit can be obtained during the battle with stegosaurus. Walk to the left side and create a winch. After using it you will have to shoot at the shields shown on the picture. The shields will be moving, so it won't be easy. It is best to stand as close to the ducks as possible, it will reduce the time needed for a bullet to reach its target.

Amber #11

Amber #11 - Isla Sorna | Jurassic Park - The Lost World - secrets - Jurassic Park - The Lost World - secrets (missions) - LEGO Jurassic World Game Guide & Walkthrough
Amber #11

Amber can be obtained during the battle with stegosaurus. Walk to the place shown on the picture and wait until he attacks you with his tail. You can also simply change to triceratops and destroy the object. After that you will receive the amber that unlocks dinosaur stegosaurus.

See/Add Comments

You are not permitted to copy any image, text or info from this page.

This site is not associated with and/or endorsed by the Warner Bros Interactive Entertainment or Traveller's Tales. All logos and images are copyrighted by their respective owners.

Copyright © 2000 - 2024 GRY-Online S.A. for gamepressure.com, unofficial game guides, walkthroughs, secrets, game tips, maps & strategies for top games.