
LEGO Skywalker Saga: Best Leia'd Plans - walkthrough LEGO Skywalker Saga guide, walkthorugh
This page of the guide to LEGO Star Wars The Skywalker Saga contains a walkthrough of the Best Leia'd Plans level from Episode 4.
Last update: 11 April 2022
On this page of our guide to LEGO Skywalker Saga, you can find the third part of the Episode IV A New Hope walkthrough. The following walkthrough describes the Best Leia'd Plans level and the accompanying quests. You will find out, among other things, how to bypass the force field, how to confuse enemies in the recording studio, how to find Leia's prison cell, how to free Leia and how to defeat the boss - Dianoga .
That's No Moon
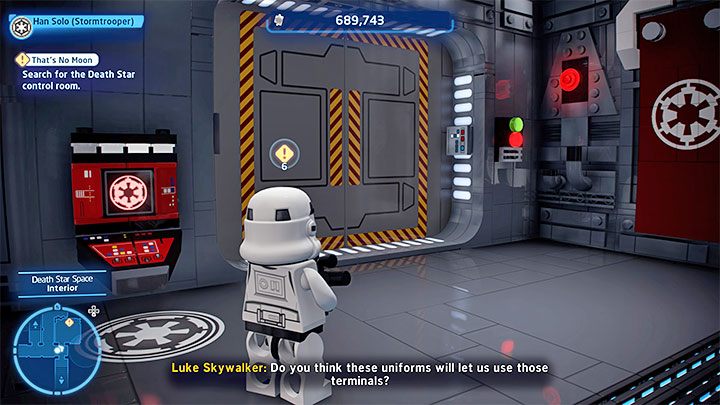
You start this level aboard the Death Star , specifically in its hangar. The heroes use disguises from the very beginning, which means that you won't be attacked by enemies you encounter as long as you don't provoke any sort of fight, that is, by shooting at them or destroying devices in their vicinity.
Follow the markers towards the control room . Take an interest in the door with a red terminal next to it. You have to interact with it and solve a simple puzzle consisting of repeating symbols.

In the new room, take advantage of the fact that the outfits you use allow you to throw grenades . Throw one grenade at the silver objects shown in the picture above.
You will unlock the blue terminal reserved for R2-D2. You have to complete the already known type of mini-game which consists in operating a few rings and matching them together.

By completing the second mini-game, you can press 2 buttons in the place shown in the picture above. Performing this action will unlock the passage to the control room.
Follow the next ongoing corridors until you reach the blue circle that allows you to start the Best Leia'd Plans level.
Best Leia'd Plans - challenges

This level features 3 challenges:
- Boring Conversation Anyway - You have to destroy the console panel to interrupt the conversation with the Imperial captain. The conversation will start after you deal with the guards in the room where you have to solve the riddle with Leia's cell. After the intercom conversation with the captain begins, shoot the central console with any weapon.

- Slight Weapons Malfunction - You have to get rid of the prison block guards like a real Scoundrel. Right after unlocking and using the turbolift, you will reach the room with the guards. Switch to Chewbacca and aim at the structure near the ceiling (check the picture above). Chewbacca will automatically target the vulnerable spot and unleash the structure right onto the enemies.
- Your Weapon, You Will Not Need It - You have to get through the first floor without being detected. You cannot alert the enemies patrolling the main corridors - avoid attacking them as well as destroying objects in their vicinity. If you haven't raised the alarm, the challenge will be completed after using the turbolift.
Best Leia'd Plans - walkthrough

In this stage, Chewbacca will pretend to be a prisoner and if you want to complete one of the challenges of the mission, then avoid alerting the enemies you encounter in the initial part of the mission. You have to choose the left corridor, because the guard won't let you pass through the main one.
You will reach a new force field, but in this case there are 2 ways of dealing with it. The first option is to switch to Chewbacca and aim at the terminal on the other side of the force field. Chewbacca will automatically find a vulnerable spot and sabotage it.

The second option is to use a grenade on silver objects adjacent to the force field (check the screenshot above). Then, you can move two crates in order to climb over them and get to the higher floor.
After you get to the upper floor, reach the place where you can use the grenade again, but this time to destroy a fragment of the floor. Thanks to this you can bypass the active force field.

Regardless of the chosen option, resume your journey. On your way you will encounter an inactive elevator and find out about the necessity to bring it back into operation.
The destination of the trip is the recording studio from which the officer will leave. There is a puzzle to complete here which consists in building a doppelganger of Darth Vader . Destroy the objects in the upper corner of the room, build a figurine and move it to the place where the X sign is painted on the floor.

Thanks to your efforts, the turbo lift is working again . Return to the elevator (picture above). You can enter it immediately and press the button to complete the journey to the highest floor.
There is a group of guards in the new room. You can get rid of them by using Chewbacca's crossbow and targeting at the structure near the ceiling (thanks to this you will complete the challenge which we described it in the previous section of the walkthrough) or by using conventional combat methods.

After defeating the first group, a conversation with the Imperial captain will start. You can listen to it until the end or destroy the central console (to complete the next challenge). Expect reinforcements, but they won't cause any major threat.
Ultimately, you have to interact with the target monitoring console . Switch to camera 1, that is, to Leia's cell. Note the symbols behind Leia.

You have to complete a simple symbols puzzle . Approach the buttons on the left and use them to select the same symbols that are visible in Leia's cell. By entering them correctly you will disable the force field. Now you can reach the cell where Princess is being imprisoned.
At the end of this stage, you will come across Dianoga boss .

This foe is not difficult. However, there are two important facts about it. In order to weaken it, you have to shoot the eye at the end of one of the tentacles. You can ignore all other tentacles at the same time, because attacking them will not deprive the boss of health points.

The boss will try to catch the heroes . You cannot defend yourself from being caught - you have to switch to another character and attack the tentacle that entangles your companion.

In the second stage of the duel you have to avoid the red circles on the ground that symbolize even more attempts of catching the hero. Run away from them and wait for the boss to finish this type of attack.

After the boss has very few health points left, the tentacle with the eye will put on a silver helmet . You have to throw a grenade at it in order to destroy it.

After dealing with the boss you also need to avoid being crushed . Destroy nearby objects and wait for a building icon to appear next to a group of them. You will build a horizontal object that can be used to temporarily stop the crushing device. The game will trigger a cutscene that ends this level.