
Stage 16 (Inside Information) | Main Stages - Collectibles LEGO The Hobbit Guide
Last update: 11 May 2016
Unique treasure 1/4

Requirements: flail (e.g. Dori)
Way to obtain: Remain in the starting point for the sixteenth stage and use the flail on the nearby interactive catch. After you rip the catch off, pick up the collectible.
Reward: Dale Standard
Minikit 1/10
Requirements: Morgul Blade (Sauron)
Way to obtain: While exploring the treasure, look out for a side path to the area in darkness. Switch to Sauron here and use his blade to pave the way to the minikit.
Minikit 2/10

Requirements: wall climb (e.g. goblin)
Way to obtain: While exploring the treasure (right after the first time you slide down) keep looking around for the interactive wall on the left, behind interactive objects. Smash the objects in the area and switch to the goblin. Grab on to the wall to reach the next collectible.
Minikit 3/10

Requirements: spade (e.g. Fili), axe (any dwarf)
Way to obtain: During the exploration of the treasure (soon after the second time you slide down) keep looking around for the spot shown in the above screenshot, where there is a key buried. Use spade to dig it out.

Before you pick up the key, clear the path ahead for yourself (you need to smash the cracked plate and hold down the building key/button). Only then, move ahead. After you walk into the next area, find a chest on the left and open it with the key.
Minikit 4/10

Requirements: slingshot (e.g. Ori)
Way to obtain: Return, for a moment, to the previous area, i.e. to the one where you dug up the key connected with the third minikit. Switch to a character with slingshot here and aim at the target on the right. You need to hit it several times, with pebbles fired from the slingshot. Wait for the pans of the large scales move and collect the minikit.
Minikit 5/10

Requirements: staff (any wizard)
Way to obtain: During the exploration of the treasure (right after the last time you slide down), note the blue catapult on the left and fire a magic projectile at it. This will allow you to obtain a minikit. Note - up until the moment in which you collect the minikit, do not approach the white artifact on the right (Arkenstone)!
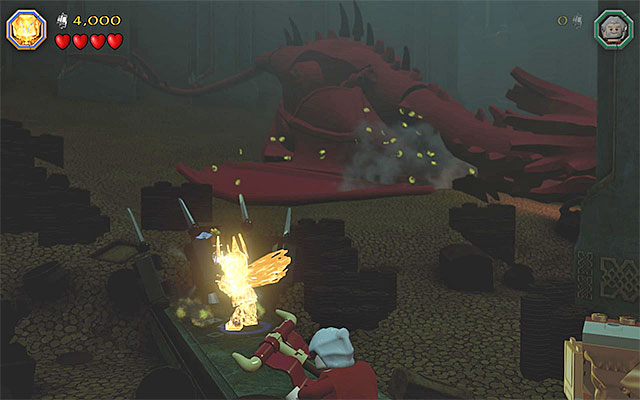
Minikit 6/10

Requirements: flail (e.g. Dori)
Way to obtain: After you walk to the large chamber with inactive furnaces (the beginning of the second part of the stage connected with defeating Smaug), switch to the character with flail and aim at the catch on the right. wait for the character to grab that catch and switch to another character. Jump towards the ally to put weight on the chain and make the minikit appear
Minikit 7/10

Requirements: staff (any wizard)
Way to obtain: wait until the game teleports you to the second part of the large chamber with furnaces (the tower with a mechanism on its top). Switch to any of the wizards here and explore the area to the left of the main tower. You need to enter the area in darkness and collect the item hidden there.
Unique treasure 2/4

Requirements: bow (e.g. Kili or any elf)
Way to obtain: You need to reach the very top in the second area of the large chamber. DO NOT USE the mechanism here and select bow instead. Aim the arrow at the nearby target, thanks to which an unique treasure will fall down.
Reward: Cluckarang - this item works just like the boomerang, i.e. it can be used to smash bricks over distance and it always returns to the thrower.
Unique treasure 3/4

Requirements: staff (any wizard)
Way to obtain: wait until you are transferred to the third area in the large chamber with furnaces (three targets and colorful circles). Switch to any wizard here and use the staff to destroy the small cover, behind which there is the collectible.
Reward: Doily Shield
Minikit 8/10

Requirements: slingshot (e.g. Ori)
Way to obtain: After you solve the puzzle with the three targets, do not use the table on the right yet. Instead, repeat the puzzle, whose solution has been presented in the above screenshot - above the target on the left, there needs to be a red circle, a blue over the middle one and a red above the one on the right. If you have done everything correctly, there will appear the minikit, on the left.
Schematic 1/1

Requirements: The Ring
Way to obtain: After you are promoted to the last location connected with defeating Smaug, start by smashing the objects on the lowest level. Then, switch to Bilbo, put on The Ring and locate the schematic on the ground.
Reward: Mithril Firework Bow Schematic
Minikit 9/10

Requirements: bow (e.g. Kili or any elf)
Way to obtain: After you are promoted to the last location connected with defeating Smaug, select bow to hit three different spots and extend the flags, as a result. Te first spot has been shown in the above screenshot and it is located on the left. Note - if the flag does not unfold, try changing your position a little and fire again. Unfortunately, the game is quite "picky" when it comes to the spot in which you use the bow.

The second flag can also be unfolded while staying at the lowest level and it is located to the right of the central structure.

The final, third flag can be unfolded only towards the end of the climbing over the central structure. The spot in which you need to fire the bow has been shown in the above screenshot. For unfolding all of the flags, you will be rewarded with a minikit.
Unique treasure 4/4

Requirements: Saruman's staff
Way to obtain: After you get to the final location connected with defeating Smaug, explore the area to the right of the central structure. Switch to Saruman here and use Saruman's Staff to destroy the small mithril cover with the treasure behind.
Reward: Dragon Hat - illuminates the nearest area and starts fires
Minikit 10/10

Requirements: bow (e.g. Kili or any elf), far jump (any elf)
Way to obtain: You need to reach one of the higher levels of the central structure (the one with the last, third flag). Use the bow here, on the slots to the right. After you stick the arrows into the slots, switch to any elf and start jumping towards the bars, thanks to which you will make it over to a small ledge with the last minikit on it.
Master Burglar
In order to obtain the Master Burglar Status, you need to amass, at least, 100000 studs. You can achieve that only in the Free Play mode. Try to destroy, thoroughly, all of the elements in the areas and complete the building minigame, as well as possible. Do not worry if you, towards the end of the mission, still have some of the points left, because you can find two violet coins (20000 studs) at the last minikit.