
Stage 15 (On the Doorstep) | Main Stages - Collectibles LEGO The Hobbit Guide
Last update: 11 May 2016
Minikit 1/10
Requirements: -
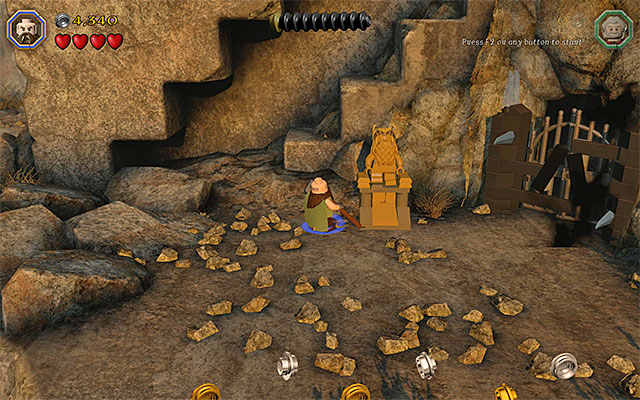
Way to obtain: In total, you need to destroy five statues of dwarves (use any weapon) and a handicap here is that they are quite far away from each other. The first statue is close to the starting point for the fifteenth stage. At the first opportunity, you need to take the path down, thanks to which you will reach a big ledge with the statue. As for the rest of the statues, you need to remember about them, and their whereabouts have been provided below.

The second statue is on one of the ledges above (at this point, the game starts a short cutscene that suggests the necessity to solve a puzzle nearby).

The third statue is to the left of the above one. You pass it by on your way to the interactive manhole.

The fourth statue is to the right of the place, where you complete the puzzle, i.e. of the colorful targets that you hit with pebbles fired from slingshot.

You find the last, fifth statue soon after you complete the puzzle and go left. It is on one of the bigger ledges so, you cannot miss it.
Gain access to the cave

While completing the fifteenth chapter of the game in the story mode, you have been unable to explore the small cave. While you are replaying the fifteenth mission in the Free Play mode, this is available and even required, because there are many of the collectibles there, which you are looking for. After you start the mission, at the first opportunity, you need to take the path downwards. Stop on the bigger ledge (there is the first one of the five statues here) and switch to Sauron. You need to use the Morgul Blade which he is equipped with, to unlock the passage shown in the above screenshot.
Minikit 2/10

Requirements: far jump (any elf)
Way to obtain: Explore the left side of the optional cave and stand in the green point with yellow leaves. Switch to any elf here and jump to reach the successive ledges above. Finally, take a leap towards the rope on the right, because this is where the minikit is.
Minikit 3/10

Requirements: -
Way to obtain: Explore the left side of the optional cave and smash all of the interactive objects. Hold down the building key/button and wait for a long beam to be built. Climb onto it and collect the minikit ate the end of the beam.
Unique treasure 1/4

Requirements: staff (any wizard)
Way to obtain: Explore the central part of the cave. There is a locked gate here. You need to cut through it, by using any cave and firing a magic bolt at it. Walk into the new area and locate the unique treasure.
Reward: Pom Poms
Minikit 4/10

Requirements: -
Way to obtain: Explore the area past the gate in the optional cave, where you found the first unique collectible, described above. There also is a key here, which you need to pick up. Go left and smash all of the objects in the area. You can now use the key on the container shown in the above screenshot and collect the minikit.
Unique treasure 2/4

Requirements: setting on fire (e.g. Sam)
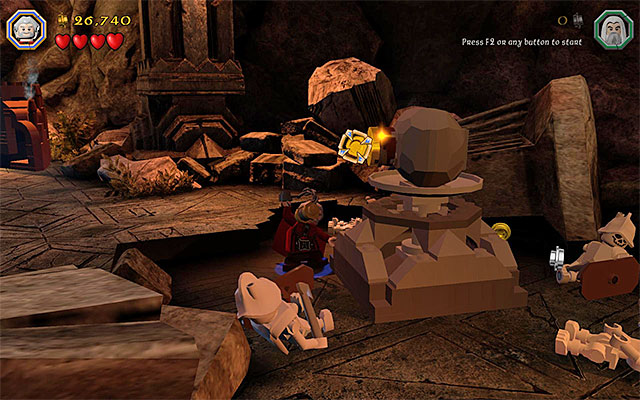
Way to obtain: Explore the right side of the optional cave. You need to smash all of the objects in the area and hold down the building key/button, thanks to which toy will build a miniature stronghold. Switch to the character that can set fire, stand on the place and light a fire. After several moments, you will be able to collect the unique treasure.
Reward: Breaduchet - the functioning of this item is identical with that of the regular slingshot but, instead of pebbles, it fires loaves of bread.
Minikit 5/10
Requirements: flail (e.g. Dori)
Way to obtain: Explore the right side of the optional cave and find the golden interactive catch. Reach for that catch, using flail, and rip it off, to obtain the minikit.
Minikit 6/10

Requirements: The Ring
Way to obtain: Right after you get through one of the manholes, you will have to smash a cracked plate. After you do that, go downwards. Locate the area shown in the above screenshot and switch to Bilbo. You need to put on the ring, which the hobbit is equipped with and obtain the minikit.
Unique treasure 3/4

Requirements: wall climb (e.g. goblin)
Way to obtain: First, you need to reach one of the larger ledges, i.e. the one at which the game starts a short cutscene, which suggests that you will soon need to solve a puzzle. Take a look around (there is the second dwarf statue here) and locate the spot where you need to use the spade. After you dig new objects out, hold down the building key/button, thanks to which you will complete the climbing wall.

Switch to the goblin and start climbing over the wall. This way, you will reach a big branch, to which you need to jump over. walk to the left and throw the collectible off the tree. Now, jump down to a lower ledge and pick up the collectible.
Reward: Dragon Kite - the functioning of this item is identical to that of a regular flail
Minikit 7/10

Requirements: Buddy-Up
Way to obtain: Go left of the area, where you found the most recent collectible (along your way, you will be passing by the third dwarf statue) and jump down to the bridge below, after a while. Here, you will find a big cracked plate and you can cut through it, only by Buddying-Up. Make sure that you pair up two of the characters and smash the plate with them. You can now access a small recess and collect the "invisible" minikit. Note - if the game does not pair up two of the playable characters, make sure that you have chosen the "standard" characters (e.g. two dwarves) for that. You need to obtain the collectible still before the puzzle with the targets, because that will raise the bridge.
Minikit 8/10

Requirements: Saruman's staff
Way to obtain: Explore the area to the right of the puzzle with the colorful targets (there is the fourth dwarf statue around). You should notice the mithril barricade here. Switch to Saruman and use the staff that this character is equipped with (Saruman's Staff) to smash the barricade. walk into the small area and collect the minikit.
Minikit 9/10

Requirements: bow (e.g. Kili or any elf), far jump (any elf)
Way to obtain: After you solve the puzzle with the targets, jump down and walk over to the left, over the bridge that has just been raised. Stop in the spot shown in the above screenshot (right next to the final, fifth, dwarf statue) and use the bow on the interactive slots above. After you fire two arrows at them, switch to any of the elves and jump towards the first bar. Move to the right now, thanks to which you will soon reach the rope with the minikit.
Minikit 10/10

Requirements: -
Way to obtain: You need to reach the top stone ledge, where you get to watch a short cutscene. Go towards the bottom of the screen and start smashing the objects near the edge. Approach, then, the hopping bricks and hold down the building key/button, thanks to which you will build the passage to the last minikit.
Schematic 1/1

Requirements: bow (e.g. Kili or any elf), far jump (any elf)
Way to obtain: Start the puzzle that consists in raising platforms and walking over them, as another character. Stop after you reach the last platform, shown in the above screenshot. First, use bow to stick arrows into the three slots on the left. After that, switch to an elf and start jumping towards the bars, thanks to which you will grab the schematic in mid-air.
Reward: Mithril Hammerhands Schematic
Unique treasure 4/4

Requirements: staff (any wizard)
Way to obtain: You need to reach the ledge with the mechanism, whose using ends the fifteenth mission. Before you use the mechanism, switch to any of the wizards and go towards the background. walk into the dark area and collect the unique collectible from there.
Reward: Friendship Slippers - any attempt to Buddy-Up results in the characters hugging.
Master Burglar
In order to obtain the Master Burglar Status, you need to amass, at least, 80000 studs. Since this limit has been set high, it is best to obtain this status, as late as in the Free Play mode. There are two factors that speak for that - only in this mode is the additional cave available and at many of the collectibles which are more difficult to get, there are blue an violet studs.