
Stage 10 (Flies and Spiders) | Main Stages - Collectibles LEGO The Hobbit Guide
Last update: 11 May 2016
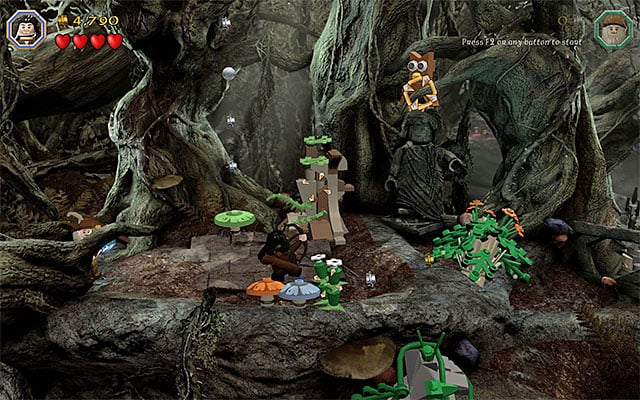
Minikit 1/10

Requirements: the ability to heal animals (e.g. Radagast)
Way to obtain: Remain in the point where the tenth stage started and switch to Radagast. You need to heal the crab-like creature that you find on the right. For that, you will be rewarded with a minikit.
Minikit 2/10

Requirements: bow (e.g. Kili or any other elf), slingshot (e.g. Ori), staff (any wizard)
Way to obtain: You need to drive away a total of five different owls that you run into, while exploring the Dark Forest. Each time, you need to use the bow. The first owl is on the tree, close to the starting point for the tenth stage. A sort of a handicap is that more owls are further into the mission so, you need to remember about them, while exploring this location. Their whereabouts have been provided below.
You run into the second owl after a while, after you walk over the large fallen tree.

The third owl can be found shortly after setting the barricade on fire (this is required to unlock the path ahead). It is in the area in which you push the big block, down to the water.

The fourth owl is in the location to the right of the two platforms that you spin using the slingshot.

You can reach the last, fifth, owl soon after you make it over to the second spinning platform. Before you take the path towards the exit, you need to jump to the ledge on the left and smash the blue barricade, with any staff. All of these actions have been described in the description of the obtaining of the first unique treasure.
Minikit 3/10

Requirements: spade (e.g. Fili)
Way to obtain: While exploring the first part of the forest, (still before setting the barricade on fire) keep looking around for the spot where you can use the spade. Using it, will allow you to obtain the knob.

With the knob, approach the nearby mechanism and interact with it. This will result in the appearing of a boat at the shore and you need walk onto it VERY CAREFULLY (it is easy to fall into water here). Steer the boat towards the background, where you will find the minikit.
Unique treasure 1/4

Requirements: slingshot (e.g. Ori), staff (any wizard)
Way to obtain: During the exploration of the first part of the forest, stop in the location with two platforms, which you spin using the slingshot. Reach the second one and jump over to the ledge on the left (the above screenshot). Here, you need to use the staff to smash the blue objects in your way.

Take another jump and land on the ledge with three mushrooms. You will have to solve a simple puzzle here, which consists in jumping onto the mushrooms, thanks to which they change colors (one jump onto a mushroom equals one change). The solution has been shown in the above screenshot - the mushroom on the left needs to be green, the middle one needs to be blue and the one on the right - red. Wait for a large mushroom to surface from below the ground and pick up the collectible.
Reward: Mirkwood Phial - distraction of others and illuminating of areas
Note - In this location, there also is the last, fifth owl connected with the second minikit!
Minikit 4/10

Requirements: bow (e.g. Kili or any other elf)
Way to obtain: While exploring the first spider cave (the one where you need to rescue five allies), you need to attack the select spiders with the bow. The first one is close to the starting point and the next four are farther ahead so, you need to remember about them, while reaching the captive allies. The whereabouts of the spiders have been given below.

The second spider is hiding behind the spider web, in the location where you rescue two allies.

The third and the fourth spider are in the main part of the cave, in the location where Bilbo deals with two other creatures, using The Ring.

The fifth spider is close to the manhole to the location, where you rescue the last ally.
Minikit 5/10

Requirements: bow (e.g. Kili or any other elf), long jumps (any elf)
Way to obtain: During the exploration of the first spider cave, stop after you walk through the first manhole. Use the bow here, against the slot above. After the arrow sticks into the wall, switch to any elf and jump to reach it. Jump again and grab the minikit high above, in mid-air.
Unique treasure 2/4

Requirements: Morgul Blade (Sauron)
Way to obtain: After you reach the main part of the cave, allow Bilbo to defeat the spiders and, after you have secured the area, examine the right part of this location. You need to switch to Sauron and use the Morgul Blade to smash the interactive objects.
Reward: Spider Bomb - a swarm of spiders appears, as a result of the explosion
Minikit 6/10

Requirements: climbing walls (e.g. goblin)
Way to obtain: While exploring the first spider cave, stop after you reach the last one, of the five, captive allies. Before you take to freeing him, switch to the goblin and climb up the wall on the left, thanks to which you will reach a minikit.
Minikit 7/10

Requirements: staff (any wizard), the ability to heal animals (e.g. Radagast)
Way to obtain: After you reach the second spider cave (the one where you fight spiders and rescue three more allies) explore the right side. First of all, you need to use the staff of any of the wizards, on the blue objects shown in the above screenshot.

Note that there appeared huge flies, in the cave. In free time, switch to Radagast, approach each fly and heal them with the wizard's ability.

After you have healed both of the flies, mount one of them and start riding it across the cave. You need to wait for new, red, spiders to appear in the cave. Attack them, by pressing the action key/button, at the correct moment. Defeating ten spiders will be rewarded with a minikit and, additionally, from now on, the bigger spiders will stop appearing in the cave.
Minikit 8/10

Requirements: bow (e.g. Kili or any other elf), long jumps (any elf)
Way to obtain: You need to reach the ally on the left, imprisoned in the other spider cave. Just to remind you, you are required to use the bow, use the bow to stick the arrow to the slot and switch to any elf to take a long jump. After you have dealt with the spider, in a direct fight, make sure that you are playing as an elf and jump towards the minikit hovering near the ledge on the left.
Schematic 1/1

Requirements: long jumps (any elf), axe (any dwarf)
Way to obtain: You need to reach the middle ally, kept in the second spider cave. Just to remind you, you are expected to use one of the elves, in order to take the jump and grab to the edge above. After you defeat the spider, in a direct fight, switch to the character with axe and smash the cracked plate. Behind the plate, there is a schematic.
Reward: (Mithril Bomb Blade Schematic)
Gain access to the third cave

While completing the tenth chapter of the game in the story mode, you have been unable to explore the third cave, neighboring the one, where you liberate the three captive allies. While replaying the tenth mission in the Free Play mode, this is available and even required, because there are, as ,many as, four collectibles in the cave. First, explore the left side of the second cave. Switch to Saruman here and prepare his staff. Enter the aiming mode (hold down the action key/button) and aim at the silver, mithril objects shown in the screenshot. You can now walk into the new location.
Minikit 9/10

Requirements: -
Way to obtain: Examine the left side of the third cave. You need to locate the skeleton with a knob on it.

Collect the knob and take it to the mechanism, in the center of the cave. Click the knob in place and interact with it. Doing that will result in all the nearby skeletons dancing. Note that there is a minikit on one of them and you can collect it immediately.
Minikit 10/10

Requirements: long jumps (any elf)
Way to obtain: Explore the left side of the cave. There is an inflatable castle here. Switch to any of the elves and start bouncing off the castle, thanks to which you will reach a minikit high above, after several moments.
Unique treasure 3/4

Requirements: long pole arm (e.g. Bifur)
Way to obtain: explore the central part of the third cave. There is an interactive plate here, which one of the characters, armed with a pike or a spear, needs to stand on. (this may be, e.g. Bifur). After you do that, switch to the second character. Climb onto the ally on the plate and jump to reach the rope above. Climb over the rope, to the very top, and jump towards the nest on the right, where there is the collectible.
Reward: Staff of Wisdom - the function of this staff is identical as that of any other staff
Unique treasure 4/4

Requirements: fishing rod (e.g. Bilbo)
Way to obtain: Explore the right side of the third cave and smash the interactive objects here. Hold down the building key/button and wait for a wooden plank to be built. Switch to the character with the fishing rod, stand on the plank and complete the fishing minigame, thanks to which you will obtain the unique treasure.
Reward: Dazzle Wig - confusing of the other characters
Master Burglar
In order to obtain the Master Burglar Status, you need to amass, at least, 85000 studs. It is best to obtain the required number of points in the Free Play mode, because this is when you unlock the third cave. As always, you should remember to smash the interactive elements in the area and about keeping an eye out for the more valuable studs (two violet studs are in the forest) and about avoiding losing all of the hearts, while fighting the spiders.