
Stage 5 (The Troll Hoard) | Main Stages - Collectibles LEGO The Hobbit Guide
Last update: 11 May 2016
Unique Treasure 1/4
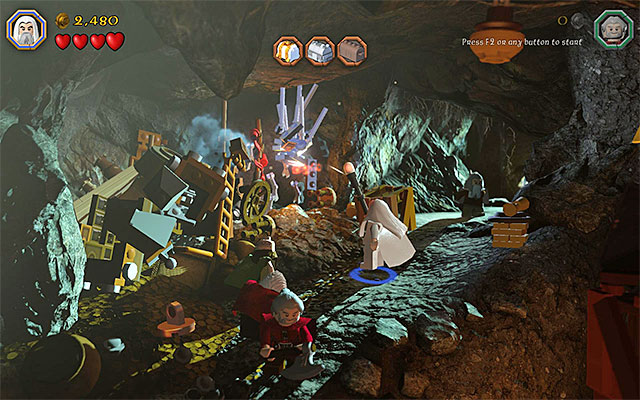
Requirements: Saruman's staff
Way to obtain: Approach the unavailable exit from the cave that the fifth stage starts in. Switch to Saruman here and use the Saruman's Staff to destroy the mithril barricade on the left. You can now examine the pile of rubble, where you will find the Unique Treasure.
Reward: Archaeologist's Pick - this item allows you to collect more studs and resources, after you complete mining minigames.
Minikit 1/10
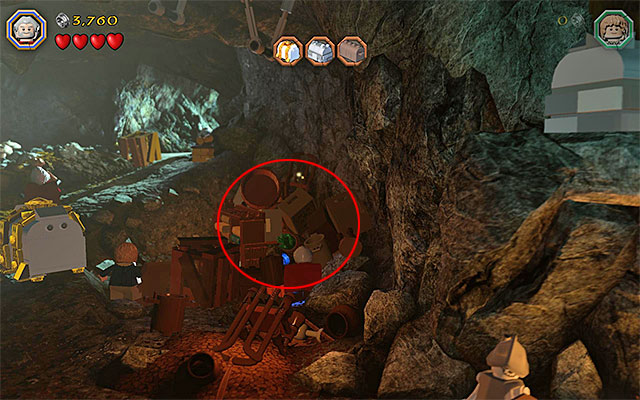
Requirements: flail (e.g. Dori), axe (any dwarf)
Way to obtain: Obtaining the first one of the minikits is connected with bringing down the golden chest, which is required to obtain one of the elf swords. Just to remind you, you need to build an interactive catch and grab it, as two characters. After you do that, you additionally need to cut through the cracked plate, using the axe. After the golden chest falls to the ground, ignore it and check out the area to the right (the above screenshot) and you will find a well-hidden minikit.
Minikit 2/10
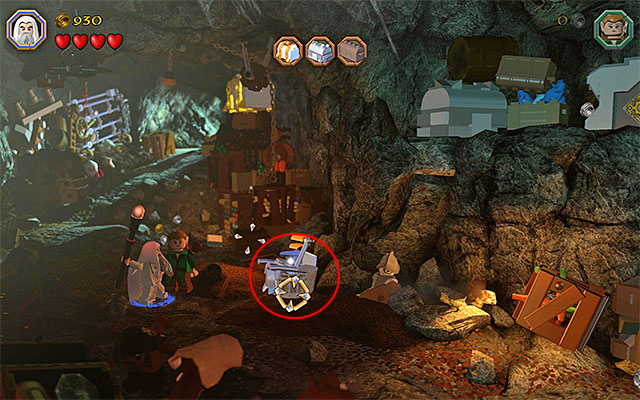
Requirements: Saruman's staff, The Ring, flail (e.g. Dori)
Way to obtain: Remain in the left part of the cave. Start by switching to Saruman and using the Saruman's Staff, with which to hit the small mithril bowl. After the bowl falls apart, switch to Bilbo and put on The Ring. Hold down the building key/button, near the hopping bricks, and wait for a new catch to be built. Finally select the character with flail and reach for the catch. Ripping off the catch will result in obtaining a minikit.
Schematic 1/1

Requirements: spade (e.g. Fili)
Way to obtain: Examine the central part of the cave. There is a buried collectible here and you need to use the spade. Thanks to this, you will dig up a schematic.
Reward: Mithril Skeleton Crank Schematic
Minikit 3/10
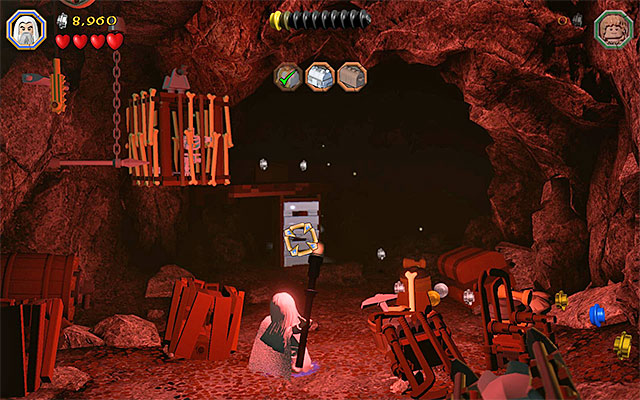
Requirements: Saruman's staff
Way to obtain: As Saruman, enter the dark area in the cave and use the Saruman's Staff to smash the mithril door on the right ( it is best to aim manually here) Behind the door, there is a minikit.
Minikit 4/10

Requirements: staff (any wizard), wall climbing (e.g. goblin)
Way to obtain: As any of the wizards (e.g. Saruman) enter the dark part of the cave and leave him there. Switch now to the goblin. Walk into the same cave, which is now illuminated by the wizard (the staff). In the area indicated in the above area, start climbing over the wall, which will allow the goblin to reach the minikit.
Minikit 5/10

Requirements: -
Way to obtain: Explore the left side of the meadow, where you save the rabbits of Rhosgobel. The minikit that you are looking for is behind one of the bushes. .
Unique Treasure 2/4

Requirements: bow (e.g. Kili or any elf)
Way to obtain: Explore the left side of the meadow and use the bow to hit the target. Wait for the Unique Treasure to drop to the ground and pick it up.
Reward: Trophy Mallet - the purpose of this item is the same as that of the Warhammer
Minikit 6/10

Requirements: bow (e.g. Kili or any elf)
Way to obtain: You need to smash five big yellow flowers around the meadow. Destroy the successive flowers with the bow. After you have destroyed all of them, you will receive a minikit automatically.
Unique Treasure 3/4

Requirements: Warhammer (e.g. Dwalin), The Ring, axe (any dwarf)
Way to obtain: Make it over to the ledge above, neighboring the glade, i.e. the one where one of the wargs is keeping a rabbit, Just to remind you, you need to use the Warhammer to push the big block over to the left and jump onto it. After you have driven the enemy away, switch to Bilbo and put on the Ring. Start building in the spot shown in the above screenshot. After you have built a cracked plate, smash it with axe.
Reward: Bananarang - works just like a regular boomerang, i.e. can be used to smash bricks over distance and it always returns to the thrower.
Minikit 7/10

Requirements: -
Way to obtain: During the chase scene, in which Radagast takes part, keep looking around for the minikit and ride over it to collect it.
Minikit 8/10

Requirements: -
Way to obtain: During the chase scene, keep looking around for the objects that are similar to the one shown in the above screenshot. In total, you need to destroy five of them (collide with them), thanks to which you will receive the minikit automatically.
Unique Treasure 4/4

Requirements: bow (e.g. Kili or any elf), long jumps (any elf)
Way to obtain: While completing the scene parallel to Radagast's chase, select the bow from the inventory and fire it against the interactive slot in the wall. Switch to any elf now and start jumping towards the successive arrows. Along your way, an Unique Treasure drops and you will have to return down to get it.
Reward: Paint Bow - apart from its basic function, this bow also spills pant over characters
Minikit 9/10

Requirements: staff (any wizard)
Way to obtain: During the scene parallel to the Radagast's chase scene, you need to stop where a big portion of the wall was smashed. Use the staff of any of the wizards and enter the small dark cave.
Minikit 10/10

Requirements: Saruman's staff, ability to set fire (e.g. Sam), slingshot (e.g. Ori)
Way to obtain: Along your path to the place where you fight the leader of the warg riders, stop in the spot shown in the above screenshot. Switch to Saruman here and use the Saruman's Staff, to destroy the mithril object. Note that a plate appeared here. You need to stand on it, as the character that can set fire (e.g. Sam) and wait for the flames to consume the wooden barricade.

Switch to a character with slingshot now and start firing pebbles at the targets and try to bring about the situation, where above the above the target on the left, there appears a red circle, and a blue one above the one on the right. Finally, you need to use the slingshot to hit the targets resembling the orcs, which appear on the hill - aim manually and always wait for the given target to be fully revealed. One of the targets is hidden behind the rock on the right and its location has been shown in the above screenshot. Performing all of the above actions will grant you access to the minikit.
Master Burglar
To obtain the Master Burglar Status, you need to amass, at least, 65000 studs. Unfortunately, this is difficult, because the point limit is steep. First of all, try to complete the building minigame, in the forest ideally, and to score 20000 studs at it. Apart from that, you should remember to smash all of the objects around you and try not to lose the entire health bar too often, while playing the scene with the orcs and wargs.