

Hitman 3: The Tour - Mendoza, walkthrough, mission story Hitman 3 guide, walkthrough
Last update: 11 February 2021
Key points of Hitman 3 - Mendoza - Important locations
Important locations
On this page of the Hitman 3 guide you'll find a walkthrough of the mission story The Tour in a mission in the Mendoza region. This walkthrough will tell you how to get Corvo Black's disguise, how to start the tour, what the options for killing Tamara during the tour are as well as how to complete the tour and unlock the hidden story mission.
Different ways of assassinating the two main mission targets in Mendoza, Don Yates and Tamara Vidal, have been described in separate sections of this guide.
- The general objectives of the mission story
- Assume Corvo Black's identity
- Talk to the receptionist and join the other guests
- Find Vargas
- Disguise yourself as a winery worker
- Acquire a grape-picking knife
- Harvest the grapes and deliver them to Vargas
- Return to Corvo Black's disguise and begin the tour
- Winery tour - 3 ways to eliminate Tamara
- Complete the tour and unlock the Closing Statement mission story
The general objectives of the mission story
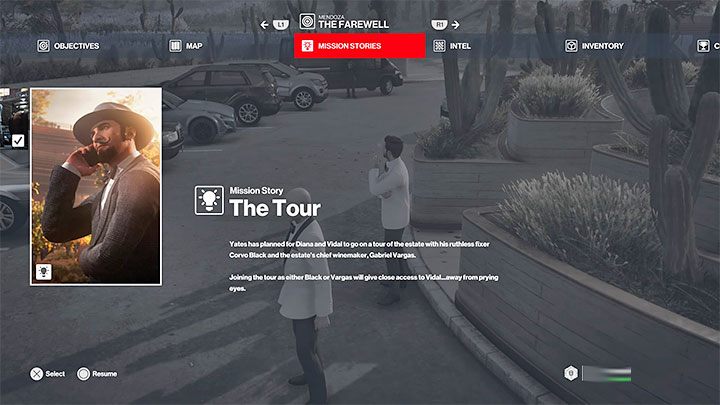
The quest involves taking part in a winery tour, during which there is an opportunity to murder Tamara. For the purpose of this story mission, Agent 47 will assume the identity of Corvo Black. The protagonist will accompany Diana and Tamara as they are guided through the winery by Gabriel Vargas.
There is also an option to assume the identity of Vargas, but it is not directly related to the mission story. The best way is to play through the tour twice and get only the disguise of Vargas instead that of Black.
Assume Corvo Black's identity

You can start the mission without a disguise. Reach the reception room in the winery building (no. 34 on the map). Corvo Black should be standing by the railing talking to the head of security. Wait until their conversation is over and start following Black (remember that he can recognize Agent 47 even in his default outfit).
Important note: This walkthrough assumes that you took care of the story quest at the beginning of this mission. If you have ignored it and want to return to it later on, then in the meantime Corvo could have moved to the starting point of the tour (no. 18 on the map). It will still be possible to get him there, though it will be more difficult - you may want to help yourself with a throwing object to pull him away to a more secluded spot.
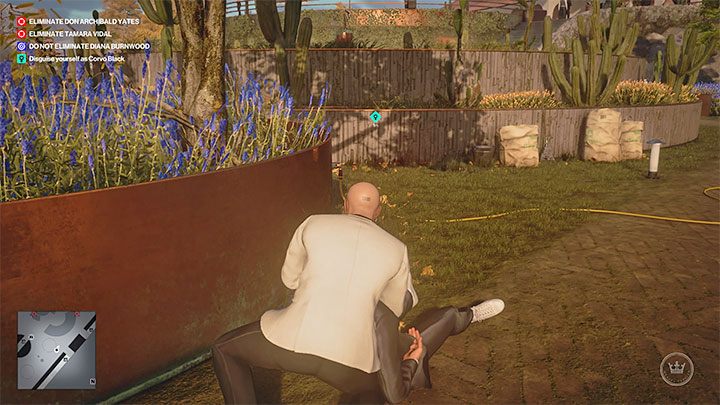
Corvo will head to an area called asado located on level 3 of the winery (no. 41 on the map). Wait until he stops far away from the party guests. Distract him by throwing an object to pull him away even further. Attack him, put on his attire and hide his body in the tall grass.
Talk to the receptionist and join the other guests
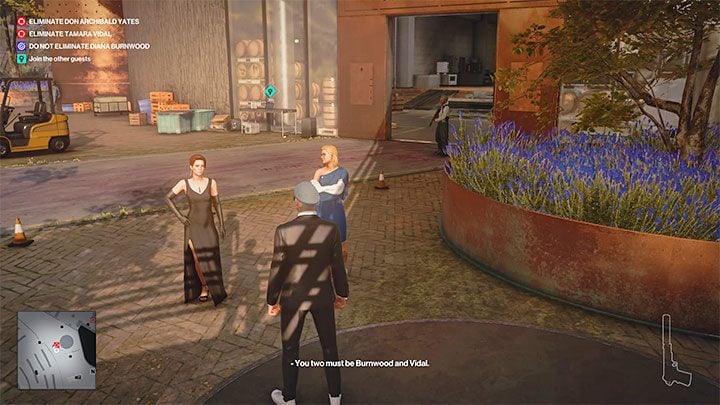
Return to the reception (no. 34 on the map) and talk to the receptionist there. You will learn where the starting point of the winery tour is located.
Take any stairs down to level 0. The starting point of the tour has been planned between the grape fields and the wine production room (no. 18 on the map). You will meet Diana and Tamara there.
Find Vargas
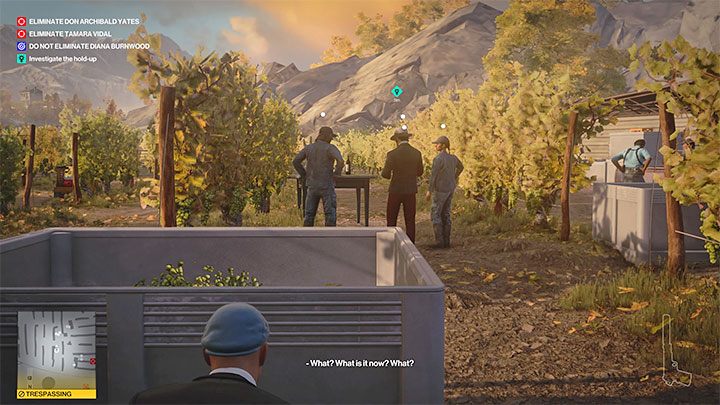
It will turn out that Gabriel Vargas is not present where the tour was supposed to start and, as a result, you will need to find him in the grape fields. You must keep in mind that Corvo Black does not have permission to stay in this area, so a lot of sneaking will be required. Use trees and large obstacles to avoid detection. You can also use instinct to locate people within the area.
Vargas is in the southeastern part of the fields (no. 19 on the map). Eavesdrop on the conversation. You will learn that he wants one of the workers to deliver him three bunches of grapes of a particular type.
Disguise yourself as a winery worker
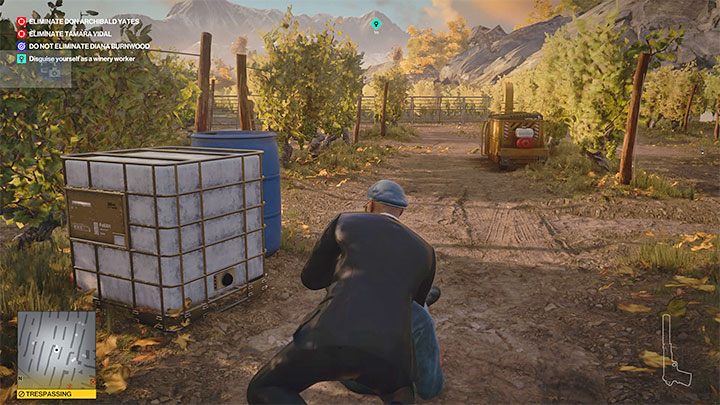
You can attack any winery worker, but the easiest way to attack is to select one of the people who have attended the meeting with Vargas (see image above). There is also a container nearby where you can hide the body and avoid the risk of possible detection later on.
Acquire a grape-picking knife
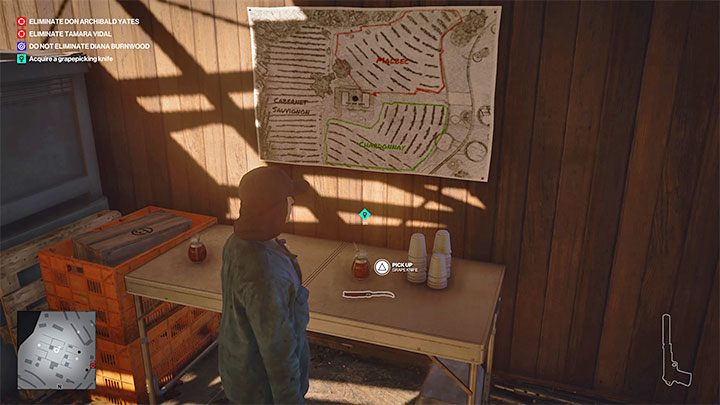
You can get the grape-picking knife at several different locations on the map. The nearest location of this type is a shed located in the grape fields (no. 20 on the map). At the entrances to the shed there are some guards who can spot Agent 47 even in disguise, but luckily, you can sneak behind their backs without having to distract them.
Harvest the grapes and deliver them to Vargas
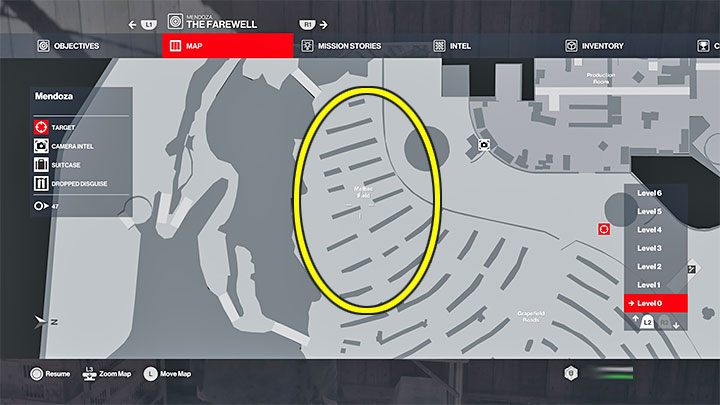
An important feature of the new mission objective is that Vargas asked for bunches of grapes of the right kind, which is Malbec. You must therefore go to a grape field with Malbec grapes, as shown in the attached picture. Conveniently, the fields are marked on the map with their names. Harvest 3 bunches of grapes from any interactive tree in the field. Return with them to Vargas. If you brought him the right grapes, you may now advance to the next part of the mission. Otherwise, you will have to go search once again.
Return to Corvo Black's disguise and begin the tour
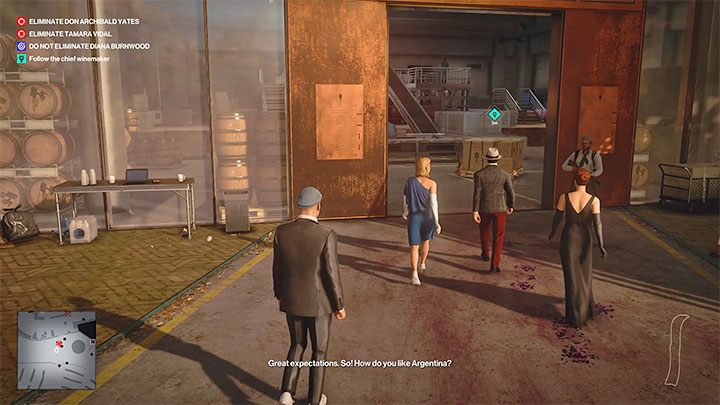
Return to the spot where you left Corvo Black's disguise - it should be where you put on the disguise of the winery worker. Once again, go to the location of your planned trip (no. 18 on the map). The tour will start once Gabriel Vargas arrives.
Winery tour - 3 ways to eliminate Tamara
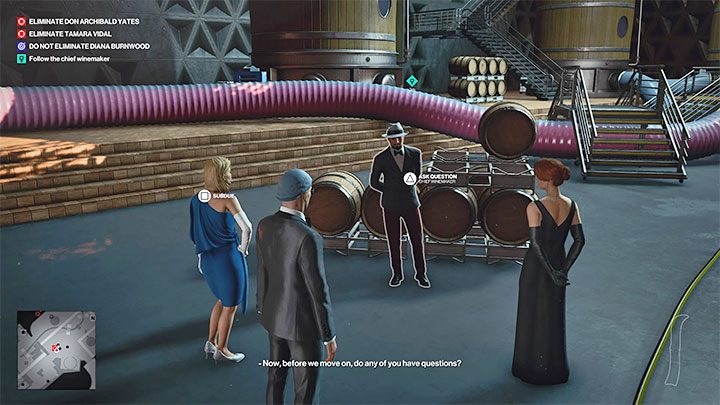
The initial part of the tour is linear - you must follow Vargas, who will talk about the winery. Once you reach the fermentation room (no. 25 on the map), there will be an opportunity to ask Vargas some questions. Save the game here, as it will enable you to (optionally) complete three different ways of eliminating Tamara in various arranged accidents.
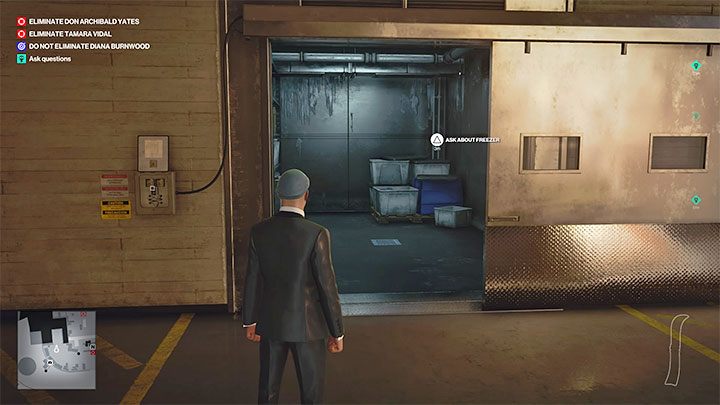
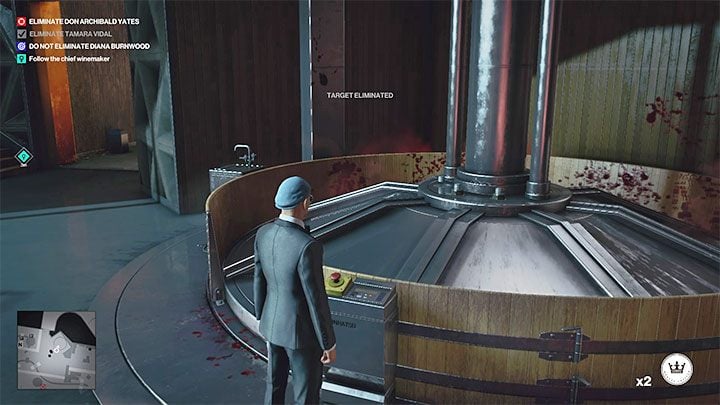
The first possible assassination option is related to the freezer located in the wine production room (no. 23 on the map). On your way there, find the screwdriver stuck into a barrel near the entrance to the room (on the grape field side). Ask a question about the freezer and wait for Vargas and Tamara to go inside.

If you do not want to kill Vargas, use a throwing object and make him leave the freezer. Quickly interact with its mechanism in order to trap Tamara in the freezer. The woman will die after a few dozen seconds and no one will discover her body. This will earn you the Coldhearted Assassination Challenge.

The second possible option is concerned with the grape crusher located in the production room (no. 23 on the map). Press the interaction button to ask Vargas about the machine.
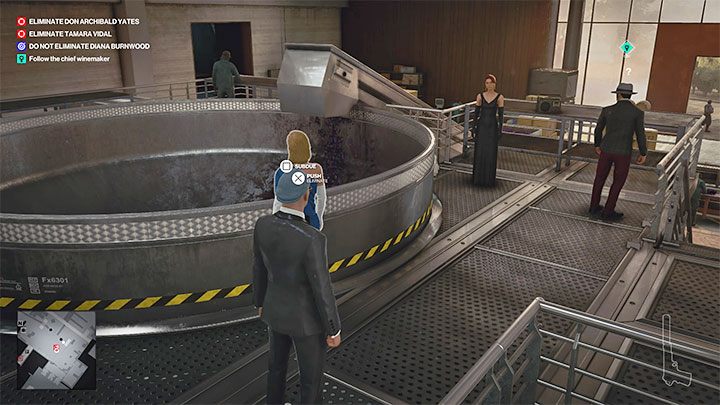
Wait until Tamara appears. Once Vargas and the worker look the other way, push her into the machine. This is the only way not to cause alarm. Tamara's body will be milled. This will earn you the Pulp Friction Assassination Challenge.
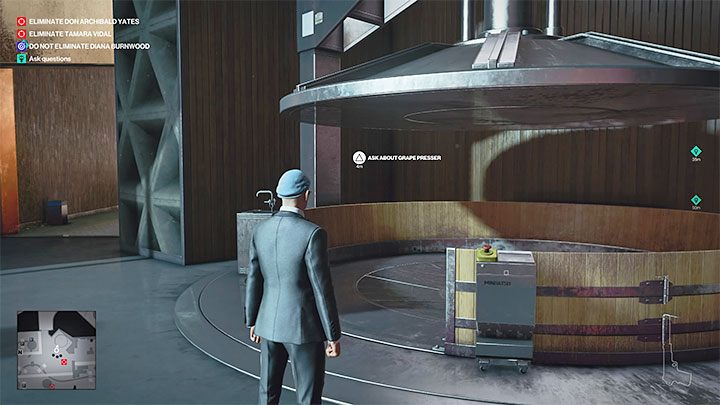
The third possible option is associated with the grape presser located in the fermentation room (no. 25 on the map). If possible, try to interact with it beforehand and remove its block (this is a forbidden action). It will make it easier for you to perform the assassination. Ask Vargas about the presser.
Tamara and Diana will have their picture taken in the presser, then Diana will distract Vargas for a moment. Make sure no one else is looking in your direction and press the button (1 or 2 times) to bring the presser down and crush Tamara with it. Similarly to the other options, this will be treated as an accident.
Complete the tour and unlock the Closing Statement mission story
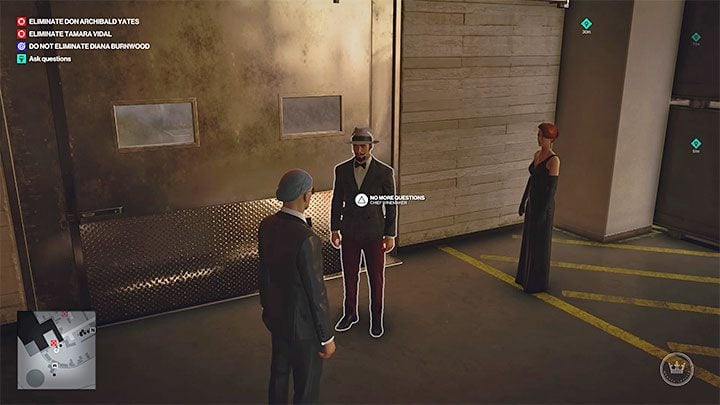
The mission story may end once Tamara dies in one of the "accidents" described above, but it is also possible to continue the mission. To do so, you must speak to Graves again that you have no more questions.
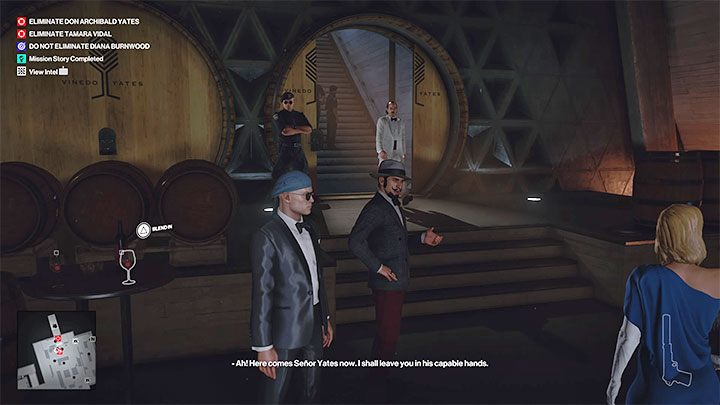
You will reach the barrel room (no. 29 on the map) where Don Yates will appear. The game will unlock the ability to play an additional Closing Statement mission story, which concerns a meeting involving, most of all, Tamara and Yates. This quest has been described in a separate section of this guide.