Guides & Walkthroughs New Guides Popular RPG Action Strategy Adventure YouTube Guides Mobile App
Download Game Guide PDF, ePUB & iBooks

Hitman 3 Guide by gamepressure.com

Hitman 3 Guide

Table of Contents
Hitman 3 - Mendoza - Important locations
Mission starting area. This is an asphalt road leading north, towards a small roundabout. You can pick other starting places when repeating this mission.
Viewing platform - Diana Burnwood. Agent 47 must talk to her at the beginning of the mission and take the invitation from her. Once you've ended the conversation Diana will head towards the winery to meet with Tamara.
Security checkpoint. Two mercenaries are outside and two other inside. You can be recorded by the camera. There's an option to sabotage the extension cord and the water tank (screwdriver is required). There are remotely detonated explosives on the desk.
Grapefield cliff. Unauthorized people aren't allowed to use this path. You can easily obtain a gaucho disguise (local bodyguard) - use a throwable object or poison the drink. There's a poisonous flower nearby - it has identical effects to an emetic rat poison. In the shed (20 on the map) you can turn the flower into a lethal poison.
Path to the grapefield. Unauthorized people aren't allowed to use this path. A single guard (gaucho) is stationed here - you can distract him with a thrown item and hide his body in the bushes.
Roundabout and parking lot. There are many NPC's nearby, including bodyguards and mercenaries. You can find an invitation. You can sneak between cars in the parking lot. You can climb on the roof of the trailer - you'll find a wrench. You can drop down to the garden (12 on the map) from the trailer's roof.
Path leading to the villa. It's guarded by 2 gauchos. You will encounter other enemies on your way to the gate of the mansion. There's a plaque with a QR code nearby - it's a collectible to be photographed with a camera.
Entrance to the winery building. You must show the invitation received from Diana (2 on the map) or found by the roundabout (6 on the map). You can proceed without stopping if you're wearing a proper disguise.
Room next to the parking lot and a tunnel. You can sabotage the fuse box to easily obtain a bodyguard disguise and a gaucho disguise. The tunnel connects the parking lot (6 on the map) with the silos area (10 on the map).
Silos area. You will encounter a lot of gauchos here - they're on the lower level and on the upper balconies. One of them can be poisoned, an enemy from a small building can also be an easy target. You can use the stairs or climb the vertical metal beams. There are snipers on the highest balcony (11 on the map).
Snipers. You will encounter two snipers tied to Eyes of Target mission story on the highest balcony of the silos. You can heavy a role in one of them taking a shot. Alternatively you can take the sniper rifle away from them or show up here with a rifle of your own. You can attempt to kill both mission targets from here.
Lower gardens. They are being patrolled by 2-man squads. You can be recognized even when using a disguise, however there's tons of high grass here. You'll find the spotter's earpiece next to the pick-up truck (it's tied to the snipers from 11 on the map and with the Eyes on Target mission story).
Boatdock. You can easily obtain a mercenary disguise and a gaucho disguise by making the enemies move away from the hut. Inside the hut you'll find a villa key, Yates's boat key, a crowbar, a screwdriver and other loot. Outside you'll find a fishing line (identical use to a fibrewire) and a boat which can be used to leave the map.
Upper gardens. They are being patrolled by 2-man squads. You can be recognized even when using a disguise, however there's tons of high grass here.
Large villa gate. It's guarded by a single mercenary who can identify Agent 47 even when using a disguise. Other mercenaries are nearby.
Villa's iron gate and ledges by the cliff. You can open the gate if you have a key (the nearest one is in the boatdock - 13 on the map) or using crowbar/lockpick. You can hang on to the ledge and move alongside the cliff or climb.
Grape fields. There are 3 different grape fields in the area. You can attack any of the winery workers to collect his disguise. There are faucets in the area to distract nearby people. After you've found a grape knife you can start collecting grapes.
Area where the tour can begin. The Tour mission story is connected to this activity. It's about giving Diana and Tamara a tour of the estate. Corvo Black (a trusted fixer working for Yates) and Gabriel Vargas (chief winemaker) will also attend the tour. Agent 47 can steal the identity of one of them. There's a container nearby helpful in hiding a body.
Vargas. He'll be waiting for one of the winery workers to deliver him some grapes. You can distract him with a water pump, steal his identity and hide his body in a container. You can also deliver him the grapes while dressed as the winery worker.
Grape field shed. You can easily obtain a gaucho or a winery worker disguise. There's a distillation machine here - if you have a poisonous plant with you (from 4 on the map) you can use it to manufacture lethal poison. You'll find a grape knife here.
Ventilation grating. You can use the camera to hack it and then climb the crates. It will allow you to sneak inside the production room.
Plaque. It contains a QR code - it's a collectible to be photographed with a camera.
Production room. The entrance from the grape fields is guarded, but you can use the ventilation grate (21 on the map). You can also get here from other sides. There are several workers on the production line. You can sabotage the freezer door with a screwdriver (it's nearby) to suddenly close it and imprison Tamara (during the tour). You can collect a Fuse Cell and place in in a device, and then turn on the high voltage power outlet. You'll find the winery worker's key here. The fuse box allows to distract the workers. You can throw Tamara inside a grape crusher (during the tour) - gruesome death. There's a toolbox for carrying items here.
Staff locker room and restroom. You can find an unused winery worker disguise and winery worker's key in the locker room.
Fermentation room. You can use a wrench (it can be found in the production room) to sabotage the wine pump and to release the wine from the kegs - this is a part of the Over the Top mission story. There are stairs here leading to the upper balconies of the room. There's a press here - you can unlock the safety mechanism and crush Tamara during the tour. Head of security is here - you can distract him with a thrown item and obtain a unique disguise.
Cinema. You'll find a crowbar, a screwdriver, propane flask and other items. The door to the stash is closed - use a key or crowbar/lockpick. You'll find emetic rat poison in the stash. There's a Branson MD-2 Microphone in the room - it's useful for planning Don Yates assassination (41 on the map). The eastern door is locked (key / lockpick / crowbar) and it leads to exterior balconies (watch out for the camera above the door).
Tech room. A gaucho and a winery worker are here - you can distract them (fuse box) to obtain their disguises. You'll find a Fuse Cell, emetic rat poison, winery worker's key and a Tier 1 Access Dongle here. You can place poison in the ventilation system and start it. You can drop down to the ventilation tunnels (28 on the map).
Ventillation tunnels. You can get here from the tech room on level 1 (27 on the map). There are two gratings in the eastern part of the tunnels and they can be hacked with a camera - Tier 1 Access Dongle from the tech room is needed. Opening the gratings will allow you to reach the wine fridge room.
Barrel room and wine fridge. The Tour (mission story) ends here and Yates shows up here (Closing Statement mission story). You can easily obtain the waiter disguise in the barrel room. Watch out for the cameras above the wine fridge - the best way to access this room is to go through the ventilation shafts (28 on the map). You can the get the waiter and sommelier disguises in the fridge. Input the 1945 code to disable the laseras and to collect a rare wine - 1945 Grand Paladin (it's tied to a challenge and to the Closing Statement mission story). There are all 3 types of "standard" wines here (minor challenge).
Plaque and the area where the sniper kills Tamara. The plaque contains a QR code - it's a collectible to be photographed with a camera. Shooting Tamara is a part of the Eyes on Target mission story. You must first silently eliminate Tamara's three bodyguards and only then command the sniper to take the shot. Tamara's body will be automatically hidden.
Wet floor. You can remove the wet floor warning signs and lead to someone falling down.
Dance floor. You can remain here as a party guest (after showing an invitation in area 8 on the map) and disguise yourself as a waiter. This is the default place to end the mission. You'll find reception entrance and stairs leading to level 2 here.
Shortcut: Backdoor. You must unlock the door from the northern side. This shortcut makes it easier to reach Don Yate's villa, as well as locations under the villa. There are stairs to the south of the shortcut - you can use them to reach levels 0 and 2.
Reception and Fermentation atrium. The balconies above the fermentation room aren't accessible to everyone. You may find out about the Over the Top and The Tour mission stories. You can push someone to a fermentation tank or use it to hide a body (minor challenge). There are two plaques with QR codes in this area - they're collectibles to be photographed with a camera.
Plaque. It contains a QR code - it's a collectible to be photographed with a camera.
Wine tasting room. You can sabotage the fuse box in a small stash room to easily obtain a waiter disguise. You can serve blue wine (Pinot Noir) to Tamara - use emetic rat poison or lethal poison on the wine before you do that.
Bathroom. You can easily obtain a bodyguard disguise by attacking him in one of the cabins. The bodyguard leaves a Security Keycard and a silenced pistol behind. Poisoned Tamara may also show up here.
Security room. You can use the photocopier to distract enemies and attack them in the corridor. This is where you can sabotage the camera footage. You can use the touch panel to temporarily open the wine fridge room (29 on the map) and to release the gas into the barrel room. There's a Security Keycard here - it's helpful in opening the northern door (and other doors on the map).
Secret tunnel and armory. You can sabotage the fuse box and easily obtain a mercenary disguise. There are stairs here leading to the villa's basement (level 3) and a corridor leading to the back paths. You can remove the wet floor sign to arrange a fall. You can explore the armory - you'll find a Tactical Wetsuit disguise (it's used to leave the map), a mercenary disguise (inside a locked locker) and other items.
Back paths and a shrine. You can use the dirt paths to travel behind the villa, but watch out for mercenaries. The shrine is an alternative location to begin the mission.
Asado. This is a public area with a lot of guests. Tamara shows up here and Don Yates may show up here (after starting the pit fire). You can replace the microphone and use the one from the cinema (26 on the map) to prepare a deadly trap for Yates. You can open fragments of the roof and hang by the ledge. Interacting with faucets distracts nearby people. You can easily attack a waiter and get his disguise. There'a s plaque with a QR code here - it's a collectible to be photographed with a camera.
Shortcut: Maintenance door. You can unlock the shortcut only from the north (from the basement). There's emetic rat poison nearby and you'll also find an ince machine - you can distract a waiter. There are stairs here.
Villa basement. It's best to get here from the main floor of the villa or from the secret tunnel (39 on the map). There are mercenaries here and they can recognize Agent 47 even in disguise - it's best to distract them. You'll find a safe - the keycode is 2006. The report from the safe can be given to Yates's wife so that she murders the mission target. There's emetic rat poison here. You can unlock the Cellar Door shortcut to reach the basement easier from the outside. A meeting takes place in the cellar as part of the Closing Statement mission story.
Stairs to the villa. The eastern set of stairs is guarded better - pick the western ones.
Villa front yard. You can obtain a waiter or an asado chef disguise. There are torches here - you can use one of them to light the fire pit in asado (41 on the map) so that Don Yates will go there. There are two cannons here - you can place cannon balls and gunpowder found in the villa's attic. You can use the cabriolet to leave the mission area (you'll need the keys from 50 on the map).
Stairs to the basement and garden shredder. At least 2 mercenaries are guarding the area - you can surprise them and hide their bodies in high grass. The passage to the basement is only accessible if you've unlocked the shortcut (43 on the map). You can place unconscious (challenge) or killed Yates in the garden shredder. Pressing the button will destroy his body.
Villa back yard. There's an opportunity here to electrocute Yates (by sabotaging the lamp and spilling the water), however you must first eliminate Valentina so that she doesn't die. The area is patrolled by mercenaries.
Living room and foyer. There are a lot of opportunities to murder Yates in the living room, including by dropping a propane flask to the chimney (from the upper floor). You'll find a door to the basement in the foyer (locked door). You can sabotage the stove in the living room.
Guest room. A lawyer and his bodyguard are here. Once you've eliminated both of them you can steal the lawyer's identity, place the documents on the desk and meet with Yates - an opportunity to murder Yates with a pen. You can also dump unconscious Yates using the window and eliminate him using the garden shredder (46 on the map). There's a briefcase for carrying items here.
Office, bedroom, bathroom and balconies. You'll find basement key and car keys here (45 on the map). The northern balcony offers a chance to poison the drink - Yates will drink it. You can drop a propane flask into the hole and drop down the chanedlier. The calendar is a tip on the safe combination from the basement (43 on the map). Check the bathroom to find lethal poison and passage to the attic.
Villa roof. It's one of the locations you need to unlock. You can reach the roof from any of the balconies on the upper floor of the mansion. You can use the gutter pipe to reach the attic.
Attic. You can reach it from the roof of from the bathroom on the upper floor of the villa. You'll find a lot of items here - emetic rat poison, unique melee weapons, Bartoli Woodsman Hunting Rifle, as well as cannonballs and gunpowder for the cannons (45 on the map). The attic is the perfect place to use the sniper rifle - you can shoot both mission targets.
Exit - Grapefields. You can choose it after killing both mission targets.
Stairs to the villa. The eastern set of stairs is guarded better - pick the western ones.
Enlarge this map

Hitman 3: Cellar safe - how to open? Hitman 3 guide, walkthrough

Last update: 19 April 2021

Key points of Hitman 3 - Mendoza - Important locations

Important locations

On this page of the guide to Hitman 3 you will find out where the safe is located in Mendoza. You will also learn about the code combination needed to open the safe and the use of the documents found in the safe.

Safe in Mendoza - location

The safe is located in the basement of Don Yates Villa (point 43 on the map) - Hitman 3: How to open the cellar safe? - The Farewell - Mendoza - Hitman 3 Guide

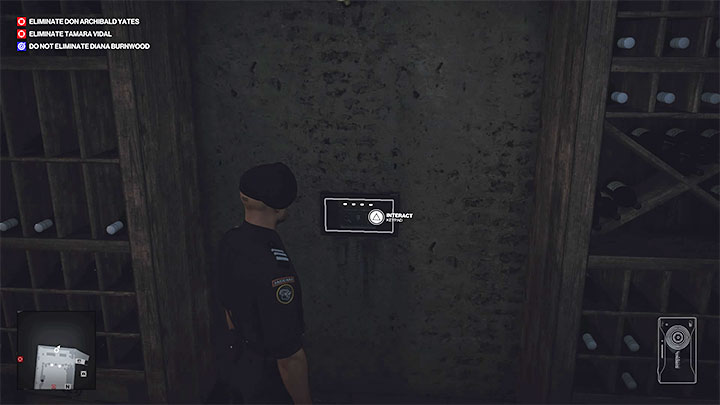
The safe is located in the basement of Don Yates Villa (point 43 on the map). The easiest way to reach the basement is to take the stairs from the foyer on the first floor of the building (point 49 on the map). In the basement, you can unlock two different shortcuts which make it easier to reach the basement from the winery and from the outside of the building.

The safe is hidden in one of the walls. There are 2 mercenaries nearby who may recognize Agent 47 even if he wears an identical outfit to theirs. Fortunately, you can sneak past them.

How to open the safe in the villa?

If you want, you can optionally find a hint to learn the combination to the safe - Hitman 3: How to open the cellar safe? - The Farewell - Mendoza - Hitman 3 Guide

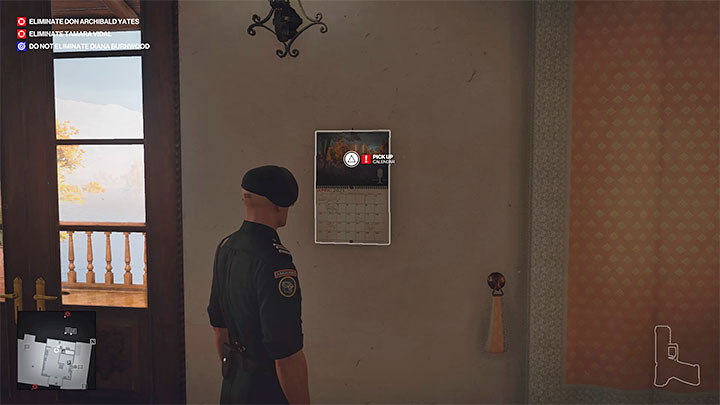
If you want, you can optionally find a hint to learn the combination to the safe. In the upstairs office of the villa (point 50 on the map) hangs a calendar with a note on Valentina and Archibald's wedding anniversary.

The code to the safe is the date they got married - 2006 - Hitman 3: How to open the cellar safe? - The Farewell - Mendoza - Hitman 3 Guide

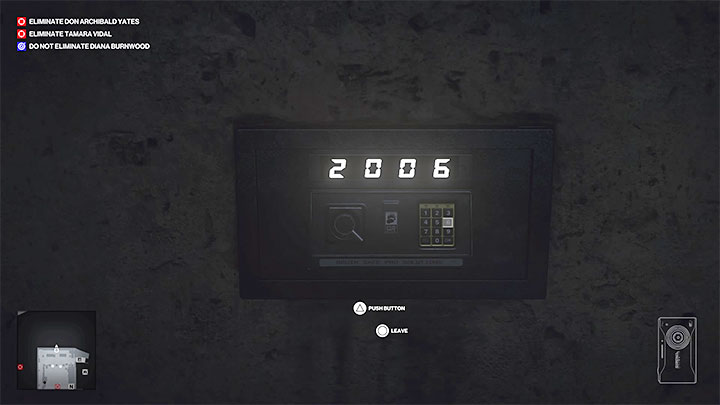
The code to the safe is the date they got married - 2006.

What are the uses of the documents found in the safe?

In the safe, you will find a Report on Data Leak which will award you with the Scandal challenge - Hitman 3: How to open the cellar safe? - The Farewell - Mendoza - Hitman 3 Guide

In the safe, you will find a Report on Data Leak which will award you with the Scandal challenge. From the report, you will learn that Don Yates played a vital role in ruining his wife's diplomatic career.

Make sure you wear a mercenary disguise that allows you to travel freely around the villa - Hitman 3: How to open the cellar safe? - The Farewell - Mendoza - Hitman 3 Guide

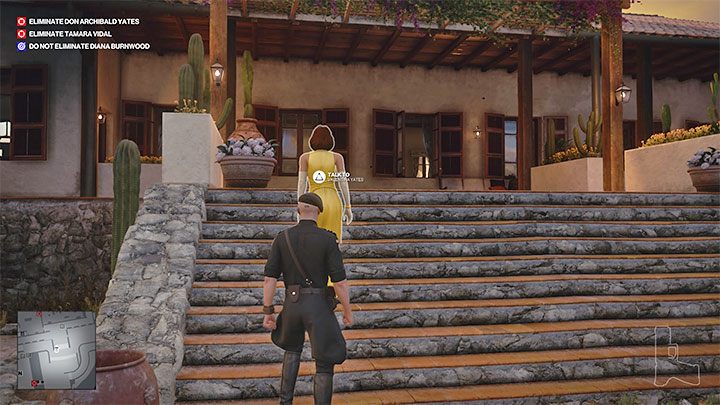
Make sure you wear a mercenary disguise that allows you to travel freely around the villa. Find Valentina on the villa grounds (she's dressed in yellow) and press the interact button to give her the report. From this point on you can only be an observer - Valentina will become enraged after reading the report and will push Archibald during a brawl with him on the balcony of the villa. This will lead to Yates' death. We've covered this in more detail on the page about the Murder of Don Yates.

See/Add Comments

You are not permitted to copy any image, text or info from this page.

This site is not associated with and/or endorsed by the IO Interactive or IO Interactive. All logos and images are copyrighted by their respective owners.

Copyright © 2000 - 2024 GRY-Online S.A. for gamepressure.com, unofficial game guides, walkthroughs, secrets, game tips, maps & strategies for top games.