

Hitman 3: The Farewell, Mendoza - map, mission information Hitman 3 guide, walkthrough
Last update: 29 January 2021
Key points of Hitman 3 - Mendoza - Important locations
Important locations
This page of the Hitman 3 guide contains the map of Mendoza and the most important information about the fifth mission story called The Farewell. You'll learn about the main areas on the map of Mendoza, the mission's premise and unique features, and about the location of the shortcuts in the mission area. You will also learn about the rewards for reaching the subsequent mastery levels in Argentina.
- The most important information about The Farewell mission
- Mendoza - Key Locations
- Walkthrough - table of contents
- Mendoza - Shortcuts
- Mastery levels and rewards
The most important information about The Farewell mission

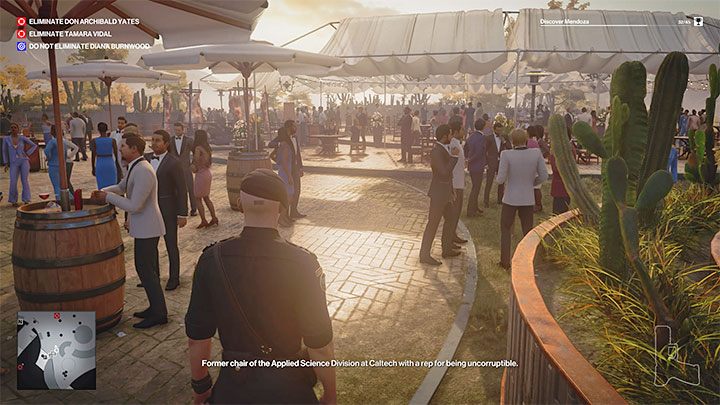
This mission is set in South America, in the Mendoza province in Argentina. This is the most scenic location in Hitman 3, and here you can explore both open spaces as well as building interiors. Agent 47 arrives at this location with the intention of meeting Diana and eliminating the two mission targets. The mission area consists of:
- A winery building where different varieties of wine are produced. You can explore areas accessible to the reception and wine tasting attendees, as well as locations where unauthorized individuals are not allowed to enter. Agent 47 has the opportunity to sabotage the winery and use its appliances to eliminate Tamara (one of the mission targets).
- Grape fields. They are adjacent to the winery building and the winery employees can be found here. Security guards are also patrolling the area. There is a shed in the grape fields that features a unique interaction.
- The gardens around the villa. Two-man patrols travel through the gardens, and in most cases one of the patrol members can recognize Agent 47 even in disguise. The gardens are also adjacent to the silos where the snipers are located (they are linked to one of the Mission Stories).
- The Villa of Don Yates - one of the two main mission targets. It is closely guarded by bodyguards and mercenaries hired by Yates. The property has a large basement and is connected to the winery rooms by a tunnel and a side path.
- The road and the parking lot. This refers to areas located near the default starting location of this mission. You can meet various NPCs in many of these locations. They are also openly accessible. However, some of these locations you have to sneak into or use a disguise.
The map of Mendoza features some locations that are publicly accessible. An invitation is required to enter the party area, but Agent 47 can easily obtain one from Diana or find one near the starting point. However, there are also restricted areas on the map, which include the entire villa and the gardens around it, the utility rooms and employee spaces in the winery, and the grape fields.
There are a few ways in which you can deal with these restricted areas:
- Sneak a lot - make things easier for yourself by throwing objects to distract your enemies, hiding in tall grass (especially in gardens) and behind large obstacles (fences, vehicles, walls, etc.).
- Use unique disguises - Agent 47 can assume the identity of e.g. a local security guard or mercenary. This will allow you to look around places that are inaccessible by default. There are several unique characters on the map as well (e.g. chief security officer). By wearing their disguises, you can move around the map much more efficiently and easily.
- Look for alternative ways - you can, for example, unlock 3 shortcuts (we've described them further down the page), open locked doors (with the use if various keys or a keycard), climb walls, make your way along the cliff by hanging from the ledge, or climb the gutters of Yates' villa.
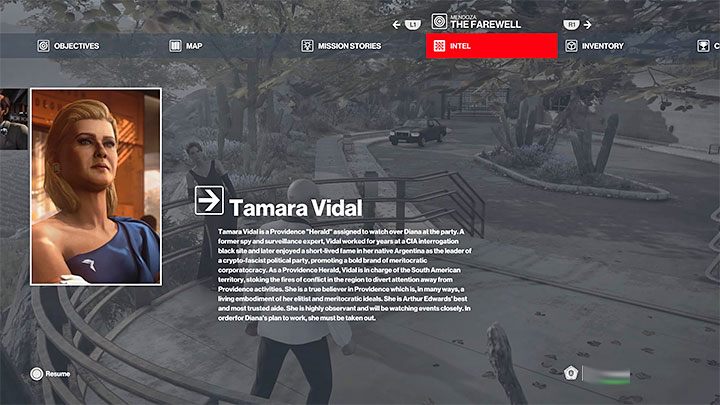
There are 2 people to eliminate in The Farewell mission. Tamara Vidal is a member of Providence, a secret organization, and her job is to keep an eye on Diana Burnwood, who is also present on the map. By default, Tamara travels through the public areas of the winery, although one of the Mission Stories involves taking a tour of the restricted areas of the winery, which Tamara will participate in.
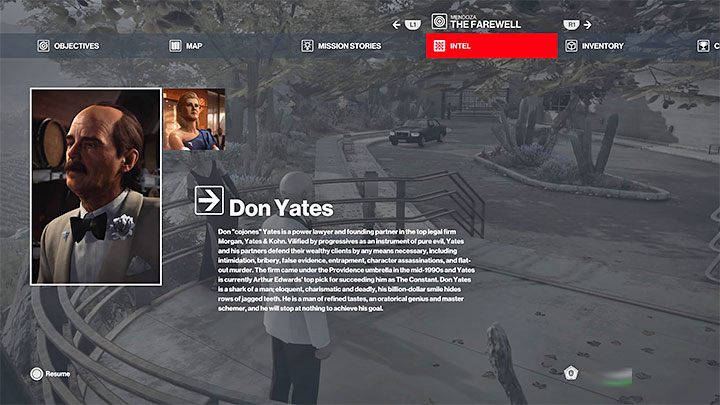
Don Yates is a high-profile attorney and one of the founders of the law firm of Morgan, Yates & Kohn. Yates is one of the candidates to replace Arthur Edwards as The Constant in Providence's ranks. He may want to harm Diana Burnwood in order to get rid of her as a potential competitor. Yates travels through various locations within his hilltop villa by default, although later in the mission he may arrive at the party taking place at the winery.
The Farewell has four Mission Stories and they allow Agent 47 to get rid of Tamara and Yates under unique circumstances. It's worth noting that one of the Mission Stories is initially hidden and can only be unlocked through additional activites. In addition to completing the Mission Stories, you can do other challenges related to eliminating the mission targets in different ways.
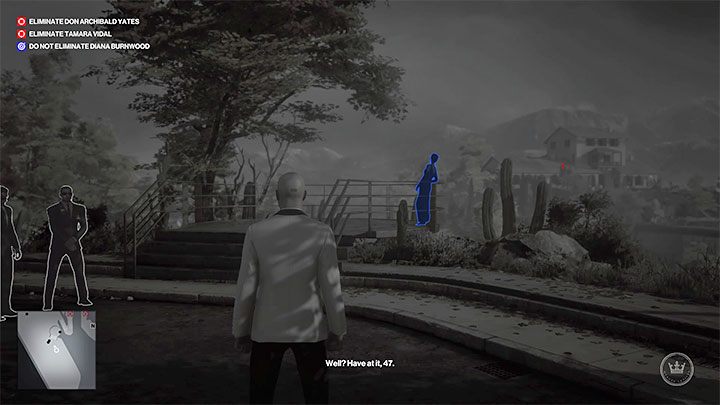
The mission in Argentina has a unique feature. Diana Burnwood has been on the map since the beginning. Agent 47 is unsure of the woman's affiliation and intentions, but nonetheless Diana's death means an immediate mission failure. You have to be careful not to kill her yourself and make sure that she doesn't die in an arranged accident (e.g. while you try to electrocute or poison Tamara).
Diana will give Agent 47 an invitation to the party, and will also stay on the map the entire time - she is marked in blue in the instinct mode.
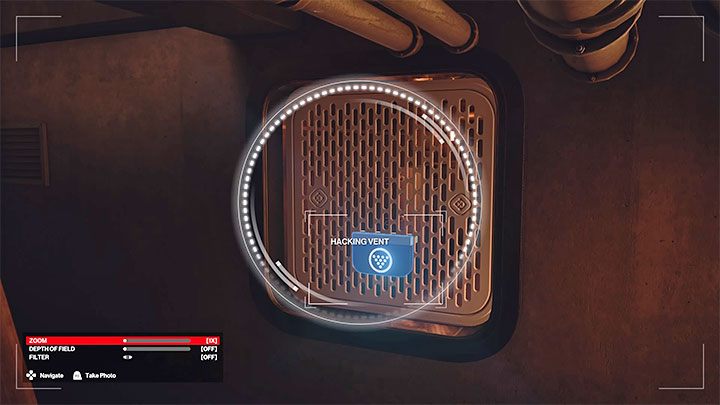
You can use the camera when you play through this mission, but this is not mandatory. It has two main uses in this mission:
- You can hack and open vents from a distance. To open two vents, you need to first obtain a flash drive with required permissions.
- You can scan QR codes in various publicly accessible areas of the map. They can be treated as secrets/collectibles and we have listed them on a separate page of this guide.
The map has several different exits, not all of which are available by default - you may need to obtain car keys, for example. Additionally, while completing the mission for the first time, you must meet Diana on the dance floor at the winery.
Mendoza - Key Locations
Below you will find a summary of the most important locations that we have marked on our map of Mendoza. References to these and other areas can be found in the following pages of the walkthrough description for the Argentina mission.
1 - The starting location of the mission. It is an asphalt road leading north toward a small traffic circle. When repeating the mission, you can start it in other places.
2 - Viewing Platform - Diana Burnwood. Agent 47 must talk to her at the very beginning of the mission and receive the invitation from her. After the meeting, Diana heads to the winery to meet Tamara.
4 - The cliff by the vineyard fields. Unauthorized persons are not allowed to use this path. You can easily get a gaucho (local security guard) disguise - throw an object or poison the drink. You will find a poisonous plant nearby - it has the same effect as rat poison. In the shed (point 20 on the map) you can turn the plant into a deadly poison.
6 - The traffic circle and the parking lot. There are many NPCs in the area, including bodyguards and mercenaries. You can find the invitation here too. In the parking lot, you can sneak between cars. You can climb up to the roof of the trailer - you will find a wrench there. You can jump down to the garden (point 12 on the map) from the roof of the trailer.
8 - Entrance to the winery building. You must show the invitation you received from Diana (point 2 on the map) or found at the traffic circle (point 6 on the map). You can move on immediately if you are using the right disguise.
9 - The room next to the parking lot and the tunnel. You can sabotage the fuse box to easily get a bodyguard disguise and a gaucho disguise. The tunnel connects the parking lot (point 6 on the map) to the area with the silos (point 10 on the map).
11 - Snipers. Snipers associated with the Eyes on Target Mission Story have set up on the top balcony of the silos. You can make one of them shoot. Alternatively, you can pick up their sniper rifle or arrive at this location with your own sniper rifle. From here you can try to kill both mission targets.
12 - Lower Gardens. They are patrolled by two-man gaucho patrols. You can be detected even while using a disguise, but there is plenty of tall grass here. Next to the pick-up truck, you will find a spotter's earpiece (linked to the snipers at point 11 on the map and the Eyes on Target Mission Story).
13 - Boat dock. You can easily get mercenary and gaucho outfits by luring enemies away from the shed. Inside the shed, you'll find a villa key, a Yates boat key, a crowbar, a screwdriver, and other loot. There is a fishing line outside the shed (its use is identical to the one of the fiber wire) as well as a boat that you can use to leave the map.
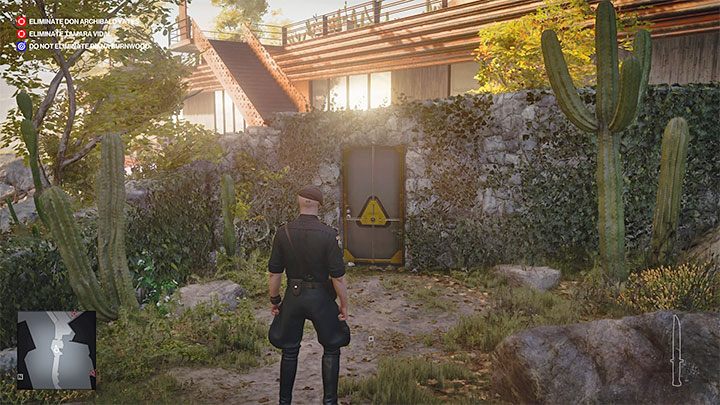
16 - The iron gate of the villa and the cliff ledges. You can open the gate if you have the key (the closest one is in the shed next to the dock - point 13 on the map) or a crowbar/lockpick. You can grab the ledge and move along the cliff or climb.
17 - Grape Fields. There are a total of 3 different grape fields in the area. You can assault any winery employee and get their disguise. There are faucets which you can use to distract the people nearby. Once you have found the grape knife, you can start picking the grapes.
18 - The starting location of the tour. The Mission Story called The Tour involves taking Dian and Tamara on a tour round the estate. Corvo Black (one of Yates' trusted fixers) and Gabriel Vargas (chief winemaker) are related to this Story Mission. Agent 47 can assume the identity of either one of them. There is a container nearby which you can use to hide a body.
19 - Vargas. He will wait here until one of the winery employees delivers the grapes to him. You can distract him with a water pump, change into his disguise and hide his body in a container. You can also deliver grapes to him disguised as a winery employee.
20 - The shed in the grape field. You can easily get a gaucho or a winery worker disguise. There is a distillation device here - if you have a poisonous plant with you (from point 4 on the map) then you can use it to produce a deadly poison. You will find a grape knife here as well.
23 - Production room. The entrance from the fields is guarded by a guard, but you can use the vent to get inside (point 21 on the map). You can also get here from other sides. There are several winery employees at the production line. You can sabotage the freezer door with a screwdriver (it's in the area) to suddenly close it and trap Tamara (during the tour). You can take the Fuse Cell and put it in the device, and attach the high voltage socket. You will find the key of a winery employee. The fuse box allows you to distract the employees. You can throw Tamara (during the tour) into the grape crusher - it's a brutal death. There is a box for carrying items here.
25 - Fermentation room. You can use the monkey wrench (it's in the production room) to sabotage the pump and have the wine spill out of the barrels - this is a part of the Over the Top Mission Story. The stairs here lead to the upper balconies of the room. There's a press here - you can unlock the security lock and crush Tamara during the tour. The security chief is staying here - you can distract him by throwing an object and get a unique disguise.
26 - The cinema. Among other things, you'll find a crowbar, a screwdriver and a propane cylinder. The storage room door is locked - use a key or a lockpick/crowbar. You will find rat poison in the storage room. There is a Branson MD-2 microphone in the room - it's useful for planning the assassination of Don Yates (point 41 on the map). The east door is locked (key/lockpick/crowbar) and it leads to the outside balcony (watch out for the camera above the door).
27 - Tech Room. A gaucho and a winery worker are here - you can distract them (fuse box) and get their disguises. A Fuse Cell, a rat poison, a winery employee key, and the Tier 1 Access Dongle can be found here. You can put the poison in the ventilation system and turn it on. You can jump down to the hole leading to the vent shafts (point 28 on the map).
28 - Vent shafts. You can get here from the tech room on level 1 (point 27 on the map). There are two vents in the eastern part of the shafts to hack with the camera - a Tier 1 Access Dongle from the tech room is required. Opening the vents will allow you to sneak into the wine fridge room.
29 - Barrel room and the wine fridge. The tour ends here (The Tour Mission Story) and Yates appears here too (Closing Statement Mission Story). You can easily get a waiter's disguise in the barrel room. Watch out for the cameras above the entrances to the wine fridge - you can reach this room from the ventilation shafts (point 28 on the map). You can obtain the waiter and sommelier disguises in the wine fridge. Enter the code 1945 to disable the lasers so you can pick up the rare 1945 Grand Paladin wine (it's linked to a challenge and to the Closing Statement Mission Story). All 3 types of "regular" wines (a minor challenge) are located here.
32 - The dance floor. You can stay here as a guest of the party (after you show the invitation at point 8 on the map) and as a waiter. This is where the mission ends by default. Entrances to the reception area and stairs leading to level 2 are located here.
33 - Shortcut: Rear door. You must unlock the door by reaching it from the north. This shortcut allows you to reach Don Yates' villa and the location under the villa more easily. South of the shortcut is a staircase that allows you to reach levels 0 and 2.
34 - The reception and the atrium of the fermentation room. The balconies above the fermentation room are not accessible to everyone. You can learn about the Mission Stories called Over the Top and The Tour here. You can push somebody into the fermentation tank or hide a body there (a minor challenge). There are two collectible QR codes hidden in the area - scan them with your camera to collect them.
36 - Wine Tasting Room. You can sabotage the fuses in the small storage room and acquire a waiter disguise easily. You can serve a glass of blue wine (Pinot Noir) to Tamara - add the rat poison or the deadly poison to the drink.
38 - Security Room. You can use the photocopier to distract enemies and then attack them in the hallway. You can also destroy video evidence from the security cameras here. You can use the touchpad and temporarily open the wine fridge room (point 29 on the map) and let the gas into the barrel room. There's a Security Keycard here - it's useful for opening the north door (and other doors on the map).
39 - Secret tunnel and armory. You can sabotage another fuse box here and acquire the mercenary outfit easily. There are stairs to the basement of the villa here, (level 3), as well as a hallway leading to the back pathways. You can remove the wet floor warning sign and thus make anyone unaware fall. In the armory, you will find, among other things, a Tactical Wetsuit (useful when leaving the map) and a Mercenary disguise (locked cabinet).
41- Asado. This is a public area with lots of guests. Tamara appears here and Don Yates may show up too (after the bonfire is lit). You can swap the microphone for the one found in the cinema (point 26 on the map) and set up a deadly trap for Yates. You can open some sections of the roof and hang from the ledge. Turning off the faucets distracts the surrounding characters. You can easily attack the waiter in a secluded location and get his disguise. There is a collectible QR code here which you can scan with the camera.
42 - Shortcut: Service Door. You can only unlock the shortcut from the north side (from the basement). You will find rat poison and an ice machine nearby - you can use it to distract the waiter. There are stairs here as well.
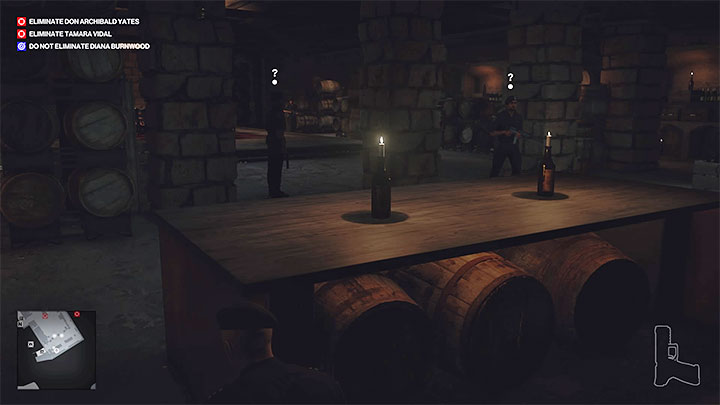
43 - Villa basement and a shortcut. The easiest way to get here is from the first floor of the villa or through the secret tunnel (point 39 on the map). There are mercenaries here and they may recognize Agent 47 even in disguise - it's a good idea to distract them. You will find a safe - the code is 2006. You can give the report from the safe to Yates' wife and thus contribute to eliminating the mission target. You can find rat poison here too. You can unlock the Cellar Door shortcut and reach the basement from the outside more easily. A meeting is held in the basement as part of the Closing Statement Mission Story.
45 - Villa Front Yard. You can get a waiter or an asado cook disguise. There are torches here - you can use one of them to light a fire in the asado (point 41 on the map), so Don Yates will head for this location. There are two cannons here, too - you can put the cannonballs and gunpowder found in the attic of the villa inside them. You can use the convertible to exit the mission (car keys from point 50 on the map are required).
48 - The living room and foyer. There are many opportunities to kill Yates in the foyer, for example by throwing a propane cylinder into the fireplace (from the upper floor). There are stairs to the basement (behind closed door) in the foyer, too. You can sabotage the stove in the living room.
49 - Guest Room. A lawyer and his bodyguard are staying there. After eliminating both of them, you can assume the identity of the lawyer, spread the documents on the desk and meet Yates - this is an opportunity to assassinate Yates with a pen. You can also throw the unconscious Yates out the window and dispose of him in the garden shredder (point 46 on the map). A suitcase to carry various items can be found here.
50 - Office, bedroom, bathroom and balconies. You will find the key to the basement and the car keys here (point 45 on the map). You can poison a drink on the north balcony - Yates will drink it. You can drop a propane cylinder in the hole and make the chandelier fall. The calendar is a hint to the code combination you need to open the safe in the basement (point 43 on the map). The bathroom features a deadly poison and an entrance to the attic.
52 - Attic. You can reach it from the roof or the bathroom on the first floor of the villa. You'll find lots of stuff here, including rat poison, unique types of melee weapons, the Bartoli Woodsman Hunting Rifle, as well as cannonballs and gunpowder for the cannons (point 45 on the map). The attic is the perfect place to use the sniper rifle - you can shoot both mission targets.
Walkthrough - table of contents
The Farewell mission in Argentina is very rich in content. We have described it in detail on the following pages:
- The Tour - This is one of the three main Mission Stories of this mission. You will find out how to participate in the winery tour and what opportunities it opens up.
- Eyes on Target - Another one of the three main Mission Stories of the mission. You will learn where the snipers are located and how you can get one of them to fire a shot.
- Over the Top - This is the last one of the three main Mission Stories of the mission. You will learn how to sabotage the winery and what you can gain from it.
- Closing Statement - This is an additional Mission Story and it involves a private meeting attended by Don Yates and Tamara. You will learn how this can be used to kill the mission targets.
- Meeting Diana Burnwood - You will find out how to unlock the main part of the mission and what Diana's role during the quest is.
- Eliminating Tamara Vidal - She is one of the 2 main mission targets. On this page you will find assassination options which are not directly related to the Mission Stories.
- Eliminating Don Yates - He is the second one of the 2 main mission targets. On this page you will find assassination options which are not directly related to the Mission Stories.
- Poison - how to get it? - You will learn where to find rat poison and deadly poison. You will also find out how to make the deadly posion yourself.
- Best Disguises - We've compiled the most helpful disguises available in the Argentina mission, including gaucho, mercenary, head of security, and waiter.
- How to disable the laser barrier? - Here you'll find some hints about solving a puzzle which unlocks a room where a very valuable bottle of wine is located.
- How to open the safe in the basement? - You'll find the location of the safe in the villa basement marked on the page. We have also provided the solution of the puzzle and the code needed to open the safe.
- Where to scan the QR codes? - Scanning QR codes is linked to one of the game's challenges, and they can be treated as collectibles/secrets. Our guide will tell you where to look for them.
- Mendoza map - how to leave? - We have provided a list of the main ways to leave the vineyard after taking care of the two main mission targets.
Mendoza - Shortcuts
There are 3 shortcuts on the Mendoza map, and every one of them is a locked door. Agent 47 cannot open them from the front even if you have the keys, a lockpick or a crowbar. Each door must be opened by reaching it from the opposite side and removing the lock. Once you unlock a shortcut, you can use it every time you repeat the mission.

Shortcut 1: Backdoor. This shortcut is located at the east end of the map (point 33 on the map), next to the winery building and at the back of the villa. A dirt path runs along the cliff by the water in this area.
You must reach the locked door from the north and unlock it. Unlocking this shortcut will allow you to get from the winery building to the villa much faster. Additionally, you will be able to avoid some of the cameras located in the guarded locations of the winery. Still, watch out for mercenaries patrolling the eastern path, whom you must (silently) eliminate or avoid.
Shortcut 2: Maintenance Door. This shortcut is located north of the asado in the winery, which is where the party is held (point 42on the map). You cannot open these doors from the south side and must first reach the basement of Yates' villa (point 43 on the map) in whichever way you choose. Watch out for the mercenaries in the basement, who may recognize Agent 47 even in a "solid" disguise. It is best to distract them and sneak past them or eliminate them in secluded areas.
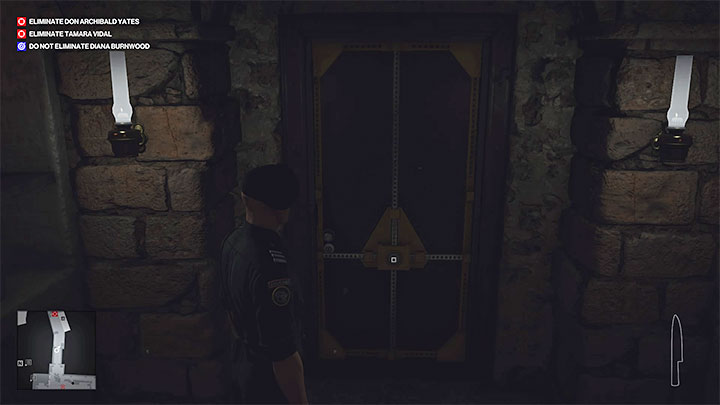
Approach the locked door from the north and unlock them. Unlocking this shortcut will allow you to get to the villa from the vineyard side much faster.
Shortcut 3: Cellar Door. This shortcut is located in the aforementioned basement of Yates' villa (point 43 on the map). Unlocking it will allow you to get into the basement much faster once you reach its general vicinity. You will find the entrance to the basement by the eastern wall of the building. You won't have to enter the villa at all to use the main basement entrance.
Mastery levels and rewards
Mendoza is one of the larger maps of Hitman 3 and its maximum mastery level is 20. You gain XP needed to advance to the next mastery levels by doing the challenges associated with the Mendoza map. The full list of rewards for advancing to the next mastery levels in Argentina can be found below.
LEVEL | REWARD AND COMMENT |
2 | New starting location - Parking Lot. Choosing this starting point may allow you to beat the mission a little faster. If you need an invitation to a party, you'll find one unused on a low wall. |
2 | ICA DTI Stealth Suppressed Pistol. This model features a high rate of fire, which comes at the cost of impaired accuracy. |
3 | Hidden Stash - Boathouse. This refers to the building located at the northern end of the map. Hiding an object or a tool there can be useful if you plan some activity in the villa or in the silo area. |
4 | New starting location - Vineyard. Agent 47 will begin the mission disguised as a Winery Worker. You will start in the grape fields and will be able to perform various activities there right away, as well as visit the utility rooms of the winery building freely. Unfortunately, you will still not be able to access the upper guarded rooms of the winery. |
5 | Kalmer 2 Tranquilizer. This weapon's special feature is firing tranquilizing darts. You can render any character unconscious (including one of the two main mission targets) without approaching them. |
6 | Hidden Stash - Workers' Bathroom. This refers to the restroom located inside the winery building. If you smuggle an object there, it will be located in one of the stalls. |
7 | New starting location - Tasting Room. Agent 47 will begin the mission disguised as a waiter. This is the perfect starting point to eliminate Tamara. You will be able to poison her without any problems, but try to find the right blue bottle of wine and obtain any poison (or take one of your own on the mission). |
7 | ICA Combat Axe. This weapon is not particularly useful, though it can be thrown and used to eliminate targets from a distance. |
8 | Large Hidden Stash - Barrel Room. A large object can be smuggled into the ventilation shafts running under the barrel room. This stash can come in handy if you plan on killing one or both mission targets there. |
9 | New starting location - Shrine. The shrine is located at the east end of the map, below the villa and next to the winery building. This is a good place to start the mission if you plan to play it without taking off your Agent 47 suit. You will be able to access both main locations and the security room easily. |
10 | Hidden Stash - Cinema. It is located in a small storage room adjacent to the screening room. It can help you if, for example, you plan to meet Tamara at the cinema. |
10 | Krugermeier 2-2 Silver suppressed pistol. It's an extremely quiet weapon, but unfortunately, this comes at the cost of short range, impaired accuracy, and dealing less damage (be sure to aim at your opponents' heads). |
11 | Hidden Stash - Shrine. The stash is located under the pot. You can use it in any way you prefer. |
12 | Large Hidden Stash - Steel Tanks. This refers to the silo area, located at the western end of the map. This is the perfect place to "deploy" your own sniper rifle if you don't want to use the weapons of the enemy snipers on the map. |
13 | New starting location - Sniper Spot. Agent 47 will begin the mission disguised as a gaucho, a sort of a local bodyguard. This is a great starting place for using the sniper rifle to shoot one or both mission targets. |
14 | Large Hidden Stash - Villa Attic. You can smuggle some objects there which would help you get rid of Don Yates or set up with a sniper rifle there. This could be an alternative to the sniper spot from the silo area. |
15 | SMG DAK Black Covert silenced submachine gun. This weapon can come in handy to fire continuously without alerting anyone nearby, but the SMG gun unfortunately cannot be "concealed" in the inventory and must remain in plain sight. |
16 | Large Hidden Stash - Grapefield Shed. It is located in the southeastern part of the map on level 0. |
17 | New starting location - Dining Area. Agent 47 will start the mission disguised as an Asado Chef in the Asado. This outfit may be helpful in poisoning Tamara and in bringing Don Yates to the scene. |
18 | Hidden Stash - Villa Basement. Delivering an item to this location can help you e.g. distract or eliminate mercenaries from the basement. |
19 | Hidden Stash - Dance Floor. You can place an item in the trash can and it will not be lost due to the actions of NPCs. |
20 | Agent 47's Outfit - Black & White Tuxedo Set with Gloves. This tuxedo does not have any unique properties. It simply allows you to change the appearance of Agent 47. |
20 | Sieger 300 Viper sniper rifle. You might find it useful when doing the sniper challenges in this mission, as well as other tasks in the game. The advantage of this rifle is that it is extremely quiet, thus reducing the risk of detection. |