
Ghostwire Tokyo: Gate to the Underworld - walkthrough Ghostwire Tokyo guide, walkthrough
This page of the guide to Ghostwire Tokyo contains a walkthrough of the final main mission Gate to the Underworld - the final boss, the ending.
Last update: 05 May 2022
This page of the guide to Ghostwire Tokyo contains a walkthrough of the main mission Gate to the Underworld, which is a part of the endgame during Chapter 6 - Binding. Our walkthrough explains how to defeat Hannya during the final boss fight, how to unlock the ending and whether you can keep playing after completing the main storyline.
- Quest rewards
- Defeat the amalgamation - Hannya, final boss fight
- Farewells - ending
- Endgame - can you play after finishing the storyline?
Quest rewards

- Transmission Beads - this is a reward for finishing the game - they let you immediately free the souls found in the game world without having to return to phone booths
- 3000 XP
- Music: Abyss, Music: Ko-omote Prototype, Music: Yaseotoko Prototype, Music: Abyss Prototype.
Defeat the amalgamation - Hannya, final boss fight
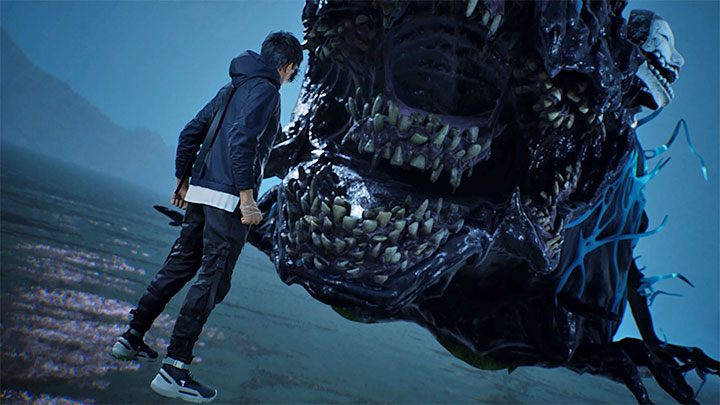
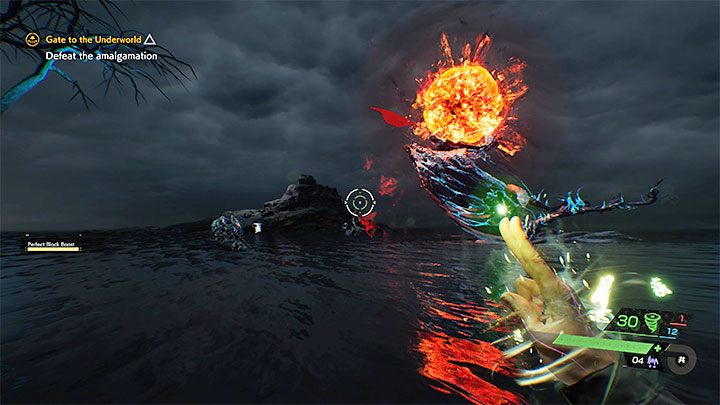
Ghostwire Tokyo's final boss is the Amalgamation - a gigantic mutated creature Hannya transforms into after completing the Mari main quest.
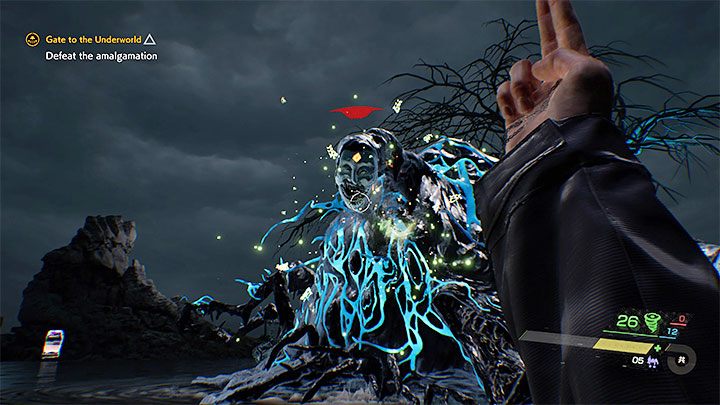
The Amalgamation's three weak points are the masks attached to it. You can locate them with spectral vision (one of them is pictured above) - two masks can be found on the sides at the front of the boss, the third one is on its back.

You can target the masks in any order but focus on one at a time. Fire and wind weaving are your best bets when trying to hit the masks.
Each time you sufficiently weaken one of the boss's weak points you'll be able to grab a core and rip it out.
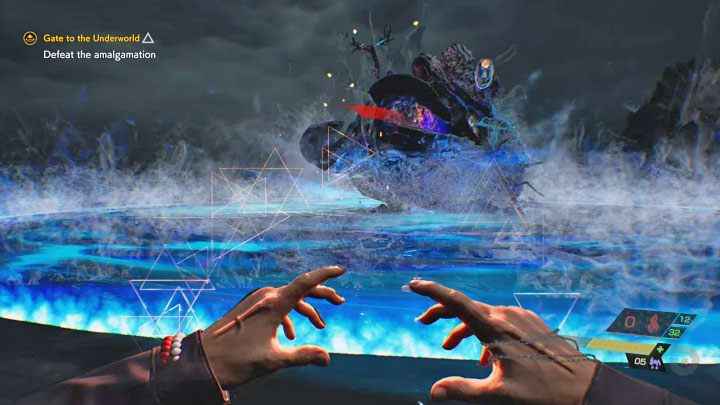
The final boss has various attacks on his disposal. One of the more common ones are shockwaves. As with previous bosses, you can jump over them or block them to reduce damage taken.
The Amalgamation has access to several AoE attacks such as swings and breaths. Both can be avoided by leaving their range early (by moving far away from the boss) or blocked.
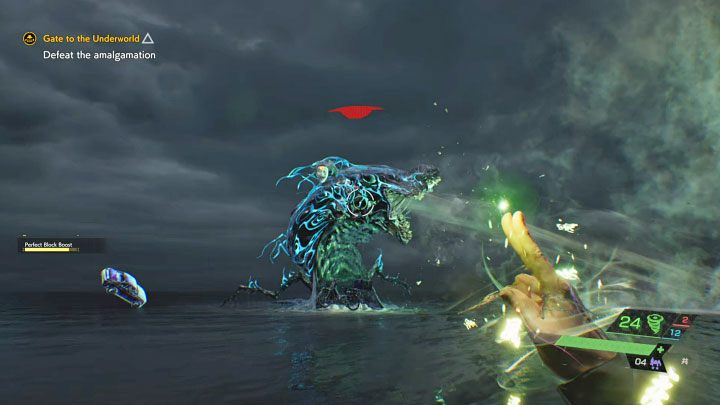
The creature can fire projectiles at you, forcing you to choose between regular blocking or perfect blocking - perfect blocks are more difficult but allow you to avoid all damage.
The one exception is the boss's giant fireball. When he's about to throw it at you start running as far away as you can before the fireball explodes.

The boss can also try to immobilize Akito by summoning undead hands out of the water. Quickly move away from them to avoid being grabbed. If you don't make it in time start moving to the side, trying to break free as soon as possible. The boss will keep attacking you while you're immobilized.
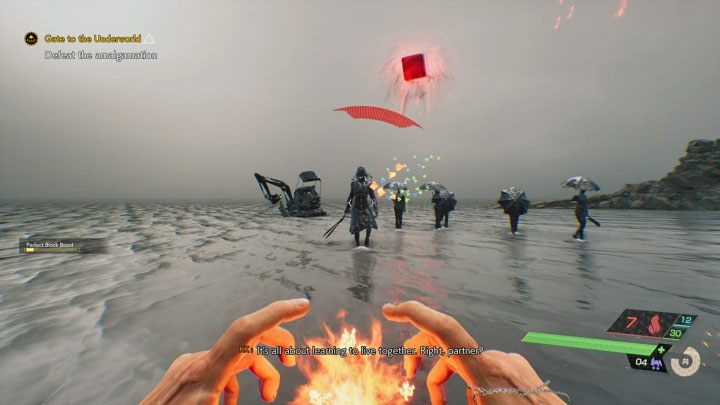
During this battle you'll face some reinforcements as well in form of groups of Visitors. They appear each time you rip out a core, and you have to get rid of them before you can resume the boss fight.
The Visitors are always clustered together when they appear on the arena. This grants you a great opportunity to hit them with an AoE attack. The second group of Visitors is more difficult due to the presence of some elite enemies, such as the shears-wielder. If you can Wire In, the fight against the second Visitor group is the best time to do it.

Keep fighting until you rip out all three of Hannya's cores. This finally puts an end to him.
Farewells - ending
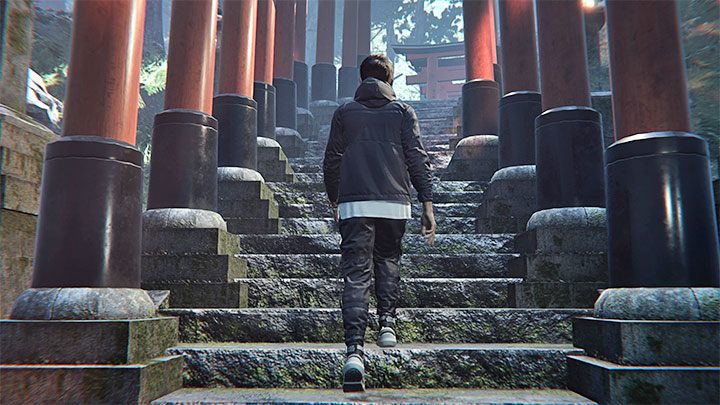
After defeating the final boss there's one more quest ahead of you, but all you need to do to complete it is walking up the stairs.
Soon you'll see the only ending available in the game - the titular farewells with Akito's sister, parents and KK.
Endgame - can you play after finishing the storyline?

After the credits the game will suggest creating a Clear Save which confirms you've completed the main storyline - create it in a separate slot and don't overwrite it.
You now have two options:
- Starting a new campaign - you can transfer some progress from your first playthrough to the second one.
- Continuing the current campaign - this will put you back right before the point of no return, at the end of Chapter 4. This option lets you complete all missed quests, optional activities and obtain all collectibles without starting a new game. You'll keep the XP gained for completing the endgame quests and gain access to Transmission Beads.