
Red, green and orange zone in Garena Free Fire? Garena Free Fire guide, tips
Last update: 12 November 2019
During the gameplay of Garena Free Fire, you will regularly fight against other players. Also, you will have to deal with the gradually shrinking battle zone. In addition, there are red, green and orange zones, which can be considered as an additional threat. In other words, these zones are as dangerous as other players. In this chapter you will learn what these zones are and how to deal with them.
Red zone
The red zone is undoubtedly known to Playerunknown's Battlegrounds players. In Garena Free Fire it works in a similar way - it appears in a random place on the map and after a dozen seconds the bombardment starts in its area. Any such explosion will eliminate the player's character from the match - that is why it should be avoided as much as possible. The best solution is simply to stay behind the red zone. However, if you can't escape from it, run quickly into any building in the area - the character you control will be safe as long as you have a roof over your head.
Note - the appearance of red zone and the bang and confusion that accompanies this event is a great opportunity to quickly move to another location, or fire at a player you have located.
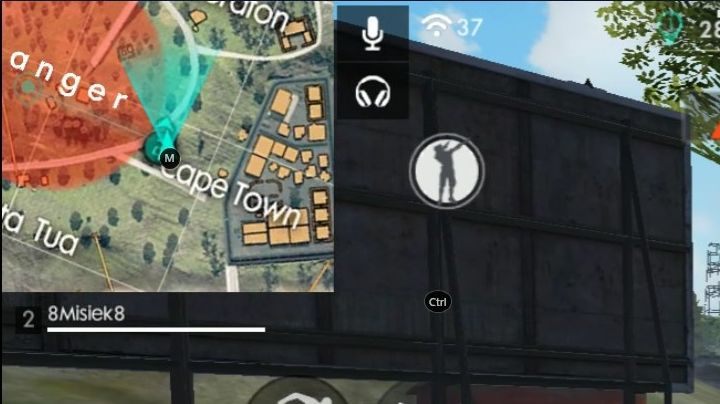
Green zone

The green zone works similarly to the red zone as it appears at a random point on the map. However, this is where the differences begin. As soon as the green zone appears, your character will take damage from poison - at the beginning it will affect and destroy your character's armor. Then, your hero will start to lose health points, approximately 5 points per second. What's more, the character is exposed to damage even while staying inside the building. The only way to save yourself from this zone is to simply escape from it - you have to leave the area.
Note - the green zone is not too dangerous for the player. Even if your character is unarmored, it will not lose more than 1/3 of health points. If the neighborhood is not safe, it is better to wait after the green zone passes through (in the spot when it got to you).
Orange zone
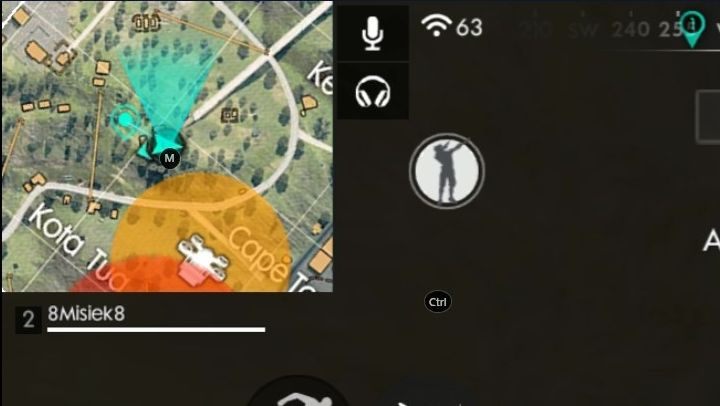
The orange zone is the complete opposite of the previous two types of zones. It appears at a random location on the map, but it's connected to a UAV drone. This drone flies over the battlefield, so the orange zone itself is also moving. All players who find themselves in the area of this zone will be marked and their position becomes visible to other participants of the match. Because of this, the orange zone, despite the fact that it does not deal any damage to the player, is undoubtedly the most dangerous of all - it can easily attract the attention of nearby players.
Note - the drone that creates an orange zone can be easily shot down, but remember that this will also reveal your position due to the noise caused by gunshots.
Zone Tips
Finally, a set of tips on the mechanics of each zone, namely:
- Each zone requires a different approach. While you're in a red zone - it is best to hide in a building, in green - you have to escape from its area (but you can also survive the caused damage) and in orange zone - you should definitely escape from its area or, in extreme situations, shoot down a drone.
- The appearance of zones on the map is a great opportunity to trap a panicked opponent - many players will try to escape from the zones and expose their current position.
- Remember that several different zones can overlap, so you can hit the green zone of poisonous damage and get targeted by a drone in the orange zone at the same time.