Additional quest - QUEST 4: The Mill Worker - part 4 | Additional quest F3: The Pitt Guide
Last update: 11 May 2016
Don't go back up, because you should spend more time exploring the irradiated zone. It shouldn't be a big problem, especially since you now possess a Gamma armor and you've probably collected a lot of RadAway's so far. Start off by moving north and focus on eliminating three Trogs as soon as possible. Remember that the longer you fight the more radiation you'll receive. Once the Trogs have been killed you can focus on finding the ingots. There are three of them and they can be found in the middle of this path, near barrels. There's also a dead slave here. Looting his body will result in picking up yet another assault rifle.
INGOTS #48, #49, #50 | Location: Near the barrels, inside an irradiated area. |
 |  |
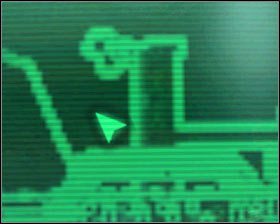
I would recommend that you keep moving north. Once you've reached an impenetrable fence turn left and head west. You will soon reach the stairs. Use the stairs to get to the roof of this new building. Continue moving forward until you reach a large gap in the balcony section [#66]. Move back a little and then jump over to the other side, landing on the roof of the smaller building. You could also try going back to find a safer way, but it shouldn't be necessary.
![[#66] - Additional quest - QUEST 4: The Mill Worker - part 4 - Additional quest - Fallout 3: The Pitt - Game Guide and Walkthrough](/fallout3thepitt/gfx/word/1655672718.jpg)
This isn't over yet. Once you've landed on a new roof turn right. You will now have to locate some wooden planks [#67]. Get on top of the planks and from there you should be able to make a second jump, landing on the highest section of this roof.
![[#67] - Additional quest - QUEST 4: The Mill Worker - part 4 - Additional quest - Fallout 3: The Pitt - Game Guide and Walkthrough](/fallout3thepitt/gfx/word/1655672734.jpg)
You should now begin moving north. There's a large black bridge in front of you and that's where you should be heading. Get there by using new wooden planks and then turn north-west. It shouldn't take too long for you to locate two ingots.
INGOTS #51, #52 | Located: On a destroyed black bridge. |
 |  |
Remain on the destroyed bridge where you found the last group of ingots and continue moving north-west. Don't change the direction of your movement even when you find yourself standing on the roof of a new building. Ignore a new dead slave along the way and instead focus on landing on a smaller section of the roof. Collect two new ingots.
INGOTS #53, #54 | Location: On a lower part of the roof. |
 |  |
Once again, don't leave the area where you found the last two ingots. Turn your character, so you'll be facing west. Slide down from the roof to the ground, turn around and find two other ingots directly in front of you.
INGOTS #55, #56 | Location: On the shelf. |
 |  |
Proceed south and when you reach one of the corners of the left building head south-east. Inspect the area BELOW the stairs (large tires to be more specific). There are two steel ingots here. Don't worry if you can't see them right away, because they're well hidden.
INGOTS #57, #58 | Location: Hidden behind the tires. |
 |  |
The immediate area is "secured", so you can now consider going back to the staircase mentioned by me a little while back. In order to do that you must begin by travelling south-west. When you get to a wall of a much larger structure just keep moving south and eventually you'll get to the stairs. Notice Wild Bill's body after using the first set of stairs. He's the man Milly told you about. I would strongly recommend taking Bill's pistol, because it's a better version of the camouflaged pistol you've received from Wernher. Don't forget to collect a letter, as well as two ingots.
INGOTS #59, #60 | Location: Next to Wild Bill's body. |
 |  |
Use the stairs to get to the upper level, but make sure to choose an assault rifle from your inventory along the way. Once you're at the top approach a small shack and get ready to get rid of a few wildmen. I had to deal with two opponents, but you must be ready to encounter potential reinforcements. Once you've won make sure to inspect bodies of fallen enemies. You should also look around the shack, because it contains two ingots and other valuables (including ammo for the assault rifle and a medical kit).
INGOTS #61, #62 | Location: Inside a small shack. |
 |  |