

Black Gulch | Walkthrough Dark Souls II Guide
Last update: 11 May 2016
Key points of Dark Souls 2 - The Gutter/Black Gulch
Passage to another location
Trap
Shortcut/Passage/Area
Landmark/Switch
Bonfire
NPC (friendly)
Item
Rare opponent/Boss
Shortcut/Passage/Area
The passage (1) � From the spot marked on the map, you can jump down over the ledges, thanks to which you will get to another platform.
Passage (2) � Starting with the spot, where you obtained the Black Firebomb, climb down the ladder. While facing it, turn by 180 degrees and jump to the very bottom. On the right, you will notice a small platform, from which you can jump down to a lower level. Now, turn by 180 degrees and jump to the very bottom again - there, you will find a zombie.
Descent � After you defeat the long earthworm, light the torch and look past the cliff's edge. You should notice a small escarpment that you can jump down onto. Then, climb down from the escarpment, onto another cliff on the left. You will face the entrance to a large cave.
Shortcut � You simply need to smash several loose planks.
Bonfire
Bonfire (!) � Upper Gutter. Once you walk onto the cliff with the statuettes, destroy them all. Then, jump down to the wooden ramp ahead and go down the path. Here, fall to another ramp below. NOTE! You should not go up the ramp, towards the ledge with the single zombie and the urn on it, because this way you will miss a bonfire! You should go down the ramp - the floor will colapse under your weight and you will land on the ramp with the bonfire.
Trap
A TRAP (1) � After you cross the first bridge, it is necessary that you keep to the right of the platform. Only after you reach the second bridge, you can move left and put the light on.
A TRAP (2) � A hole in the very center of the platform.
Item
Ring of Life Protection � After you take the first passage, climb onto the wooden structure and jump towards the chest.
Twinkling Titanite � From the spot where you obtained the Ring of Life Protection, turn towards the wooden structure. Below the stone ledge, on which you are standing, you will notice a spot that you can jump/roll towards. Inside, there is a chest with the item.
Havel's Armor Set � Requires the Forgotten Key (Black Gulch). The armor is inside one of the jars.
Dark Pyromancy Flame � After you spring the second trap, walk over the bridge and turn right. The item is inside one of the jars.
Black Firebomb x3 � In the chest on the upper level
Titanite Chunk � After you cross the second passage, you should notice two jars within the structure, The item is inside one of them.
Tattered Cloth Armor Set � Set After you cross the second passage and kill the zombie, turn around and jump into the passage that you can see. THe set is inside the jar.
Ring of Evil Eye � From the spot, where you obtained the Tattered Cloth Armor Set, jump ahead, towards the ramp. At the other end of the ramp, there is a chest with the ring.
From the spot, where you obtained the Ring of Evil Eye, climb up the ladder, to the very top. The item is inside the jar, in a small structure in the middle of the platform. NOTE! The jars are watched over by an exploding mummy!
Rotten Pine Resin x3 � After you take the ladder, jump down to the platform with the jars. The item is inside.
Great Club � From the spot, in which you obtained the Rotten Pine resin, jump over to the platform with the jar and, from there, onto another one with a chest. The item is inside.
Lifegem x20 � At the very bottom, inside one of the jars.
Dark Fog � At the very bottom, inside one of the jars.
Ring of Giants +1 � 1 Ring of Giants +1 and Petrified Dragon Bone
Landmark/Switch
Platform (1) � You need to spring the first trap and take a long jump.
Zipline (the beginning) � On the rooftop above the spot where you found the Bandit Greataxe
Ladder � It is hidden behind two jars (there is Dung Pie x2 next to them)
NPC (friendly)
Giant Ant Queen � Harmless. Its fumes heal poisoning (but they partially damage your equipment).
Lucatiel of Mirrah � Right before the bottleneck with the oil slicks on the ground, you should light a torch and look down the cliff. You willl notice a small stone ledge that you can fall onto. Inside, there is the Lucatiel.
Darkdiver Grandahl � Requires the Forgotten Key. It is past the door, in the descent.
Rare opponent/Boss
Invasion: Melinda the Butcher � Appears along your way back from the ledge with the Ring of Life Protection.
Boss - The Rotten
Giants (Forgotten Key) � You will reach here after you take the described passage. The opponents drop the Forgotten Key.
You have to watch out here, because there are stone statues on both sides of the passage. Approach them carefully and destroy all of them.

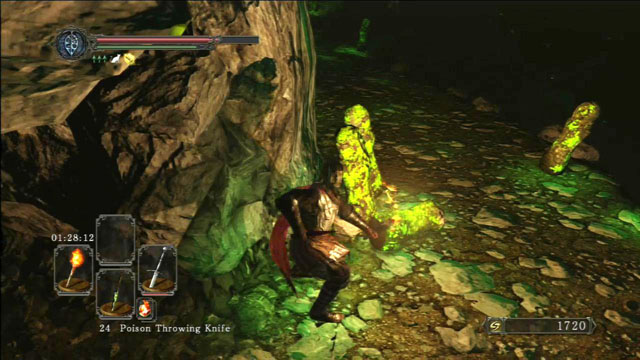
Finally, you'll notice some dark puddles. When you get close to them, venomous octopuses will come out of them. Don't let them grab you because this attack takes a lot of health points.
There's a corridor on the left, a chest at the end of it contains Shotel and Great Magic Weapon. Two giant worms will come out of holes in the wall afterwards. Come up to them from the side and perform several quick strikes.

Then, more octopuses will show up and you'll see another corridor with a chest that contains a Divine Blessing.

Go along the wall and destroy the statues. Pass the corridor with fog and take a path up. You'll be in a cave where you can light a bonfire. There's a Pharros Lockstone in one of the yellow urns.

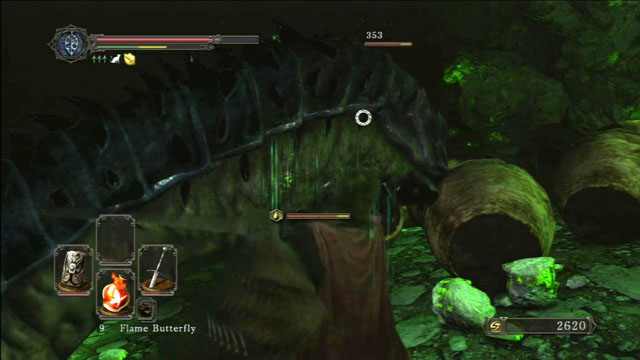
After you light the bonfire, you can explore the side of this location. Go back to the place where you fought the worms. Approach the ledge between holes and jump down. You'll see a closed door. Jump farther down and enter the dark tunnel. There are two giants there. Fighting them is really hard. The best way to kill them is to lure them to the tunnel and reaching the ledge. They won't go all the way towards it but you'll have time for 1 or 2 distance attacks. It's time-consuming, but it's the best way to defeat them.

When you defeat them, you'll get a Forgotten Key and a Soul of a Giant. Explore this place because there is a chest with a Ring of Giants +1 and Petrified Dragon Bone in one of the caves.

Enter the next cave and take the Silver Talisman. Then enter the cage to go up. Go to the ledge and jump down. You can summon someone to help you fight the boss here.

But first go back to the closed door and open it with the key you've found. Inside you'll find an inactive teleporter and an old man sitting on a chair. Talk to him and use all the dialogue options.

Go back up and walk through the fog to begin the fight against The Rotten. When you defeat the boss, explore the location. Take the Fire Seed from the corpse. Find a way out and open the chest that contains Bone Dust, then light a bonfire that will transport you to Majula.