Blood Rocks #2 III | Cairo Dracula: Origin Guide
Last update: 11 May 2016
Open your inventory and start off by choosing your newly acquired gold deben. You will have to use this object on the main portal (screen). Once this is done, open the inventory again. This time you'll have to choose blood. Use the bowl on the portal and you'll notice that it has changed to sand. Listen to what Van Helsing has to say about this discovery.

Open your inventory and choose a lantern. Use the lamp on the left column and wait for the game to zoom in on that location. Now you'll have to participate in a new challenge. The objective of this riddle will be to choose correct pyramids from your inventory. Take your time to familiarize yourself with the objects on the screen. The pyramids you were able to collect can be found to your left. You should also notice a lantern in the bottom of the screen. You'll use arrow buttons to move it. For now it should remain where it was when you've started this puzzle.

Start off by choosing a large pyramid from your inventory. Place the pyramid above the lantern (screen). As you've probably noticed, a shadow has appeared above the upper pyramid. You will have to adjust the location of your pyramid by using the left control bar (screen).

Use both arrows to place your first pyramid in a correct spot. Once this is done, choose a standard pyramid from the left list. Place it to the right of the first pyramid (the large one). You will also have to move the lantern to that location. If the shadow doesn't fit, try choosing another pyramid from this category. Don't use the bar to move the shadow, because you would have ruined the whole thing. Finally, choose a small pyramid and place it in a correct spot (screen). If you've done everything correctly, you will be allowed to proceed further.

If you take a peek in your inventory, you should notice that you've been left out with only three correct pyramids. Your next task will be to place them on the sand (that's where you saw a portal earlier). The large pyramid must be placed to your right, the standard one in the middle, and the small one to your left. Look at my screen for confirmation. You are going to be rewarded with a short cut-scene, showing you that a secret passageway is now accessible.

Head on towards the bottom of the screen. Start off by taking a large Metal bar. Once this is done, click on the left passageway and listen to what Van Helsing has to say. Enter the new corridor. A short FMV sequence is going to be displayed on your screen, warning you about the crocodile. You won't be able to pass through, so go back to the main chamber of the tomb.

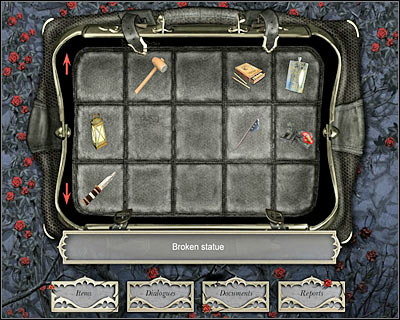
You can take a closer look at some of the nearby statues, however this is optional, so you may as well proceed with the main task. Pick up a Piece of column which can be found next to the right statue. Open the inventory and choose an axe. You will have to use the axe on the left support (screen). Doing this will allow you to place the boat in a correct position.

Open your inventory once again. Choose a piece of column and use this object on the boat. After that, choose a metal bar from your inventory. You will have to use this item on the boat as well. Doing this will allow you to push the boat towards the flooded room. Proceed to that area. Click on the boat (screen) and you'll be allowed to approach the sarcophagus without having to worry about the crocodile. Click on the sarcophagus and read a new report - The Mystery of the Temple.

You may proceed to your left. Try clicking on a mysterious mist which blocks the access to the next room. Listen to what Van Helsing has to say about the mist. Open your inventory. Use the axe on the black sphinx. Once this is done, choose the broken sphinx statue from your inventory and use this object on the mist. You will be allowed to enter the final area of the tomb. You will have to perform only one action here. Take the Papyrus by clicking on it. Ignore the warning about an incoming earthquake. Try going back to the previous room and you'll automatically return to the surface. Also, you'll be transported back to Cairo.
