
Take out Kirin Jindosh | Mission 4 Dishonored 2 Guide
Last update: 25 November 2016

Note! There are two methods that can be used to take out Jindosh. The first one is to flip the lever in the main hall, having a conversation with the man and then going through subsequent rooms filled with mechanical soldiers. This option is reserved for players focusing on direct confrontations, murder and destruction. If you, however, prefer a more subtle approach and want to complete a special action associated with eliminating Jindosh without using any levers or starting an alarm, you should follow the path described below.
If you want to acquire the special action you can't use any levers or alarm any guards in the area. You can do that by getting to the uppermost floor, into Jindosh's laboratory, through the following route. Enter the room on the right side, look up and destroy the window on the ceiling with a crossbow. Get to the upper floor with the help of Blink or Far Reach and head straight ahead (the place is shown on the above screenshot).
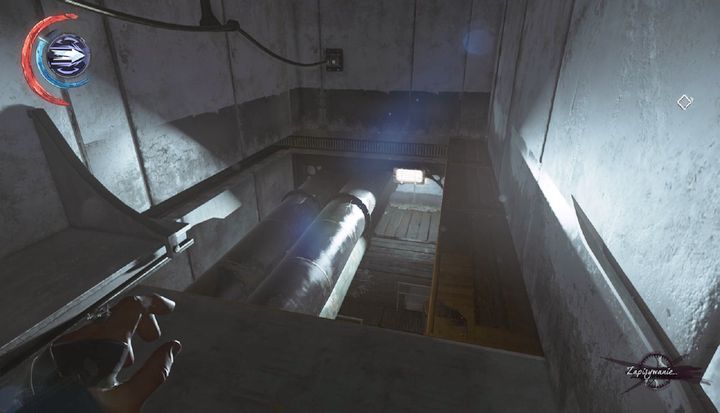
Get to the end, turn to the right and jump down, between pipes. Afterward, head into the corridor on the left side.
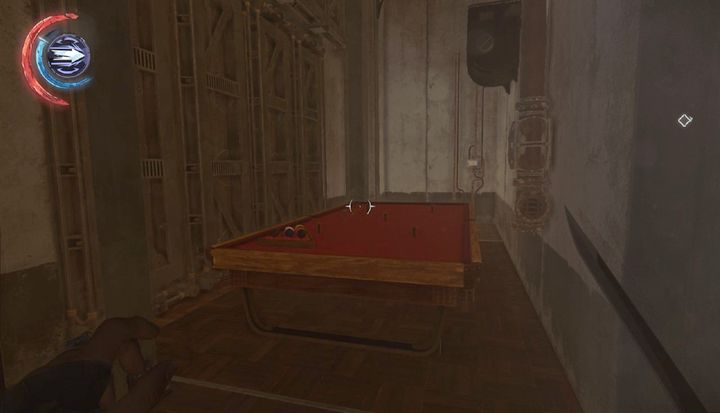
You should now arrive at the place shown on the above screenshot. Refrain from activating the lever located on the right side of the pool table. Instead, jump on the black platform located above you and use it to get to the upper floor.
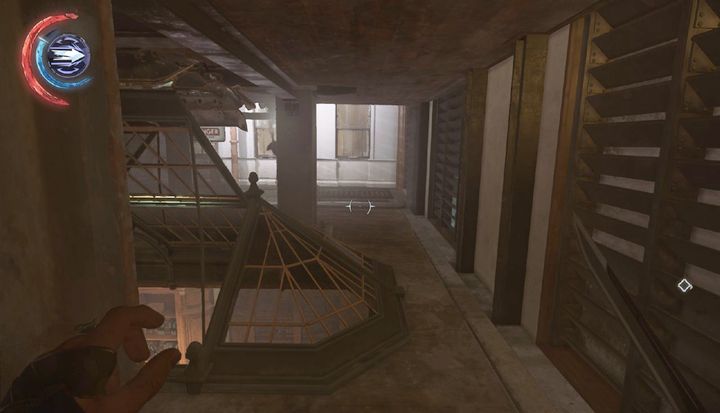
Afterwards, turn to the right and head towards the place shown on the above screenshot (it's impossible to get lost here as there's only a single corridor in the area). You can't run (or walk, if you play on higher difficulty levels) in this area - crouch and approach the window shown on the above screenshot. You should be able to see a small gap below you - you can drop down and head through a passage guarded by Bloodflies to acquire a bone charm. During your march you will stumble upon a whale oil container - take it out to turn off a sentry pylon that will bother you during the latter part of this mission. Reach the end of the route, jump on top of an elevator and use it to get to the highest floor.

Regardless of your decisions, collect the bodies of incapacitated enemies and hide them behind the window. This will keep the mechanical soldier from becoming active after you eliminate Jindosh. Afterwards, head towards Jindosh's living quarters. There are electric keys located in the room you're currently in - one of them is hanging from the mechanical soldier which Jindosh is tinkering with, whereas the other is lying on the nearby table.

Collect the items, head towards the balcony, jump on the black platform visible on the above screenshot and jump through the abyss (by using Blink or Far Reach). At the other side you will find several coins and a key to the maintenance level. Collect them and go through a small gap in the wall.

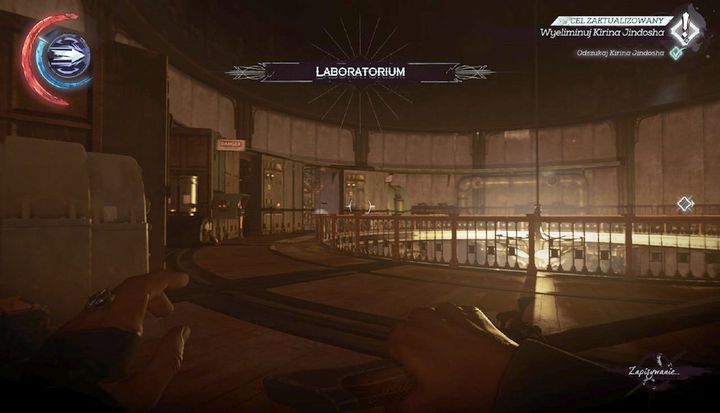
There are two routes leading to Jindosh. You can use the door located on the right side to reach the lab, or you can summon the elevator to reach the uppermost floor. Regardless of your choices you must watch out for a mechanical soldier patrolling the area. Those enemies can see behind them, making them extra dangerous. If you decided to use the elevator, select fourth floor to reach Jindosh's location.
When you reach the laboratory turn to the left and use Blink to get on top of black wardrobes.
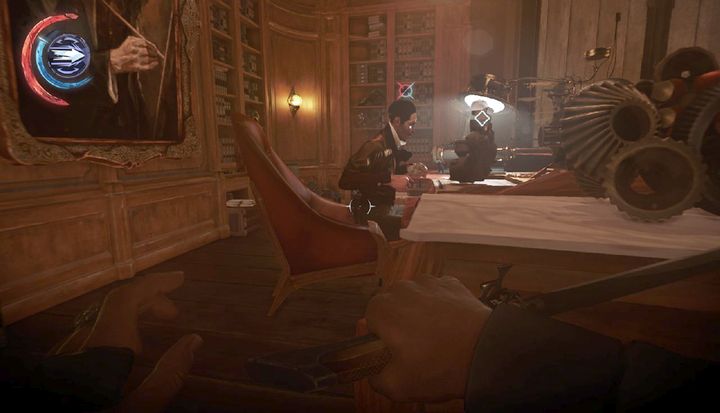
At the end of the route you have to wait for the mechanical soldier on the right side to head to the opposite direction. Afterwards, perform a Blink or Far Reach to get near the desk where Jindosh can be found. The man won't even notice you and you will be able to easily take him out.

If you want to take him out quietly you have to jump on top of his chair and choke him, exactly as shown on the above screenshot. If you decided to take him out quietly you have to take his body, jump on top of the black wardrobes on the right side and place the body in the shadows. Afterwards, approach the mechanical soldier on the left side (the one that is currently inactive) and use the electric key you've found earlier to reprogram it. There's a high probability that your soldier will be able to best Jindosh's one in combat. However, if that is not the case, use a level three stun mine to get rid of the enemy once and for all.
Afterwards, get back to Jindosh's desk and collect a blueprint lying there, as well as a painting hanging on the wall. There's also a note - Note to Kirin Jindosh - containing a hint about Sokolov's whereabouts and an electric key that can be used to take out mechanical soldiers in the future.

After exploring the upper level and collecting coins take Jindosh's body and jump to the lower floor, to the main lab. There's a electroshock machine standing right next to the power generator - place Jindosh there to earn a bloodless elimination. There's a switch next to the machine - at the moment it's inactive as there's insufficient power to turn the device on. Additionally, there's a board with all of the lab devices (and the amount of power they need) and an audiograph.
To turn the machine on you must select the first option (anatomy) from one of the stations and optics from the second one. You should see seven levels of power on the power generator, the exact amount required to turn on the electroshock device. Additionally, selecting anatomy will reveal a platform with a rune on it. Once the generator is charged flip the switch and use the machine on Jindosh. Your next task is to rescue Anton Sokolov, but before you do that you should fully explore Jindosh's living quarters.