Public Enemy | Connor | Detroit Become Human Walkthrough Detroit Become Human guide, walkthrough
Last update: 02 July 2019
Public Enemy takes place right after the attack on The Stratford Tower by Marcus and his team. Another mandatory scene. Optionally, if you and Hank are friends, he will confiscate your coin in the elevator. Then, follow the police officers while listening to the briefing (both actions are written into the Flowchart).
Corridor
: You follow Connor to the top of the tower. Remember the choices from the previous chapter - you'll know where to look for clues:
- Examine the body of the guard (if in the Stratford Tower chapter you have decided to attack and shoot one of the two guards before entering the studio). It does matter which of the guards you shot - each of them is indicated in the Flowchart as other events. Examine the body of operator, if he was killed by Marcus in the previous chapter - Stratford Tower.
- Investigate the body of the operator if he has been killed by Marcus in the previous chapter (The Stratford Tower)
- Examine the phone - if you haven't got a weapon in QTE, when you choose to attack the guards watching the entrance to the studio. Then, North drops the phone to the corner of the room.
- Check Simon's blood trails if he has been wounded (If you haven't equipped your weapon during the QTE that seen you attack the guards guarding the entrance to the studio or you shot the guard on the phone (on the left).
Studio

Watch the recording displayed on the screen.
Enter the recording studio. The room contains many clues, but to continue, watch the recording and go to the roof. Additional clues registered by the Flowchart:
- A blue cap on the floor
- The recordings from the cameras next to the terminal

- A black police officer -(if you saved him on the roof during The Hostage, by approaching the deviant)
- Blood trails on the console - (If you haven't equipped your weapon during the QTE that seen you attack the guards next to the door of the studio)
Moreover, in case a SWAT team has attacked you after the recording:
- Bullet holes (in three locations across the room),
- Blue blood on the wall (if you helped Simon get to the roof),
- Traces of blue blood on the console (if you entered the room, you attacked the guards, but: you shot the guard on the left, you didn't pull out the weapon in time).
- Simon's body (if you haven't helped or failed in helping Simon escape).
Kitchen

The entrance to the kitchen is located behind the wall on the opposite side of the studio's consoles. You don't need to visit the kitchen. Inside, you'll find a newspaper. Warning - finding the deviant leads to one of the endings of the chapter. Conduct the interrogation as you see fit - locating the deviant (or not - both actions are found on the Flowchart, but lead to the same solution) leads to him conducting an attack on Connor.
- Retrieve the knife from your left hand (otherwise, you'll die - one of the endings of the scene)
- Retrieve the biocomponent (otherwise, you'll die - the second possible ending) (otherwise, Hank and Connor survive after the defect is shot by a policeman); Optionally, this path will occur when you do not leave the kitchen.
Start chasing the deviant. If he manages to grab a weapon from one of the guards, you are left with a following choice:
- Protect Hank - Hank will like this, public eye, system instability. Connor dies - this causes another start of the meeting with Kamski.
- Grab a policeman's weapon. The best option - no one dies, Hank's reputation increases.
- Run on a defect - a good ending, everyone is alive, Hank's reputation grows, system instability.
Roof
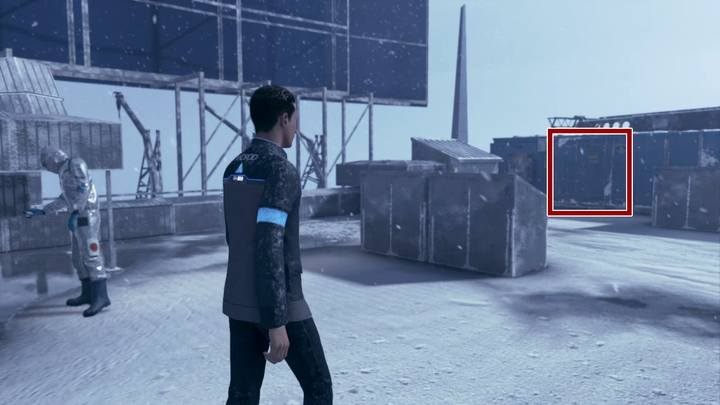
The roof contains additional clues that make their way to the Flowchart:
- A bag with parachutes
- Footprints
- A weapon next to the suitcase
- The door leading back to the building
- Simon's blood trails (If you've helped him get to the roof and saved his life).
- Simon's body - if you killed him as Marcus on the roof (when he was wounded in the shooting, but you helped him out on the roof).
To end the investigation, talk to Hank when he stops walking around the roof.

If Marcus helped the wounded Simon survive on the roof, follow the blue blood to a blue booth - open the door to find the android. This leads to further options:
- If you stay in your current location, Simon will be killed.
- If you start following Simon and won't catch him (failed the QTE)
- If you start following Simon and catch him, Connor will receive additional information and increase the system instability.
Endings
Please note that Connor's death in this scene affects how the next one will begin: Meeting with Kamski. In the next scene, if Connor died, you will lose some respect for Hank. To complete the Flowchart, you have to finish the game in both ways. This chapter can end in many different ways:
On the roof:
- Connor is traumatized - SWAT has attacked the building, Simon was taken to the roof, Connor has found Simon and caught him. System instability.
- Connor dies running on a defect - if you failed in QTE while attacking the defect.
- Connor and Hank are alive - if you stay behind, Simon will be killed by a policeman.
In the kitchen:
- Connor dies in the kitchen - if you do not free yourself and do not put the biocomponent back on. System instability, respect for Hank.
- Connor doesn't catch up with the defect, after freeing / chooses the option of Facing defect in the corridor - a good ending, Connor and Hank live. System instability.
- Connor catches the deviant and protects Hank Connor dies, public opinion, system instability. Hank's reputation.
- Connor catches the defect and shoots him - the best ending, everyone are alive, Connor kills the defect. Hank's reputation.
