

Days Gone: Cascade - map, important locations Days Gone guide, walkthrough
Last update: 02 April 2021
Allied camps
1 - Copeland's Camp � The first camp in the game; you can buy here supplies, upgrade motorcycle, but you won't obtain here new weapons.
2 - O'Leary Mountain � In this camp you can rest, use a Locker and find some random supplies, materials and ammo in the chest, that Boozer gained.
Other important areas
1 � Passageways between regions. They connect Cascade with Lost Lake. You must advance in the game to unlock them.
2 � Passageways between regions. They connect Cascade with Belknap. You must advance in the game to unlock them.
2a � Passageways between regions. They connect Cascade with Belknap. You must advance in the game to unlock them. Push the car from Belknap-region-side, to unlock a passage for a bike.
Most important locations on the map
1 � Ambush Camp. Enemy camps can be conquered to reveal some secrets on the map and unlock new crafting recipes, by finding map in the bunker hidden in the camp.
2 � Infestation zone.
4 � NERO Checkpoint. Watch out for nearby Horde. To get into checkpoint, grab a fuel from the boxex near the front of the train and push a car, to get on the roof of the checkpoint.
5 � NERO Checkpoint.
6 � NERO Checkpoint. This one is unlocked in one of the first missions.
7 � NERO Research Site. Point is located in the mine; watch out for the Horde!
8 � NERO Research Site. Jump here (near crashed chopper) using bike; nitrous might be useful!
9 � NERO Research Site. Research site is located in the cave; keep to the left in the caves.
10 � NERO Research Site. At the end of the bridge.
On this map to Days Gone you will see Cascade - the first area in the game. This map contains all hidden side activities: NERO Checkpoints and Research Sites, Infestations, Ambush Camps and Horde locations.
NERO Checkpoint (4)

Checkpoint marked with no. 4 on the map is the first post that you come across. It is marked on the map as a side job. This is not the easiest Checkpoint - it's protected by a Horde, which has a nest on the train and is not willing to leave it.
- To get to this site, throw canister over the fence, which you will find on the locomotive.
- Push the car on the slope to the building to climb it.
- Refuel the generator and start it - but remember to destory all megaphones on the building and in the vicinity beforehand.

You may kill the horde in an easy way by sneaking to the trailer cars and then by throwing grenades and Molotov cocktails at them (or inside the trailer cars). Then run and blow up barrels and other explosive items; at the end of the road is, however, it's woth to have a prepared motorcycle - in case of quick retreat and failure. If you do not retreat too far, the Horde will be reduced by the number of opponents you have already defeated.
Ambush Camp (1)

For this camp (marked point 1) it is worth to travel in the beginning stages of the game. It is best to get there from the northern side, through the secret passage (near point 10).
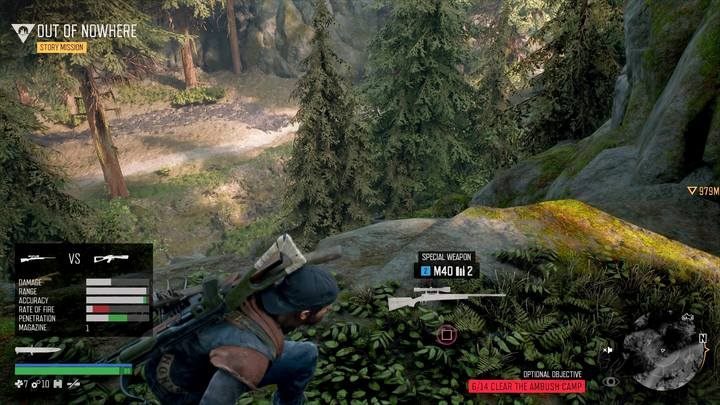
On the west side, on the hills, you will find a sniper. This is one of the first ones you will encounter in the game - after eliminating him, you can easily pick up his weapon and use it until you turn it into another (you can also purchase ammunition for it in the camp).

The entrance to the bunker can be missed easily - its under the high voltage pillar.
NERO Research Point (8)

NERO Research Point (8) can be found south of the Copeland camp. It's the first point you need to reach by using a motorcycle. It is necessary to install nitro in advance, because the jump is difficult to perform, and failure can result in damage to the vehicle, or even death. On the spot you will find some crafting materials, a box with Injector and a recording (secret).