
Road of Sacrifices - Swamp Dark Souls III Guide
Last update: 11 May 2016
We divided the swamp area into three main parts which begin at the end of the road that leads from Halfway Fortress bonfire. The first part is the swamp itself and the other two are ruins that are situated on both sides.
- Lower part of the swamp - on the left
- Lower part of the swamp - on the right
- Lower part of the swamp - the middle
- Fight Yellowfinger Heysel
- How to deal with crabs
- Ruins in the east part of the area
- Ruins in the east part of the area - road to Farron Keep
- Ruins in the west part
- Path to the Cathedral of the Deep
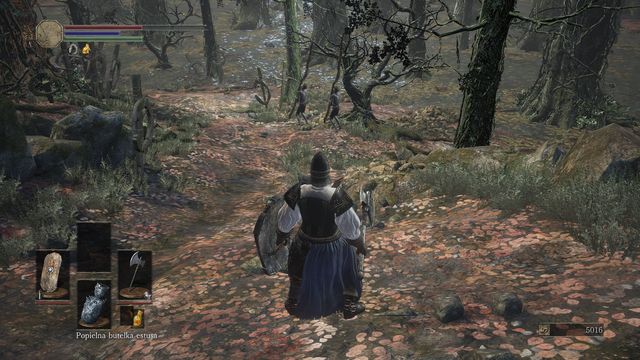
Lower part of the swamp - on the left
Deal with the first enemies that you come across. Draw attention to the fact that you will encounter a lot of them in the area. Furthermore, they will hide between trees and try to merge with the surrounding, so walk slowly and steadily eliminate them one by one. Dodge their attack to get behind their backs (you can also block their charge).

Turn left and stick to the edge, in order not to miss anything. You will find 2x Titanite Shard (one is located among a group of stone creatures which are extremely toxic. Take the item and run quickly in the other direction) There is a Twin Dragon Greatshield among the trees (watch out for peasants with sticks, who will jump out of nowhere when you least expect it).

Locate a stone arch and you will find a Fading Soul. You will be attacked by a bunch of peasants and rabid hounds. Pass the arch and turn left to find yourself above the swamp and reach a bonfire.
Lower part of the swamp - on the right

At the starting point (get to Halfway Fortress bonfire) head right this time. Walk along the path and you will find a Titanite Shard by the wall (and some more enemies). Travel some more and you will reach stone ruins that you should leave for now.
At the entrance you will be forced to deal with two opponents carrying a cross on their backs. Sneak up to them from behind and kill them one by one. Don't let them catch you in a storm of strikes or you will lose a lot of HP.

Enter the ruins and head left. You should have a stone wall on your right, and a little further some trees and a huge crab. It is not wise to fight it now so grab Great Swamp Pyromancy Tome and Conjurator set.
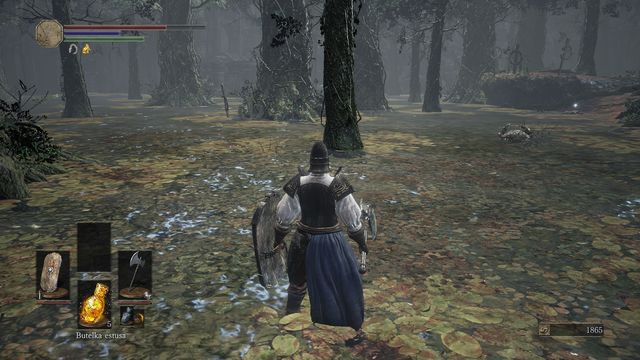
Lower part of the swamp - the middle
Finally, search the middle of the area. You will find Green Blossom. From here, you should be able to spot another giant crab on your left. Body laying not far from it has Grass Crest Shield.
Move to the next ruins and search the area for Green Blossom. Turn right (Stairs leading to the ruins with a note "turn back" on the ground) to find Fallen Knight Armor set.
Once you collect all the items, you can deal with the crabs or explore the ruins. Ruins situated in the eastern part of the area lead to Farron Keep, while the larger one located in the western part will take you to Abyss Watchers (you will encounter a boss, Crystal Sage, on your way).
Fight Yellowfinger Heysel

In the middle of the swamp, you can use Ember to summon Yellowfinger Heysel. As there are many enemies around you, call him when they are dead, or lure him into the ruins where you will be rather safe (fight in the corridor not to get spotted by the knight). Heysel will fire projectiles from a distance, so try to engage in a direct combat. Defeat him and you will receive Heysel Pick and Xanthous Crown.
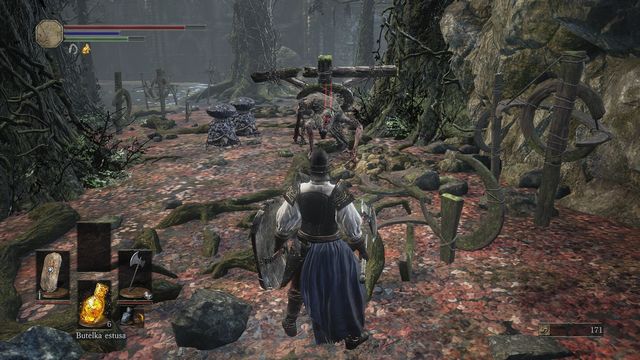
How to deal with crabs
Huge crabs are very tough enemies. First of all, each of them has impressive strength that can be observed through a number of attacks (pincers, grip). Furthermore, they are very fast and can perform special slides to catch up with their prey. On top of that, they shoot substance that not only deals damage, but it also slows you down. Crabs can also hide underground and return to the surface with a restored health bar - this happens when it is taking damage and cannot attack itself (e.g. if you throw Firebombs at them from an elevation that is next to Crucifixion Woods bonfire, and they don't want to attack).

All of the mentioned features make the direct combat extremely difficult. If you think you are ready for it, try to work on it by using distance attacks or other items that can inflict damage. During the fight don't lock the camera on your opponent and circle around it. Follow these hints and you should be able to attack its legs and body from behind, and thus stun it or immobilize for some time.

There is another method that you may want to try out. Lure the monster between two narrow trees and it should get stuck. Move back and attack the creature from a safe distance. Just make sure that you have enough items.

You can also lure it to the small passage to the ruins which is located in the northern-west of the swamp (see screenshot). If you manage to drag it there, the creature will have little to no chance to catch you. Just watch out for its substance. There isn't enough space to maneuver but on the other hand, the crab won't be able to reach you.
Remember: Crabs are not enemies that appear only once and they will respawn when you visit bonfires or die. If you find it too difficult, just forget about the crabs and collect items that you find on our way.
Remember 2: Before you engage in combat, deal with other minor enemies that are scattered all around. If you don't, they will make the crab fight even more difficult.
Ruins in the east part of the area
The first part of the ruins can be located in the lower part of the swamp. The road that leads to them goes along some rocks, and you will encounter venomous creatures and two opponents with crosses on their backs. The entrance is in the corner of the location.
Remember: There is a crystal lizard behind the bars, on the right. The passage can be opened from the other side in Farron Keep.

A knight is waiting for you inside. This one is especially deadly, as he deals tremendous damage. Your only chance of defeating him is dodging all the blows and striking back. Don't let him hit you because 2-3 blows will kill you. Beware of the thrust that is often perceived by a run, and an attack, during which he is dragging his weapon.

This foe is tough, so it's ok to give up the fight or use a cunning trick. If you are lucky enough, the knight should stand still at the end of the stairs when you first enter the corridor. Instead of drawing attention to yourself, enter the balcony on the right. You will find Sellsword Set. You will be able to jump lower, behind the knight, and thus collect Sellsword Twinblade in the hole on the right. There is also Farron Coak. This position will allow you to sneak up on him and performing a powerful blow (see screenshot).
Ruins in the east part of the area - road to Farron Keep
After you collect the items and win the fight (or not), exit the same way you got in, and head up, along the wall. Go higher to find Large Soul of an Unknown Traveler hidden under the rocks.

Enter the balcony to find Homeward Bone. The ladder will take you directly to a bonfire that is in Farron Keep.

However, two guards are blocking your way. Fighting both of them at the same time is suicide, so it is crucial that you lure one of them away. You can head towards the swamp (but only if you killed the giant crab), but it is highly possible that they both will follow you. Another method is to stand in front of them and leading them into the ruins. Get to the balcony behind them and one of them should stop chasing you. If you fail to do that, try to avoid the guards in the first place and use the ladder that will take you to the bonfire. Try again by going up the ladder (only one guard should notice you).

One of the opponents with a sword will try to attack from mid-air (when you move back) and perform vigorous strikes. The former attack is easy to dodge, and the enemy will stay on the ground for a couple of seconds, which gives you enough time to hit him. If you keep on walking back, he will continue this attack. Don't get caught up in the latter attack. Defeat him and pick up Exile Greatsword.

Time to deal with the other creature. Although he has a small shield that allows him to block your attacks, it is easy to break through his defense by striking right after rolling over. The foe has a mighty club and perform attacks similar to the previous opponent. Thus, strike back after the mid-air attack. Apart from that, the thug can heal himself. Whenever he kneels and a yellow luminescence appears around him, it is time to run up to him and deal a powerful mid-air attack. This should stop him from healing and deal additional damage. Kill him and obtain Reinforced Club.
Ruins in the west part
Move from Crucifixion Woods bonfire and locate nearby ruins. Don't go inside just yet and walk around it, along the wall from the left side. You will encounter four opponents on your way.

At the end of the road jump down - you will land in a corner, and find Estus fragment near the body. Head to the bonfire and you will come across Ember and a strong enemy with a cross on his back. Deal with him and go right to leave the ruins and find a Soul of an Unknown Traveler by the tree.

Walk around the wall from the right and find the entrance (see screenshot).

As soon as you get inside, hide on the right side and kill two enemies that will spot you. A mage, standing above you, will shoot projectiles at you. If you stay behind the wall, he won't be able to hit you and other enemies will come to you one by one. If, for some reason, the plan didn't work, run inside, draw attention of at least few opponents and exit the room quickly. You will be able to deal with them separately near a narrow passage. Clear the area and collect Heretic's Staff situated in the corner. Head upstairs.

There is a single opponent that will swoop upon you once you pass the bridge. Turn right and go downstairs. Eliminate the crystal lizard and obtain Crystal Gem. Use the stairs in the next room. You will see a hole in the wall that leads outside - stick to this wall and at the end you will reach a platform and a Golden Falcon Shield. Get back to this place once again and head upstairs. Jump down from the balcony and at the end pick up Ring of Sacrifice from a nearby body.

Exit the ruins and walk the wall around from the right side. You will find a small passage that leads to a locked room. Watch out for a sleeping enemy that will attack you as soon as you get inside. Defeat the creature and collect Sorcerer Set and Scholar Ring.
Head back to the bridge in the ruins.

Turn left and go upstairs. If your intelligence is 10 or higher, Orbeck will teleport to Cleansing Chapel. If you promise him to retrieve all the scrolls, he will teach you some spells. There is a Blue Bug Pellet on the other side, by the broken stairs.
Turn back and head to the bridge, or jump down to where you met Orbeck. The path to the boss leads through a corridor. Avoid the sorcerers or take them down (it is wise to kill one by jumping down on him). Defeat Crystal Sage and unlock the way to Cathedral of the Deep.

Remember: Should you have any problems, you can call Eygon to help you. The place where you can call him is behind one of the columns in the corridor with two sorcerers and several other creatures (see the screenshot and remember to use Ember). You should kill all the remaining monsters before you summon your ally. He will be of great help in the upcoming battle.
Path to the Cathedral of the Deep

After the battle with Crystal Sage, a passage on your left will be unlocked. Heading the path up, you may want to jump down on a ledge. You will face one crystal lizard and another one just around the corner. For each killed lizard you will receive Twinkling Titanite. The path will take you to a bonfire. Depending on the path that you chose, you will encounter two creatures with cages on their backs, or a witch. Draw you opponents near the main road and face them one on one. Don't underestimate them as they are more demanding versions or monsters encountered in Undead Settlement. Search the bodies to find Herald Set and cross the bridge that leads to the first bonfire in Cathedral of the Deep.