Formations | The Basics Cossacks 3 Guide
Last update: 17 October 2016

How effective your units will be depends not only on their numbers and technology. It also matters whether they are in a formation. You need an officer and a drummer for that. They both can be recruited in barracks after building an academy. You also need a certain number of soldiers. Infantry formation can consist of 36, 72, 120, 196 or 400 people. Cavalry needs to have 40, 90 or 160 horses. Cavalry doesn't need an officer. Such unit gets a bonus for melee and ranged attacks, as well as for defense.
Besides that, formations will make army management easier. One click will select the whole unit - you can still group some of these formations under number keys. Additionally, if you set these units in a given way, they will keep that order after moving. Otherwise they will move in one, undistinguishable mass. Mixing units in formations with those without it will also create a slightly chaotic combination.
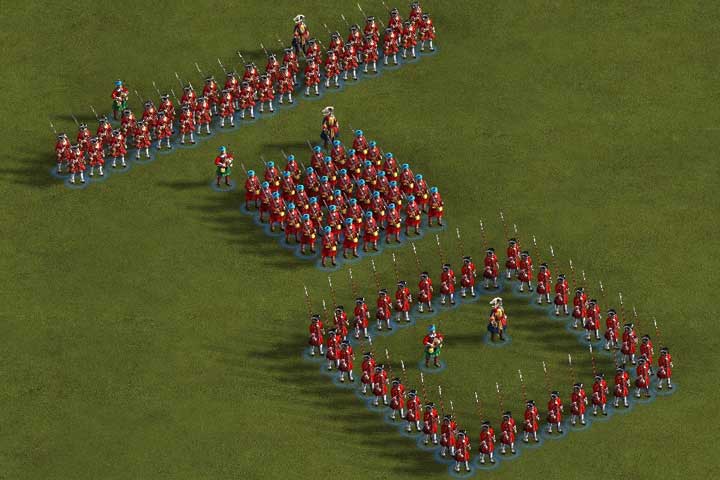
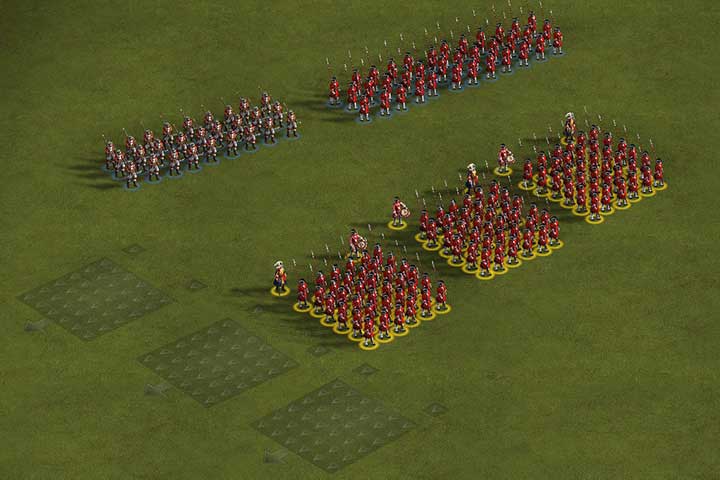
You can choose one of three formations:
Line formation - the unit creates a long and thin formation. Perfect for ranged units. Every row takes part in fighting, so this is a very effective formation. Remember that a big unit will take up a lot of space in this formation.
Column formation - the soldiers form an even formation. Easy to move, and good for melee units, especially when fighting against cavalry.
Square formation - sued when you don't have many soldiers buy want to take more space in defense. Also perfect for guarding the artillery. Set the cannons in the middle and order the soldiers to surround them - there, you don't have to worry about them naymore. This formations is also useful for pikemen and riflemen.
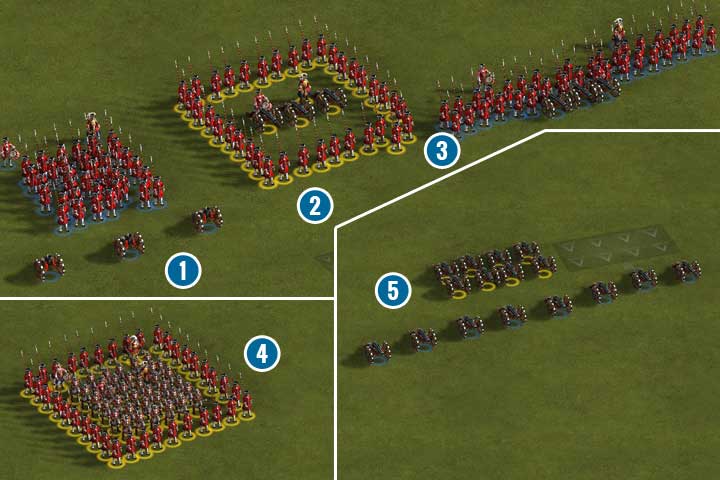
Such units in different formations can be freely combined to use their fullest potential. Place howitzers in the first line - since their range is rather poor - and behind them, infantry. (1). You will thus have an assault group. At the back, or during defense, set the infantry to square formation and place artillery in the middle (2) - preferably long-range cannons. Remember to give "hold ground" order to the infantry - otherwise they will leave the cannons. (3) is similar to 1, but it's better to use ranged infantry (melee will do too), and artillery right at their noses. In case of clashes on short distance the cannons ought to be moved behind the infantry, where it can continue to fire. (4) another combination is placing a column of ranged units within a square of melee troops. It's similar to the second variation. (5) note the position of artillery in formation (down), and without (up). If it's not in formation, it will always create a tight, two-row line. The plus is that it's more compact and easier to maneuver. But under enemy artillery fire, it's easier to lose multiple units if they are close to each other. In formation, the cannons will create a long line with big intervals. This formation should be used to attack hostile fortifications and artillery. It's easy to manage such unit in the army since in "remembers" its position.

An example of assault army setting. Most often it should look like this: melee infantry at the front, best choice would be pikemen. Their attacks are pretty solid, they're cheap and effective against cavalry. Behind them - short range cannons, i.e. howitzers. Should the enemy attack with infantry those guns will decimate them. Then, riflemen in a long line, it's best if they hold their position (alternatively, you can adjust it manually). Next will be long range artillery - use it for damaging hostile troops, artillery and fortifications. Light cavalry will be used to attack exposed musketeers and cannons. Dragoons will be a mobile chasing unit; they're slower than light cavalry, but deal a lot of ranged damage. They're perfect for hunting fleeing musketeers. At the end, heavy cavalry as support; should the enemy gather advantage, attack your weak spot or if your troops are otherwise in a dire situation, these heavy horsemen can deal with such problems. Alternatively, instead of them, you can place there riflemen who are unable to fight hand-to-hand, or grenadiers, in order to save as much of them as possible and use at the enemy's walls.
Of course, you won't be able to set this formation at all times. There often will not be enough time or money to do so, but you should always plan the composition of your army, or at lest the main group.