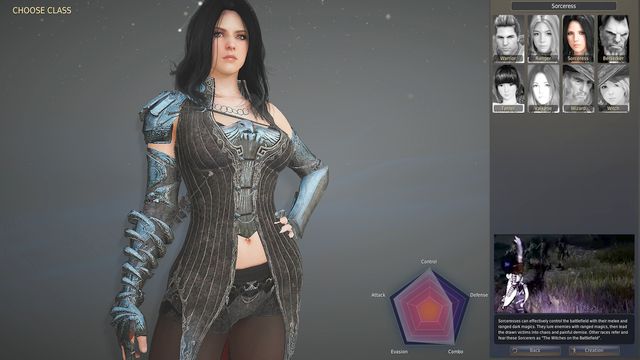
Sorceress | Character classes Black Desert Online Guide
Last update: 11 May 2016
Class description

Sorceress is a class that uses magic, but fights at close range. Unarguably, this one is the best class in 1 on1 duels in PvP. However, things do not look as well in group PvP, due to the scarce restraining skills. It is also perfect against monsters and thanks to the AoE skills, the class will easily win against larger groups of enemies. Sorceress is a difficult class, due to the low level of defense and low maneuverability. Just like the Ranger, Sorceress focuses mainly on attack, dodging and on combining skills.
Armoring
The main weapon of the Sorceress class is the amulet. Thanks to it, you will be dealing damage from magic at short distance. Combined with the secondary weapon - the talisman, it is the only right weapon to use. While leveling up and completing quests, you will be finding quite good armoring which you can well use up until the moment that you find something better. What is better is Yuria Amulet that is beyond compare in PvP and PvE. A more expensive and more reliable alternative is Liverto Amulet. Unfortunately, just like in the case of the previous classes, Liverto is very expensive and up until you earn enough silver, you will have to keep using Yuria. The Sorceress's secondary weapon is the talisman. One of the better talismans for this class is Krea Talisman, which has a high accuracy and defense factor. As an alternative, you can use Helrick Talisman which instead of defense bonus, provides you with attack bonus.
When it comes to armor, a good choice is Agerian set, which provides you with a bonus to speed of casting spells. Its high availability and affordability make it a very attractive one. It is a good idea to upgrade it during the game, which increases your defense and you do not have loads of that.
When it comes to jewelry, Sorceress's best choice is Bares. With high attack factor (AP), it is exquisite among sets of this type.
Skills
Skill | Description |
Shards of Darkness | Shards of Darkness is the basic skill, that regenerates your Shards of Darkness points. Thanks to this skill, you can regenerate mana that you need for other skills. As soon as you gain access to skill combining Spirit Absorption, invest in it as quickly as possible. |
Shield of Darkness | Shield of Darkness is your defensive boost. You can maintain a permanent effect of this skill. |
Bloody Contract | Bloody Contract is your healing skill. If you have abundance of mana and you are low on health, it is a good idea to trade mana for health. |
Dark Armor | Dark Armor is a passive skill that increases the amount of your defense points. |
Shard Explosion | Shard Explosion is a skill that can be combined with Shards of Darkness. After you use it, the Shards that you have collected are turned into mana and a boost to damage dealt. At the same time, it deals high damage to the enemy. |
Bloody Calamity | Bloody Calamity is one of your strongest skills. It deals severe damage to all opponents within its reach. You should use it as often as possible. |
Dream of Doom | Dream of Doom is a skill necessary to use up energy from Rage of Black Spirit. It deals severe damage within its reach. |
Rushing Crow | Rushing Crow is a dashing/teleportation skill that ensures your character with greater mobility. |
Night Crow | Night Crow is yet another teleporting skill that increases the overall mobility of your character. |
Below, see some example combos for the Sorceress:
- The first, basic, combo is Darkness Released followed by Claws of Darkness. The sequence is [W]+[F] + [S]+[LMB]
- The second combo is Dark Split followed by Low Kick, Darkness Released, Rushing Crow and Low Kick. The sequence is [LMB]+[LMB]+[LMB] + [F] + [S]+[F] + [W]+[RMB] + [F]
- The third combo is Sinister Energy followed by Sinister Shadow, Absolute Darkness and Abyssal Flame. The sequence is [RMB]+[RMB] + [D]+[RMB] + [RMB]+[RMB] + [A]+[RMB] + [RMB]+[RMB] + [S]+[RMB] + [LMB]+[RMB]
- The fourth combo is Midnight Stinger followed by Crow Flare, Beak Kick and Claws of Darkness. The sequence is [SHIFT]+[LMB] + [W] + [W]+[E] + [F] + [S]+[LMB]
- The fifth combo (for advanced players) is Signs of Agony followed by Shard Explosion, Ultimate: Midnight Stinger, Shadow Kick, Claws of Darkness, Dark Flame, Shadow Eruption, Ultimate: Shadow Eruption, Dream of Doom. The sequence is [S]+[E] + [SHIFT]+[LMB] + [F] + [S]+[LMB] + [LMB]+[RMB] + [SHIFT]+[F] + [LMB] + [SHIFT]+[E] + [LMB]
