Game Guide - Hints BS Midway Guide
Last update: 11 May 2016
Lets start off with couple of hints - some of them probably seem trivial and obvious to you, but it's easy to forget about even such simple things, when playing this very dynamical and quite difficult game.
 Naval Academy completed but I wasn't a primus, I think :-)...
| Before you'll start your proper game complete Naval Academy - this tutorial is long and boring, but it will help you to get used to non-typical steering/controls and to master the commanding units in the first place. |
In Battlestations: Midway you will find also a Units/Weapons Encyclopedia - besides it's very interesting, it can provide you valuable informations about enemy units (their armament, armor and speed values, etc.). |  Well, well, well - what we have here? Yamato Battleship? Pfff...
|
Ok, time to be more concrete.
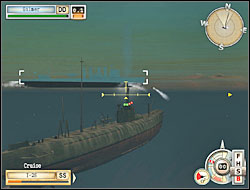
When you're commanding a submarine the biggest threat for your ship presents enemy destroyers and patrol boats - both equipped with sonars and armed with depth charges. And even if these small patrol boats have no sonars, their crews have probably 6th instinct of detecting submerged submarines - all my experiences lead to this conclusion. You can avoid these enemies by diving to level 4th (max. submersion), however, water pressure on this level slowly but unrelentingly crushes your submarine's hull - first, and second - it's a temporary and partial solution. So it's better to pick up the glove and to fight the enemy. And you have a one, very effective way to win this. Let your enemy detect you with his sonar when you're sailing on the periscope depth. He is closing then and when he's very close (let's say 2-3 lengths of his hull) - stop your engines. Your speed decreases to zero, you stop making noise and enemy is losing sound contact with your submarine. So he is turning and traversing your submarine's course ahead her bow or behind her stern. If he don't want to cut in your course for some reason, just turn on the engine and shut it down once again after few seconds.
 You shouldn't mistreat me earlier with depth charges, loser!
| Now he must rise to the bait, I mean catch up a sound contact with you for a moment once again, make a proper turn and finally traverse your course. All you have to do now is to lunch two torpedos at his side/board (take an adjustment "at a guess" on his movement first), firing them from rear (stern) or front (bow) launchers (depends on situation). But pay attention that the enemy cannot pass by your submarine too close, otherwise your torpedos - even if they were properly aimed - will go under him. It's very effective tactic and developer should actually limit its usage with some patch, I think... |
The description above applies to situation when enemy destroyer is closing from your board (side), but if he's approaching from the stern or bow, parallel to the submarine, you can deal with him in the same way, except that after shutting down the engine enemy will make a turn leaving your course. And then you must quickly fire two torpedos before he will move too far away to one of your sides (boards).
The submarine under your command unfortunately needs to come to the surface from time to time, to allow your crew to take a breath of fresh air. But emerging when enemy is close can be dangerous (damn, it is!) from obvious reasons. So you have three tricks to minimalize that danger. First - come to the surface when you're far enough from your enemies. Try to stay backwards to them, to expose only your stern to enemy fire (you will be presenting a small target then), eventually manoeuvre hard to avoid artillery shells. It's even better to sail away, turnaround and emerge with bow pointed at the enemy, so your deck gun can open fire - but you must plan such a maneuver properly earlier... Then take a deep breath catching max. amount of air and dive again.
Second trick - come to the surface close to the board of enemy tanker or cargo ship (if they are in the area), making one of them your shield against the enemy warship. However, these "civilian" ships are armed with cannons sometimes, but you can quickly neutralize their armament with your own deck gun. Besides, enemy warship often fires his guns regardless of the ships he should protect. Third trick (best in my opinion): we're emerging just for a second (literally), to only let the conning tower of our submarine show up above the water-level, and we're diving back immediately. Repeat this operation couple of times to catch up max. amount of fresh air. Of course enemy will be shooting at us when he'll see us on the water but he should't have a time to hit us accurately. |  Crew, prepare for boarding!
|
To sink enemy destroyer or cargo ship you will need two torpedos, cruiser wants three or four (depends on his version - light or heavy) before he'll head to the bottom, bigger warships like battleships and aircraft carriers require even six torpedos. This note refers to all kind of torpedos - these launched by your submarines and destroyers, but also dropped by your torpedo bombers (airplanes). Before firing the torpedos try to get as close as possible to the enemy to not give him a chance of avoiding your salvo. Oh, and try to perform your torpedo attacks (especially when using airplanes to these purposes) in short time intervals. Otherwise the enemy - after collecting a few torpedos that didn't sink him though - will fix (patch) all holes/leaks in his hull and.. the whole party starts from the beginning (well, almost).
 Three, almost simultaneous torpedo impacts - they will have a lot to patch...
| Spread over the whole target's silhouette your torpedos firing in one salvo, to be sure that at least one of them will hit him, even if he's taking evasive actions (orders full astern, for example) - aim at bow with one, at stern with second and at midship with rest. This hint refers to the attack performed mainly by the submarine. While commanding some destroyers, also armed with torpedos, it's a wise idea to order them (right in the beginning of a mission) to use this weapon at own will (free fire), by holding down left Alt, cycling to "torpedos" and turning this feature on. Later, in the fervor of a battle, you can easily forget about this, or manually firing the torpedos from every destroyer can be difficult and makes us lost. |
Launched torpedos (their tracks) are visible on map when its fully zoomed in. Try to avoid torpedos enemy has launched in your direction by taking suitable evasive actions - change your ship's course, speed up or slow down, sometimes even stop in place. If you have no chances to duck, turn with ship's bow towards the incoming torpedos - maybe only one or two will hit you, instead of the whole salvo. There are no neuralgic for ship's maneuverability mechanisms in your ship's bow (while stern hides the engine room) so it can survive few impacts. |  Ufff, that was close...
|
 A piece of empty ocean all around but here's crowded as in city bus during rush hours.
| When you have a few ships at your disposal one of them is usually more important than the rest - often it's an aircraft carrier. The enemy knows his importance and tries to sink him with torpedos, among other things. So it's good to protect such a "floating airfield" (or another important ship), by placing rest of your fleet sailing with him in formation pretty tightly, to shield his big body (his boards) with ships' hulls from the direction enemy torpedo-bombers are coming. Better to lose a scrubby destroyer than a carrier, right? You can change your formation by choosing suitable command from order's menu (activated with left Alt) and than left-clicking & dragging with your mouse (on map which appears) small circles symbolizing points of destination for your ships. |
Besides, enemy airplanes (torpedo-bombers), when approaching the target, will have to make their way through the AA fire wall raised by our ships screening the big guy.
On the other hand, when we're fighting with the enemy using our deck guns (artillery), and with several ships, we should place all of them in a row formation, one behind another, to let all of them fire at the target without interference - the firepower is then great. And, of course, we're trying to stay sideways to the enemy with all our ships to let every deck gun fire.
Try to open fire with your deck guns from a maximum possible range, using the binoculars and zooming in the view (middle mouse button). The biggest range and deck guns have battleships, medium - cruisers, and destroyers have the smallest range and the weakest artillery. Try to aim (taking adjustment on enemy movement) at the ammo magazines (their explosions can sink enemy warships in the twinkling of an eye) - usually they are located below the guns' towers. However, potential hits at these places are the matter of luck in this game... |  Well-aimed salvo at the ammo magazine and this duel is won.
|
The dots you see under the crosshair - green/yellow/red/purple - denote whether the deck gun (one of these dots) can see the target/the target is in range/you can fire at him (green dot), the gun is reloading or turning towards the target (yellow), the deck gun can't shoot at a target cause he's out of range or the deck gun can't see a target or the deck gun is damaged (red). Purple dot can be seen probably only when commanding a submarine and denotes that you have no more torpedos for suitable torpedo launcher (unfortunately you can't reload them in base/shipyard).
 Bombers attack the target longitudinally, torpedo planes use transverse approach (from sides).
| Before you attack enemy warships with your bombers (no matter: dive bombers or level bombers) or torpedo planes, set the routes of approach for them, because game won't do this for you. This advice concerns especially torpedo-bombers - without our intervention they love to attack at some stupid angle (from ship's bow, for example) and then they missed with their torpedos, because the target was small and narrow. So your bombers should approach the target in his longitudinal axis and torpedo planes should attack from his board (side). Only when all planes are in proper course you can assign targets for them and eventually lead the attack by yourself. |
Dive bombers and their bombs present controversial usefulness (at least for me - I personally prefer torpedo planes), except two situations - when you have to bombard carriers' flight decks and enemy land installations. Actually, it's better to use for this first purpose your level bombers (B-17 Flying Fortress or B-25 Mitchell). But if you insist to use dive bombers, better check first hot to make a proper dive bombing - peep how is doing this (automatically) the computer, when you have assigned the target for him (don't touch your mouse when spying, unless you're holding down Ctrl key): aircraft decreases his airspeed, rolls on his back and then dives. |  The Japanese over there below will remember for a long time this steely rain which fell on them today...
|
 Japanese "divine wind" (kamikadze) in American edition.
| When you're attacking a floating target with your torpedo or dive bombers, it's good to turn yourself into the "kamikadze" after releasing the torpedo/bomb and to crash into the enemy - such an action inflicts additional damages to him (though, not large). Do this especially if your plane is heavily damaged and his return to the base is questionable. Besides, his RTB (return to base) takes a long time and usually you don't have a possibility to launch other planes in that time. But often you have many airplanes at your disposal in suitable scenarios, so you can turn into "kamikadze" some of them. Shortly - in many missions it's more profitable to commit a suicide attack with your plane, than long home-coming. |
[However, if you decided to make your way home with these aircrafts remember, that during their return they can help your fighters and shoot down a couple of enemy planes.] Additionally, to be sure that most of our bombs or torpedos will hit the target, you can attack him only with one unit at the same time (lead that unit personally), while rest of squadrons wait closely but on safe positions for their turn. When job is done by your first unit, switch to next. This way you have an assurance that nobody will fail (screw-up) his job.
Arm your fighter planes (before launching them) with 200 lbs bombs - they can often perform dive bombing while not dealing with enemy airplanes and I didn't notice negative influence of additional load on their flight characteristics. Remember only to direct them back to dogfighting after bombardment, because they like to head home then. Your fighterplanes can also destroy enemy cargo ships using only their machineguns - strafe enemy cargo ships' decks. |  Typical situation when enemy sails with a cargo of fireworks.
|
 Three flights of fighterplanes and one flight of torpedo-bombers - take-off immediately!
| When using an aircraft carrier and his airplanes it's a wise idea - especially during the battle with enemy carriers - to launch from this "floating airfield" three flights (each consists of 3 planes) of fighters and one flight of torpedo planes. In many cases it's a max. number of planes that can take-off and operate from one of our carrier in a given moment. These three torpedo-bombers can sink enemy destroyers from his carrier's escort one after another and they have also ability to damage something bigger (a cruiser for example), while three flights of fighters can properly take care of the same number of enemy planes. Because simultaneous attack on maximum numbers of enemy aircrafts is very important in plenty of missions, especially when you have to repel enemy air raid, several waves of his planes one after one. I would recommend this scheme and such a composition of your own airforces as very effective. |
You can order your aircrafts (mainly fighters) to escort other planes (e.g. bombers), during their flight to the target - just select your fighter unit and right-click on bombers: you'll see a green arrow from first unit to second. This way you can also order your planes to escort one of your ships, to patrol aerial area over him. |  Hey, hey, wait for me!
|
 Two "Zeros" takes-off for a CAP over the island. "Zero" is an american codename of this type of Japanese planes, not the description of their pilots flight skills :-).
| Other useful command (again - mostly for fighters) is to patrol any area, so-called "combat air patrol" (CAP). Hold left Alt to open order's menu of your air unit and turn on "CAP" and "free fire" features, then right-click on map with your mouse. Your planes will circle over this spot and attack enemy aerial units nearby, but should also bombard enemy ships (if your fighters have bombs). |
To yet increase the number of enemy aerial units simultaneously attacked by your forces you can - when controlling one of your flights/squadrons/etc. - order your wingman to attack one of enemy units (by clicking them on map or in external view) and personally strike another. Of course this tactic is for players that doing fine in the air alone. After the dogfight you can gather your teammates around you by ordering them to regroup. |  By holding down left Alt button and pressing W, S, A or D key, you're assigning simple commands.
|
 I think I had some +6g during that attack :-).
| When the dogfight starts, shoot down enemy planes aiming at their engines (especially when facing multi-engined bombers). Start your attack when you're already closing them frontally. Later, the tactic of attacking them at different angles works good, because I've noticed that such a typical action when you're sitting on theirs six in many cases requires a lot of ammo and... patience to send them to the ground - some enemy planes seem to be almost indestructible. |
The most dangerous damages your ship can sustain and that have direct impact on his vitality are water leaks and fires. First are created mostly in effect of torpedos impacts, second rises as a result of bombardment. All those damages can be fixed in the repair's panel (press R to open it), by sending emergency teams (those little human figures) to adequate compartments/with suitable orders (patching the holes, fire fighting). It's good to hold one of these man in each of neuralgic locations all the time and from the beginning of a mission, to quickly deal with problems. So, for your carrier, place one man in locations called "water", "fire" and "flight deck". For rest of your ships place these emergency teams in spots "water", "fire" and "weapons" (mainly deck guns are there). Location called "manoeuvre" is not so important and you can assign people there only when you see some failures.
Additionally, when ship has suffered a damage, you should quickly look into this panel and check how dangerous the damage is. If the water leak is big (blue <<< and >>> on the boards) immediately assign all three humans to suitable location ("water") and hold them there not until the hole in the hull is patched but even longer - because they can also pump out some water. Similarly, when dangerous fire occurs (red icon of fire), quickly fight with it using all three man. |  Jesus Christ, all to water pumps, quickly! Or to sea-boats better...
|
From time to time (particularly before starting the fight) you should look into the location called "weapons" in this repair's panel (by default you can't see your weapons there) and check the condition of your deck guns (red colour means that gun is heavily damaged, yellow - damages are minor, etc.). Otherwise you can "wake up with one hand in the chamberpot" - this is old Polish proverb ;-) that means, in this particular situation, that in crucial moment of a battle you have no guns to fire, because you forgot to repair them earlier.
 Hey, buddy, do you want this pontoon or not!? Judging your battleship's condition it can be useful for you...
| You can give your units to the teammates in multiplayer games by left-clicking with your mouse unit you want to give and pressing your mouse wheel. Than select a player in menu that appears. |
Finally (yup, that's all, folks - no more obvious hints :-)): tactical sheet (in-game available after pressing Esc key and then "tactics" button, or something like that - so uncomfortably) showing which our units have chances (and how big) when fighting against suitable enemy units (this green mark denotes that our unit has good chances against the enemy, red X means no chances and dash - potential duel will remain indecisive):

However, the correctness and usefulness of this sheet is controversial: for example it points to the conclusion that the submarine has no chances when dealing with enemy destroyer, but I already told you earlier in this chapter that things stand just the opposite :-)...