Example scenarios - Siege of Hope - part 2 | Example scenarios BattleForge Guide
Last update: 11 May 2016
When the tower falls down, move the War Eagles forward, send them to the right (there are no units there that could harm them). Move the rest of the troops to the right and destroy the camp. Kill your Eagles, by double-clicking the skull icon, like before.
Build two Power Wells and a third Monument with a Frost Orb in the destroyed Twilight lair. You can also find a chest of gold aboce the camp. Let your units regenerate life and summon Tremors when the Orb is already available.

Take this army east. You will reach another crossroads, leading to two camps. Send Two Tremors and two archer squads (any of them) to the one on the south, turning left on the road to destroy a turret there and build Power Well in its place. Then continue south.

The rest of your army should go north. Summon one Tremor and two teams of Silverwind Lancers to aid. After a while you will reach the enemy's base - it shouldn't be a challenge to your units supported by Coldsnap.

After destroying the camp entirely, build a fourth Monument (you know which Orb to choose) and two Power Wells. You don't have to worry about Power - you gain a lot of it every second. Before leaving protect your structures with two Cannon Towers. There's a chest of gold near.

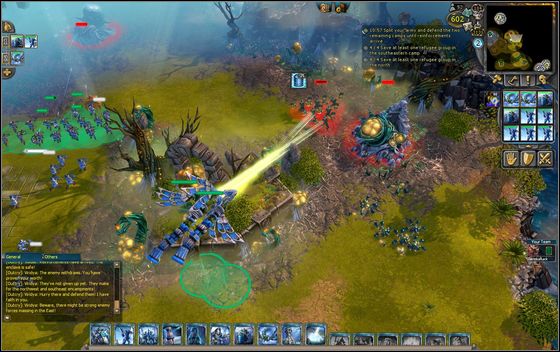
At the same time the other team has reached the southern camp which is defending against the enemy. Kill the encountered enemies, enter the camp and build a wall to put archers on. Go further inside the camp, build four Power Wells there and protect them with another wall. Your two Tremors should now be standing between the two walls.

Send the other team, as fast as you can, to the northern camp that's just being attacked. Go inside, build a wall and four more Power Wells. Send your archers to the wall. Then summon a Battleship in each camp - because of cooldown, do so in the northern one firstly.

Now defend both parts of the city, until the meter goes down to zero. During the fight you can add more archers to the walls or, optionally, get another Battleship. You should remember to repair the walls - to do so, click on them and then on the hammer icon.

When the camps are safe, the only thing left to do is killing Twilight Infester. Team up your forces (for example, near the fourth Orb), summon as many creatures as cooldowns allow and attack the giant. During the fight you can use Coldsnap and Maelstrom. You don't have to kill the remaining units - after killing the Infester the mission ends successfully.
