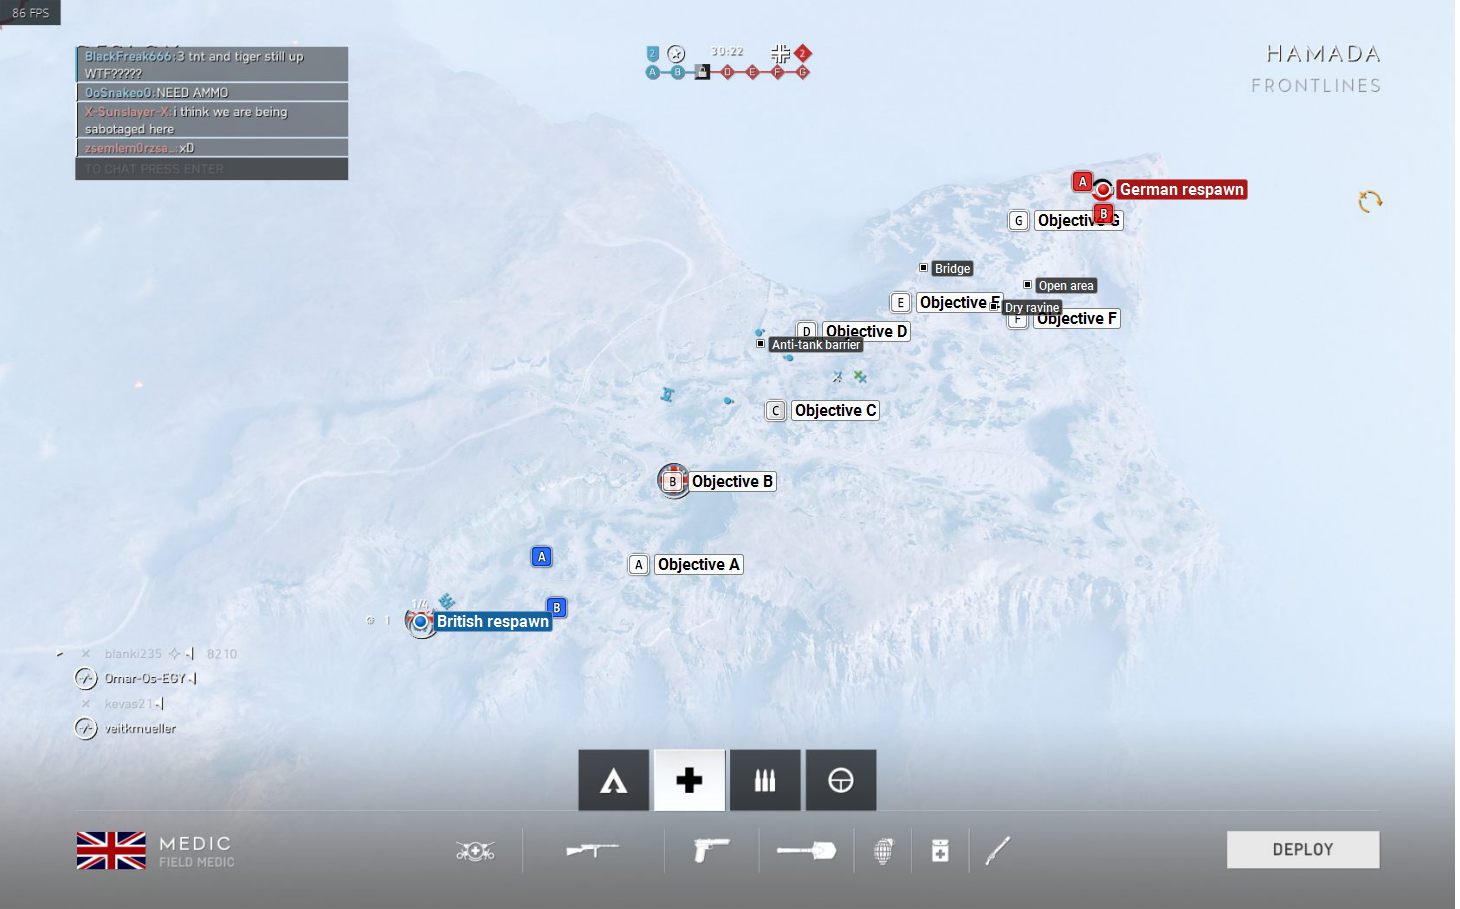
Hamada Map - Frontlines Mode Battlefield 5 Guide and Tips
Last update: 14 May 2019
Key points of Battlefield V - Hamada Frontlines
Useful and helpful places
German respawn
British respawn
Objective A � This flag is located next to road, it is surrounded by tiny hills - use tanks and shape of terrain. This point can be under fire from objective B.
Objective B � It is located on tiny hill - use shape of terrain as a cover. Fire support from tanks is recommended. Enemy can shot this point from objective C.
Objective C � Heavily fortified, especially behind the flag.
Objective D � The flag is located between tiny hills. You can find there a lot of cover and anti-tank cannon. It can be fortified a bit.
Objective E � Flag is located between ruins. It can be fortified with sandbags and barbed wire. You can flank this objective from every side.
Objective F � This flag is located next to dry ravine - it can be under fire from flag E and G. Use shape of terrain to get some cover.
Objective G � A lot of cover. If you are on the way to this flag, using shape of terrain as a cover is recommended.
Target is near B - it's hard to attack without tanks, because of lack of cover, what's more, defenders can flank from terrain, that attackers can't reach.
Target is near A - it's hard to attack without tanks, because of lack of cover, what's more, defenders can flank from terrain, that attackers can't reach.
This target can't be under fire from target B - it's highly recommended to use shape of terrain as a cover and the fire support from tanks. Attackers can flank this target easily.
This target can't be under fire from target A - it's highly recommended to use shape of terrain as a cover and the fire support from tanks. Attackers can flank this target easily.
In this chapter you will find the map of Hamada in the Frontlines mode. The chapter contains a general characteristic of the map, map legend, as well as descriptions of flags in terms of available covering spots. The Battlefield 5 game guide will guide you on the battlefield.
Characteristic of the map
The action of Hamada map takes place somewhere between Egypt and Libya. There are 7 points to capture here. Given the size and the terrain of the map, you should be using tanks and other armored vehicles. All of the capture points are located in places similar to the Conquest version of the map. Some of those points, closer to the British base, are located on an open field, making it a necessity to the shape of the terrain to find some cover. The closer you get to the German base, the more cover spots and ruins there will be.
After capturing 7 flags by your team, your task will be to destroy 2 points near the enemy base. In the scenario in which the enemy captured 7 flags, your team will be forced to defend its own points near the base. Regardless of the side controlling the flags, the attacking side has a limited amount of tickets to perform the assault. The game ends once all of the points are destroyed or when at the end of the map one of the sides has more defensive points. Playing as part of a team is crucial here - if you do not have it or there is no one alive at the moment, you will need to travel back to the battlefield from the last captured point.
Points to destroy, both near the German and British sides, are located in an open field. Both sides must use terrain to find cover, especially the side attacking the objectives near the British base. While attacking the objectives near the German base, you will find two hills that can be used as a cover.

