
Deactivate the jamming signal | Main storyline Batman: AO Guide
Last update: 11 May 2016

Go ahead towards the room where the radio workers are being held. After you get there, it is a good idea to follow the game's suggestion and use the Smoke Pellet, to prevent Batman from being shot by the firearms wielding gangsters. Right after you use the pellet, press the key/button that selects the hook from the inventory and use it to get to the gargoyle above the entrance to this room.
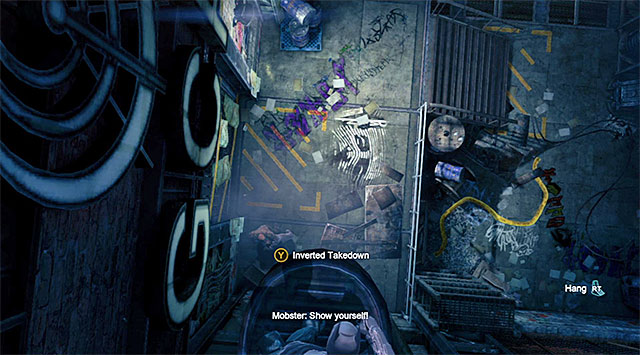
Continue using the hook, to reach successive gargoyles located in front of the protagonist. After you land onto the last gargoyle, you should be directly above the gangster who is holding one of the hostages. Press the Inverted Takedown key/button, which will eliminate the armed enemy.

You can now easily glide down, because you will not be targeted by one of the enemies for the time being. After you land, locate the grate to the venting shaft and start squeezing through the shaft. Stop after you reach the shaft's exit and wait for the other one of the gangsters to turn away, and press the silent takedown key/button.

Approach the wall and jump to reach another venting shaft. After you exit this one, stop at the wall shown in the above screenshot and press the appropriate key/button to perform a takedown through the wall (you can use the detective vision to your aid here). After you have saved the hostage, walk over to the other side and take the only available passage to the next part of the tower.

Stop after you approach the barricaded staircase, look up and use the hook to grapple onto one of the upper balustrades. Do not attempt to climb using the hook and wait for the last gangster to stop at the balustrade. In the way you have already learned, initiate the silent takedown here. You can now climb and take the door to the GCR Tower - Control room.

Turn right to get to the crime scene, which you will have to examine thoroughly. To do that, turn on the Evidence Scanner and start by scanning the victim's body (you need to press and hold down, each time, the key/button displayed by the game. Listen to the commentary concerning the victim's identity.

The next site that you need to scan is the DNA traces located in the Northern part of thee control room. You also need to scan this device.

Stand now in front of the control panel located in the left part of the control room. You need to scan it also.

The final step is to find the access card that belonged to the victim. Allow for reconstruction to display again and influence the replay process by pressing the appropriate keys/triggers and following the red mark that symbolizes the trajectory of the cart. This will allow you to determine that it fell into the venting shaft shown in the screenshot. Disable the detective vision for a moment, open the grate, initiate the scanner again and scan the Access Card.

Disable the detective mode for good now and select the Cryptographic Sequencer from the inventory. Initiate the targeting mode, target the control panel and start the hacking process. You now will have to play a mini-game of finding and setting the password by using both analog sticks (or the appropriate keys and the mouse).

Open the newly-unlocked door and climb up the ladder, by which you will exit the building and enter the Coventry district. Listen to the radio conversation with Alfred, open the next door and approach the terminal of the communications tower assigned to this district of Arkham. Again, use the Cryptographic Sequencer, by which you will determine the password (the screenshot) and deactivate Enigma's security measures (only for the district that Batman is currently staying in).
[Batwing Drop Point Unlocked: Coventry]
[Enigma's Relay Network Unlocked: Coventry]
[New Character Profile: Enigma]
[New Side-mission Unlocked: Enigma]