
Walkthrough - Intensive Treatment #2 - part 1 BAA Guide
Last update: 11 May 2016
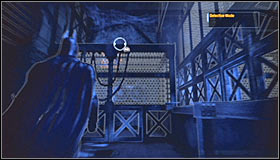 |  |
There aren't any enemy units in the area, so you're free to look around. Proceed to the northern section of this room. You'll have to use your hook to get to the upper platform (screenshot #1) and you'll find a new ventilation shaft soon after that.
 |  |
Once you've left the shaft proceed to your right (screenshot #1). Head down to a lower platform and enter the second shaft (screenshot #2). Make a few steps forward and watch a cut-scene informing you that all the nearby gargoyles have been booby-trapped. As a result you'll have to use different methods to deal with all the armed thugs in the next room (you could try using the gargoyles, but it would be VERY risky).
 |  |
Start off by moving the grating, so you'll be allowed to enter Intensive Treatment Lobby. Wait here for the first guard to begin moving the other way. Drop down quietly and approach him while still holding the crouch key. Perform a silent takedown. Don't wait for the alarm to be raised and instead continue moving forward while remaining on the balcony (screenshot #2).
 |  |
You can now try eliminating the second guard who should be patrolling the area near the entrance to the main building (screenshot #1). It's quite risky, because Joker will sound the alarm once he's noticed the body of the first guard. The only area where you'll be safe is the roof of the central building (screenshot #2). Return here each time you've attacked the inmates, even if it was a failure.
 |  |
You'll now have to begin securing this entire section of the building. You probably won't have a lot of opportunities to use your Glide Kick ability, so instead you should focus on performing direct silent takedowns. You can also consider using your gadgets. Sonic Shock Batarang is always a good idea (screenshot #2), especially if it will explode near a larger group of inmates.
 |  |
It'll also be possible to perform takedowns by landing on opponents through the glass roof of the main building. I would recommend using this method only if you're close to the end, because otherwise you would be vulnerable to enemy attacks after the landing and it wouldn't be easy to return to the roof section. Once you've won enter the main building and look around.
 |  |
Your current objective will be to locate a large control panel on one of the walls. Use your sequencer on the panel and advance through all three stages. Disabling the panel will unlock two passageways leading to the Cell Block Transfer and you can choose either one of them. Proceed north, ignoring strange noises heard along the way.
 |  |
You'll soon have to take part in a series of new visions provided by Scarecrow. Don't be frightened by image distortions after which you'll be presented with a new version of the introductionary film. Notice that this time you'll be moving as Joker, however the camera will soon show action from Batman's perspective. Wait for the game to inform you about your "failure" and choose the 'retry' option from the list. :-)
 |  |
Wait for Batman to free himself from his grave and proceed towards the nearest passageway. Perform a single jump over a small gap, ignoring the second Batman seen to your right. Choose a Line Launcher from your inventory and aim your gadget at a small balcony located in the distance (screenshot #2). Don't forget not to hit a moving object while taking a ride on the rope!
 |  |
Once again you'll be forced to avoid the Scarecrow. Start off by running to your right. You'll have to perform a single jump and take cover behind a small brick wall (screenshot #1). Wait until it's safe and climb up to a higher platform. Get ready, because you'll soon have to defeat the first group of skeletons.