Episode 5 Scene 2 part 1 | Episode 5 Alone in the Dark Guide
Last update: 11 May 2016
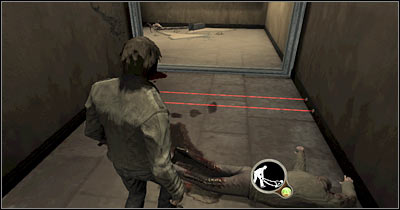
You will come across a body of a killed man. As you've noticed, the body is blocking your way, so you'll have to start pulling it to release two laser beams (screen). Once this is done, a nearby gate is going to be raised and you're going to be attacked by the bugs at the same time. I wouldn't recommend fighting. Instead, start running forward. Once you've reached a new area, you'll watch a short cut-scene. Notice a few nests. Your top priority will be to destroy them to release more laser beams.
If you don't have any Molotov cocktails in your inventory, you will have to focus on creating such inventions. As a result, proceed towards the kitchen (screen). Jump over the counter, instead of using the door. Thanks to that, you'll have a few additional seconds to make necessary preparations. Start combining handkerchiefs with explosive bottles. Create at least one cocktail.

Go back to the main area of the museum. There are two corridors leading to the nests, however you can choose the corridor located in front of you. Get as close to the wall as possible. Light the cocktail on fire and prepare to throw it (screen). Obviously you will have to make sure that it flies over the wall and lands somewhere near the nests.

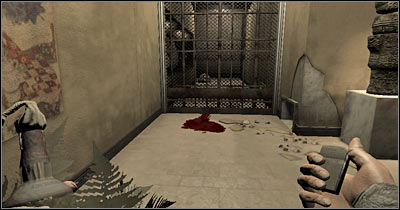
One cocktail should do the trick, however you can speed up this process by throwing a second cocktail inside that room. Wait for the flames to consume both nests. Once this is done, destroy the glass wall on your left and proceed towards a new corridor (screen).

Keep moving forward until you've reached a new gate. Notice that an interesting cut-scene has been displayed on your screen (screen). Observe how the little creature reacts. Go back to the main room and deal with all remaining bugs. It's extremely important that none of these creatures interrupts you later on.

Go back to the kitchen area. You may ditch the handkerchiefs, because you won't need them for this task. Instead, be on a look out for a duct tape and a new explosive bottle. Combine these items in your inventory (screen). Once this is done, choose a lighter for your other hand and head back to the closed gate.

This is going to be a tricky puzzle, mostly because you'll have to be very precise at what you're doing. You should be standing somewhere next to the gate. Wait for at least 30 seconds and observe what is happening around you. Light the cocktail on fire when the creature is near its nest (screen).
Wait patiently for the bug to get here. Once this has happened, press and hold the right mouse button. Aim the cocktail at the creature (screen) and thanks to the duct tape, it'll automatically remain attached to its body. The creature will go back to the nest and that's when the explosion will occur. If you've done everything according to the plan, you'll be able to destroy the nest and you'll unlock this passageway at the same time. Head on forward and wait for the second gate to be raised as well.

You are going to reach a much larger area of the museum in just a few seconds. Sadly, this area is swarming with monsters. Don't even think about using your pistol against them. Instead, try running towards the opposite end of this hall. You will notice a fire here, so it's fairly obvious that you should pick up a chair.
