Episode 3 Scene 2 part 1 | Episode 3 Alone in the Dark Guide
Last update: 11 May 2016
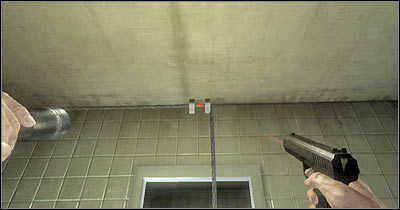
DON'T leave this area, because you'll have to deal with a new problem in the first place. You would have been electrocuted on your way out. Choose a pistol from your inventory and switch to FPP view. Destroy a small object which holds the cable (screen). Doing this will allow you to exit this room safely.
Take your time to explore the surrounding area, especially since you won't have to worry about being attacked by the winged creatures. You should be able to find a lot of interesting items here. Check the locker near the medical point. You'll find a plastic bottle inside (screen) and it's extremely important that you pick it up.

Choose the explosive bottle from your inventory. Move back and throw the bottle at the partially destroyed wall (screen). You can do this by pressing and holding the right mouse button. Make sure that the bottle has landed near the wall. You could also drop it or use a gun right away, however it won't be necessary.

Choose a pistol from your inventory and aim at the explosive bottle. Once you've found it, take your shot and enjoy a nice explosion. You should be able to destroy the wall which will allow you to exit the public toilet. Enjoy the view. :-)

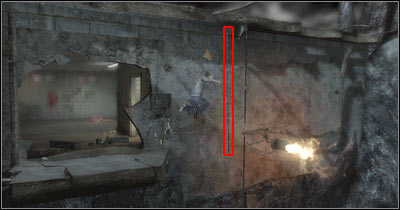
Start off by turning left. You'll have to make a very precise jump here and your objective will be to grab a new rope (screen). Once this is done, press 2 to choose a pistol from your inventory. You'll have to start shooting at the winged creatures. You could also try going back to the previous platform, however it won't be necessary. You'll probably have to kill three monsters before being able to focus on the task at hand.
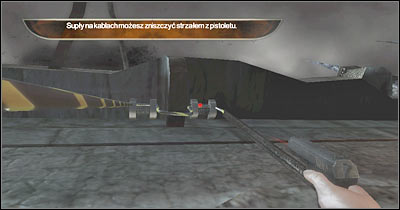
Don't holster your weapon just yet. Instead, look up. You'll have to be aiming at a small hook (screen). Destroying this object will allow you to lower the rope a little. Destroy the second hook and you'll slide all the way down to the lower platform. You'll be forced to deal with a new group of winged creatures here. Use a pistol or combine a spray with a lighter to get rid of them. Also, make sure to heal your wounds after each fight (only if it's necessary).
You may finally holster your pistol, especially since you won't have a lot of ammo at your disposal. Pick up a large metal pipe. Use this object to destroy the glass surface (screen). Obviously you will have to adjust the position of the pipe in your hands, so you'll be able to perform this activity. Drop the pipe and head on to the lower platform. Search this area for new objects and proceed to the lower level once again. Thankfully, this time you won't have to brake any objects.

It would be a good idea to use your pistol here. You should notice a few creatures in the distance and I'd recommend killing them. Use the fact that the monsters are focused on a body of a killed civilian, so you won't have to spend too much time aiming at them. Get rid of all of these creatures and holster your gun. Start running and jump towards that platform (screen).
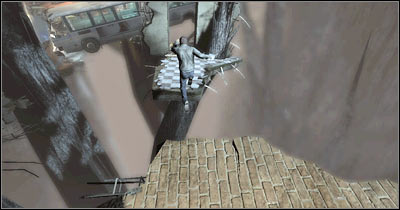
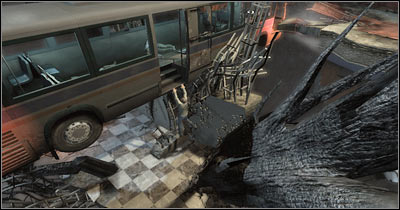
Make a few steps forward and wait for the camera to change its position. Approach the hanging bus and perform a single jump which will allow you to get on board (screen). You will have to be very careful here, because you may die by mistake. Follow my instructions to avoid unwanted problems.
It's going to get very tricky here, so pay attention to what I'm saying. Your task will be to balance the bus, so it doesn't fall to the abyss. You'll find bodies of three dead civilians here. Start dragging them towards the back of the bus (screen). You can't move forward unless you've transported all of them. Approach driver's cabin and open the door. Leave the bus slowly.
