Mission 6 - part 2 | Novus UaW: EA Guide
Last update: 11 May 2016
Second objective: Use Constructors to repair the ship's power cores
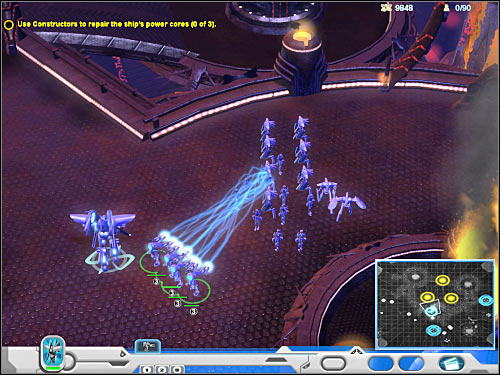
It turns out it was a trap. As a result, you will have to help Mirabel escape. Before you can leave the ship, you will have to repair three different power cores. Gather the rest of your squad around your main character. Make sure that Constructor units are standing somewhere in the middle, because you will have to use them very soon, so you can't allow enemy forces to destroy them. Take out several groups of enemy troops. I'd strongly recommend sending your main character to deal with the alien creatures, so you won't have to worry about losing more units. Once the battles have ended, select your Constructors and order them to begin repairing other units. You'll have to pay for the damages, but you have plenty of resources at your disposal, so there's nothing you should be worried about.
Head south, because that's where you'll be able to free some of the imprisoned units. New Constructors will be among the rescued allies, so make sure that they're safe. I would recommend ordering all of your squad members to take part in these battles, because you'll be dealing with larger groups of enemy forces (screen). Now you will have to proceed towards the eastern section of the ship. Mirabel will have an opportunity to rescue two other groups of allied forces. Remember to surround Constructor units with stronger troops in order to prevent them from being destroyed.
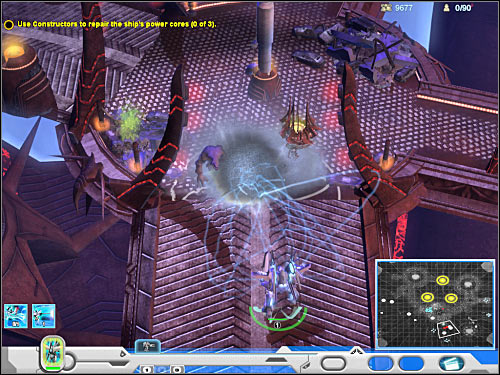
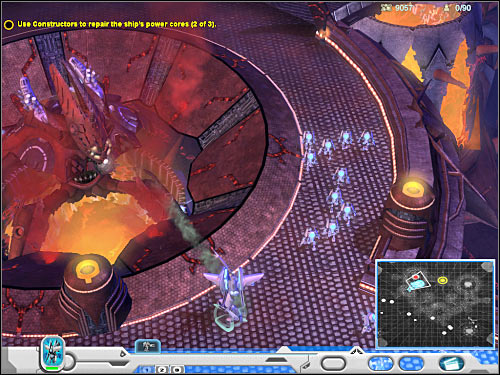
Gather everyone around your main character and proceed towards the nearest power core (6 on the map). It should be located to the north-west of your current position. Leave your main army somewhere near the main deck of the ship and allow only your Constructor units (screen) to get closer to the power core. It would be a good idea to have a large group of these units selected, because it'll speed up the process. Head on to your west and approach the second generator. You will have to repair it as well. You've only got one more object on your map, however reaching it is going to be more difficult. Make sure that you've repaired the other two.
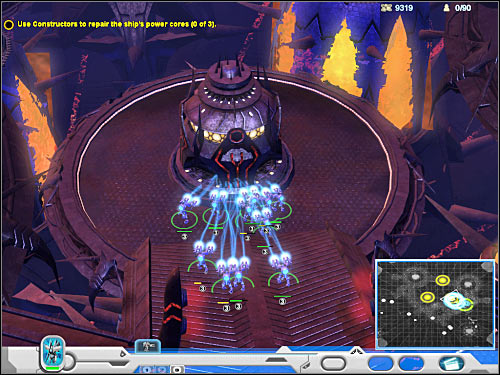
Like I've already said, repairing the final third generator is going to be more difficult, because both passageways leading to it are being guarded by enemy Walkers (5 on the map). As a result, you will have to distract one of these units. Choose Mirabel and a few standard troops. Start attacking the Walker, however make sure that your main character doesn't lose too much health. Send the rest of your army towards the power core. You will have to order your Constructor units to get there as well. Order them to repair the power core. Thankfully, you won't have to worry about the safety of your troops, because you won't need them anymore once this is all over.
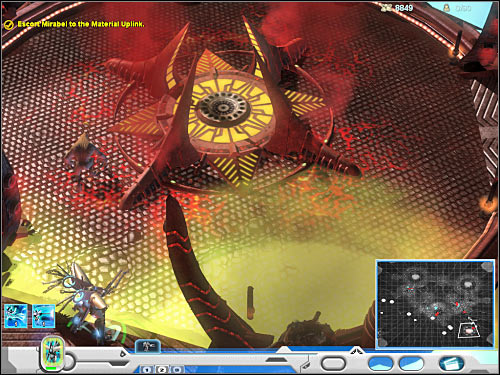
Third objective: Escort Mirabel to the Material Uplink
Before this task officially appears on your list, you should consider sending Mirabel to the south, so you won't have avoid the hazards all the way to the Material Uplink. Your objective here will be to reach the exit (7 on the map). Double-click on that area and wait for your main character to get there. Mirabel shouldn't lose too much health along the way and you won't have to take special interest in the safety of your remaining units. Also, ignore some of the nearby explosions. Allow Mirabel to get closer to the Material Uplink building (screen). Doing this will allow you to end the mission. Get ready for the final battle!!