Reach the evacuation zone | Mission 6 - Special Missions HQ Splinter Cell: Blacklist Guide
Last update: 11 May 2016

Go right and take the stairs that lead towards the fountain that you can see in the distance. Do not go down the stairs to the very bottom and jump over the first balustrade that you bump into. Jump down into the lower ledges. Go right and walk around the two guards standing to the left, who should be busy talking to each other.
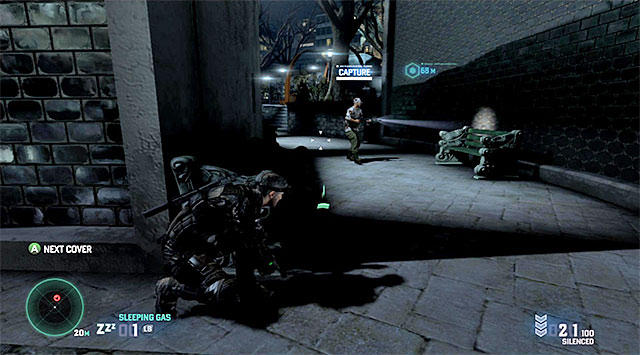
Remember to remain at the right side of the park at all times. Select the back passage that is being patrolled by a high-value target. To catch this enemy, it is best to lurk in the spot shown in the screenshot, i.e. at one of the walls. Knock the target down and make sure that you hide the tied up body in a dimly-lit area.

You can now resume your exploration and reach the two bridges. Approach the lone on the left and make sure that the enemy with shield, who is standing a bit away, is looking another way. Enter the bridge, jump over the left balustrade and shimmy to the left. You now need to wait for the right moment to move on- the enemy with shield needs to be facing the other of the bridges, and the standard guard, who is patrolling the area, needs to be in another place, or be turned away.
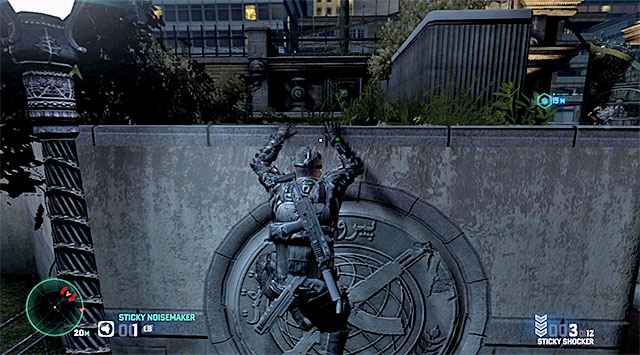
Once you have the opportunity to, climb the bridge again and take the stairs to the left. Note - if you are experiencing difficulties with avoiding the enemy with shield, you should divert his attention with, e.g. sticky noisemakers. After you take the stairs, reach the ledge above as quickly as possible. This is because the area is being patrolled by a guard dog.

Quickly, make it to the tall wall around the park and grab onto the ledge above. Thanks to this you won't have to worry about being sniffed out by the dog.. Shimmy to the right. Just like before, you will have to wait for the right moment to act - both the guard and the dog need to move away from the park's exit. Quickly, drop down and reach the van with Briggs. At the same time, you will receive a reward for neutralizing the high-value target. (up to 30 thousand dollars).
Additional tips for the Panther/Attack playing style: when it comes to the dog that you encounter towards the end of the mission, it is best to jump onto it yet, the dog's corpse can be quite quickly noticed by a guard.