
The Final Descent | Side missions - Raven Rock TES V: Skyrim - Dragonborn Guide
Last update: 11 May 2016

You will receive this mission in the mine in the northern part of Raven Rock. It's inhabited by an old miner - Crescius Caerellius - and his wife. If you speak with the old man, you should learn that the place has been long shut up. The cause of such situation is the disappearance of the previous owner - the great grandfather of Crescius himself. The desperate man will ask you to head down into the mine and find the corpse of his ancestor, who most likely died there. Who can refuse such a request?
Speak to Crescius Caerellius

The first part of the mission is fairly easy - you just have to ask the man of all the details regarding the mine and its former owner. After using up all the possibilities, you will receive Gratian's Letter and Raven Rock Mine Key. Equipped with those two items, you can head down the mine on which the house of Crescius Caerellius was built.
Retrieve Gratian Caerellius's Journal

Go past the quest giver and down the stairs. Keep going down as deep as possible - that way you will reach the main level of the mine. The path branches here - if you turn left, you will come across a Skeever and eventually reach a dead end. The corridor on the right is by far a better choice. If you want, you can take a look inside the trough beneath the stairs, though you won't find anything there beside a Frostbite Spider.

Head onwards along the platforms. You should come across three more spiders on your way, one after another. Kill them and move further along the corridor. The deeper part of the mine has been boarder up. On the other side you should be able to see lots of spider-webs. If you swing your sword the boards should get destroyed, allowing you to move onwards. Note that there's a East Empire Company chest here, the content of which will surely come in handy. When you're done collecting valuables, turn towards the steel gate and open it using the key received from Crescius.

Cross the gate and head down to the next cave. Be cautious when doing it - there's a Draugr resting in one of the side niches. One way or another, there still will be one more danger waiting for you - a trap set in the further part of the underground. Try not to walk into it!

In the next cave you will come across three Draugrs - two sleeping and one patrolling the area. Despite what it might seem, fighting them can be quite hard - some enemies are capable of using spells and have a considerable amount of life. That's why you should start off by silently killing the two sleeping ones and leave the third one for the end. It's by far the easiest way of dealing with this threat.

Move onwards and you will come across a suspiciously looking room. It's quite specious and its central point is surrounded by a couple thrones with sleeping Draugrs. Head to the middle of the room and all the enemies will wake up to attack you. As there are five of them and at least one of them is capable of casting powerful spells (including Conjure Frost Atronach), you should avoid a direct fight. Instead, try eliminating the enemies one by one, at best while they're still asleep (a bow and stealth skills might come in handy). After dealing with them, look inside the chest standing in the corner of the room - you should be able to find a big mount of precious items inside, assuming you can break the lock (master level).

The next room will let you catch your breath - it's full o useful items, contains an alchemy set and a lore of stalhrim. If you're in possession of one of the special pickaxes (Ancient Nordic Pickaxe), you will be able to obtain a few pieces of the precious material. The easiest way of obtaining one Is completing Retrieve Ancient Nordic Pickaxe.

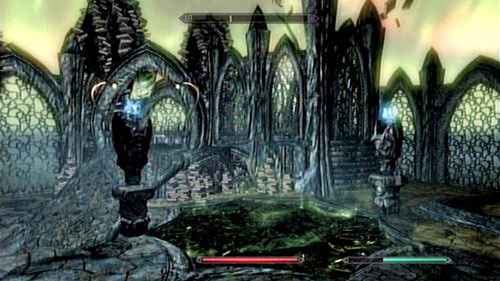
After resting and filling up your pockets, you can head further. In the corridor leading to the further part of the catacombs you will find a magic trap - in order to avoid the deadly lightning, you have to pull out the soul stones from the pedestal. The faster you do it, the less health you will lose. Keeping as much life as possible is very important, as in the next room you will have to fight three more Draugrs - including two Draugr Deathlords. Fighting them will be very difficult unless you separate them and fight them one at a time. Being able to fight at a distance will come in handy here - you just might be able to eliminate the threat before they even reach you (the enemies aren't too fast).

After the fight, head towards the small waterfall. Behind it you will find a passage to a room with another stalhrim lore and some valuables (in vases). Afterwards return to the room in which you fought with the Draugr Deathlords and head to its upper level. Go across the wooden walkbridge and activate the device found opposite to the enchanting table (also note the chest found there). That way you will unlock the door in front of you. Go through it and turn left to find the Ice Spike magic book. Afterwards turn 180 degrees and head up the platform.

There's another trap waiting for you here - lightning will try to hit you from time to time. Hide behind the wooden cover and wait for the proper moment, use Whirlwind Sprint and jump to the soul stone which shoots lightning - if you pick it up, the trap will stop working.
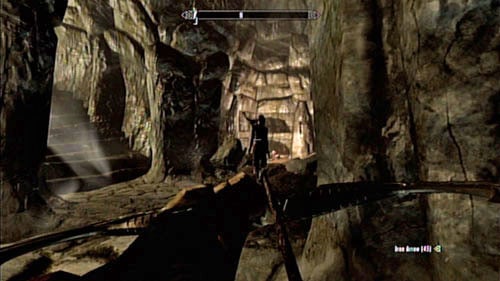
In the further part of the underground you will be in for a rather nasty surprise - three pressure plates, pressing which will result in a series of deadly projectiles. Try avoiding the trap and approach the door at the end of the corridor to find a treasure chest. Afterwards head back and search for a side corridor (it's rather hard to notice and a torch should come in handy). Go through the twisty and narrow corridor and you should reach a rather big cave.

Jump down and approach the skeleton which rests by the large gate - it's Gratian Caerellius himself. Search the remains to obtain Gratian's Journal and the peculiar Bloodskal Blade. Take a look at the current of the underground river - by its estuary you will find a treasure chest. Note that the cave in which you found yourself has no exit - you have been trapped!
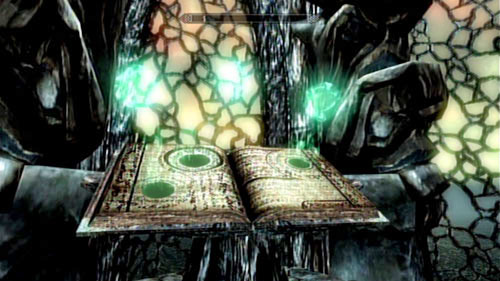
(Optional) Read Gratian Caerellius's Journal

As you have probably noticed, you are trapped - just like Gratian who lying by your feet. The dead man's journal can give you some hints. Read the notes and you might be able to solve the puzzle.
Escape Bloodskal Barrow
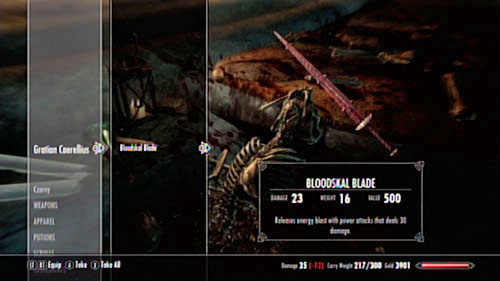
Gratian's Journal contains a hint - the magical sword (Bloodskal Blade) which you found by the remains seems to have peculiar properties. In fact, in emits a deadly beam of energy in the direction in which it is swung. It's rather obvious that it's the key to the puzzle and your key to freedom.

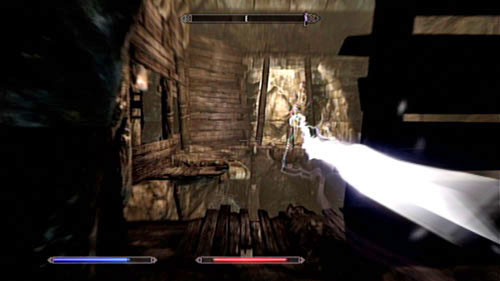
Stand in front of the large gate and take a closer look at it. On its sides you should see a narrow red beams of light. Equip the Bloodskal Blade and swing it at the red points to activate the opening mechanism. Keep repeating this operation until all the holes are hit and the gate opens.

Cross the magic door and you will reach a corridor with lots of pendulums. Use the Whirlwind Sprint and get across. That way you should end up in a big room filled with water. In its middle there's a chest which seems to be too tempting. Approach it to cause the Dragon Priest Zahkriisos to appear. Fighting him is quite challenging - the enemy can protect himself using spells, he's very fast and casts powerful lightning. Keep drinking health potions, use resist shock potion if you have one and kill the enemy. The key to victory is pushing him to a wall - he don't be that dangerous without the ability to move.
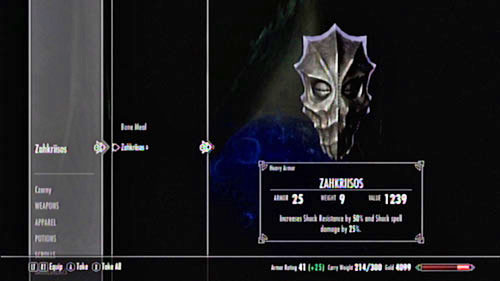
After you defeat the Priest, pick up his mask - it provides a 50% Shock resistance and increases damage from such spells by another 25%. Approach the altar at the end of the room to learn one of the Word of Power - Dragon Aspect. Afterwards head through to the room on the right (parallel to the one with the pendulums and take all the valuable from there. Note that there's a Black Book resting on the pedestal - read it and you will be moved to the mysterious world of Apocrypha.

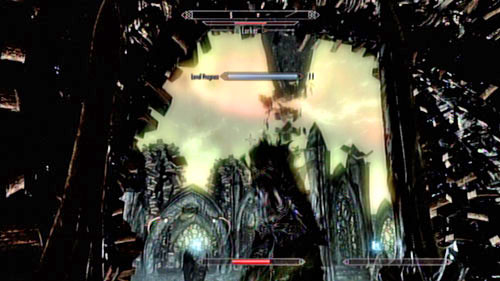
In the psychedelic world of Hermaeus Mora you will have a rather easy task - you need to get to the other side of the level. You will have to look out for the deadly tentacles on your way (they appear on both sides of the footbridge) and defeat a Seeker. When you get attacked by him, the side mission - Black Book: The Winds of Change - will begin.

Get past the tentacle pond and collect the soul stones from the pedestal. Afterwards turn on the switch and enter the complicated labyrinth. The case is easy here - you need to move onwards, collect valuable on your way and push all switches. A Seeker will cross your path at some point, but if you don't enter the next tentacle pond you should be just fine. Before entering the room with which the labyrinth ends, heal up your wounds and get ready for a fight. You will have to face a powerful Lurker, who's not an easy enemy.
During the fight with the Lurker you have to focus on leading out as much powerful attacks as possible. At first you can also fire some surprise projectiles - the enemy should lose some health before even noticing where it's being attacked from. Sooner or later you will however have to fight it directly - at this point some health potions will definitely come in handy, as the beast has some quite deadly skills.
With the monster dead, approach the switch on the right and use it. That way you should unlock a door on the left (behind the stairs). Collect the valuables found there (including some black soul stones!) and use the next switch. Additionally, if you read the Worlds and philosophy book nearby, you will be able to learn some new tricks with two-handed weapons.
Head to the newly unlocked passage and take a look inside the container found there. Afterwards open the mysterious book lying on the pedestal. At this point Black Book: The Winds of Change will come to an end and you will have to make an uneasy choice:
Name | Effect |
Scholar's Insight | Reading skill books gives you an extra skill point. |
Companion's Insight | Your attacks, shouts, and destruction spells do no damage to your followers when in combat. |
Lover's Insight | Do 10% more damage and get 10% better prices from people of the opposite sex. |
After choosing your destiny, you will be moved back to the mine of Caerellius (Bloodskal Barrow) and will be able to continue your journey.
After shaking off the unpleasant feeling and noticing that you're back in the normal world, head towards the round stairs leading to the mine entrance. Go through the door and turn on the device which will open the secret passage. You will end up in a cave inhabited by three bandits. Eliminate them and search their goods - you might come across something useful there. Afterwards head to the exit and catch some fresh air, as you're back to the surface!
Return to Crescius Caerellius

You have surely noticed that the journey through the mines took quite some time and threw you far from Raven Rock. Indeed, you ended up far in the north, in Bloodskal Barrow. You can't use fast travel to return to the city, as there are too many bandits in the area. Eliminate them and head to the quest giver. On your way, be sure to check all the rooms inside the castle - there are some valuable to be found inside.

Crescius Caerellius can be found in his house beside the port in Raven Rock. Enter the building and speak with the old man. You might not understand the importance of what you have done - thanks to you, Solstheim will be revived. The ebony mine will be reopened and boost trade in the whole area. New villagers, merchants and artisans will soon arrive, and all thanks to you. Congratulations!